Table of Contents
Share On
Omniful Invoices: Dashboard Billing & Payment Guide
We are introducing a new dashboard-based invoice payment experience that allows users to view, filter, pay, and track invoices directly from the Omniful dashboard.
The new Omniful Invoices module is now available under Settings, providing centralized access to all invoices.
Summary
Omniful has introduced a dashboard-based invoice payment experience that allows users to view, filter, pay, and track invoices directly from the dashboard. With this enhancement, a new module, Omniful Invoices, has been added under Settings, providing centralized access to all invoices.
Now, users can manage invoices end-to-end directly from the dashboard, reviewing details, completing payments, and tracking statuses in one place. This enables the following key benefits: Centralized access to current invoices from the Omniful dashboard. Invoice filtering by status, billing account, generation date, and due from past date. Detailed invoice view with fee structure, usage-based fee ranges, and ad hoc fee breakdown. Direct payment functionality is now available via the ‘Pay Now’ option, enabling users to complete payments directly from the dashboard through the payment gateway.
Note:
- Invoices are generated directly from the dashboard based on your billing cycle (e.g., monthly or as per agreement).
- A payment window of 10 days applies from the date of invoice generation; failure to complete payment within the due period will result in account suspension.
- Users must have the required Omniful billing permissions to access and manage invoices on the dashboard. Please ensure these permissions are assigned to relevant users.
How It Works
1. Open Omniful Invoices.
Navigate to Settings → Omniful Invoices to view invoices on the dashboard.

2. View and Manage Invoices
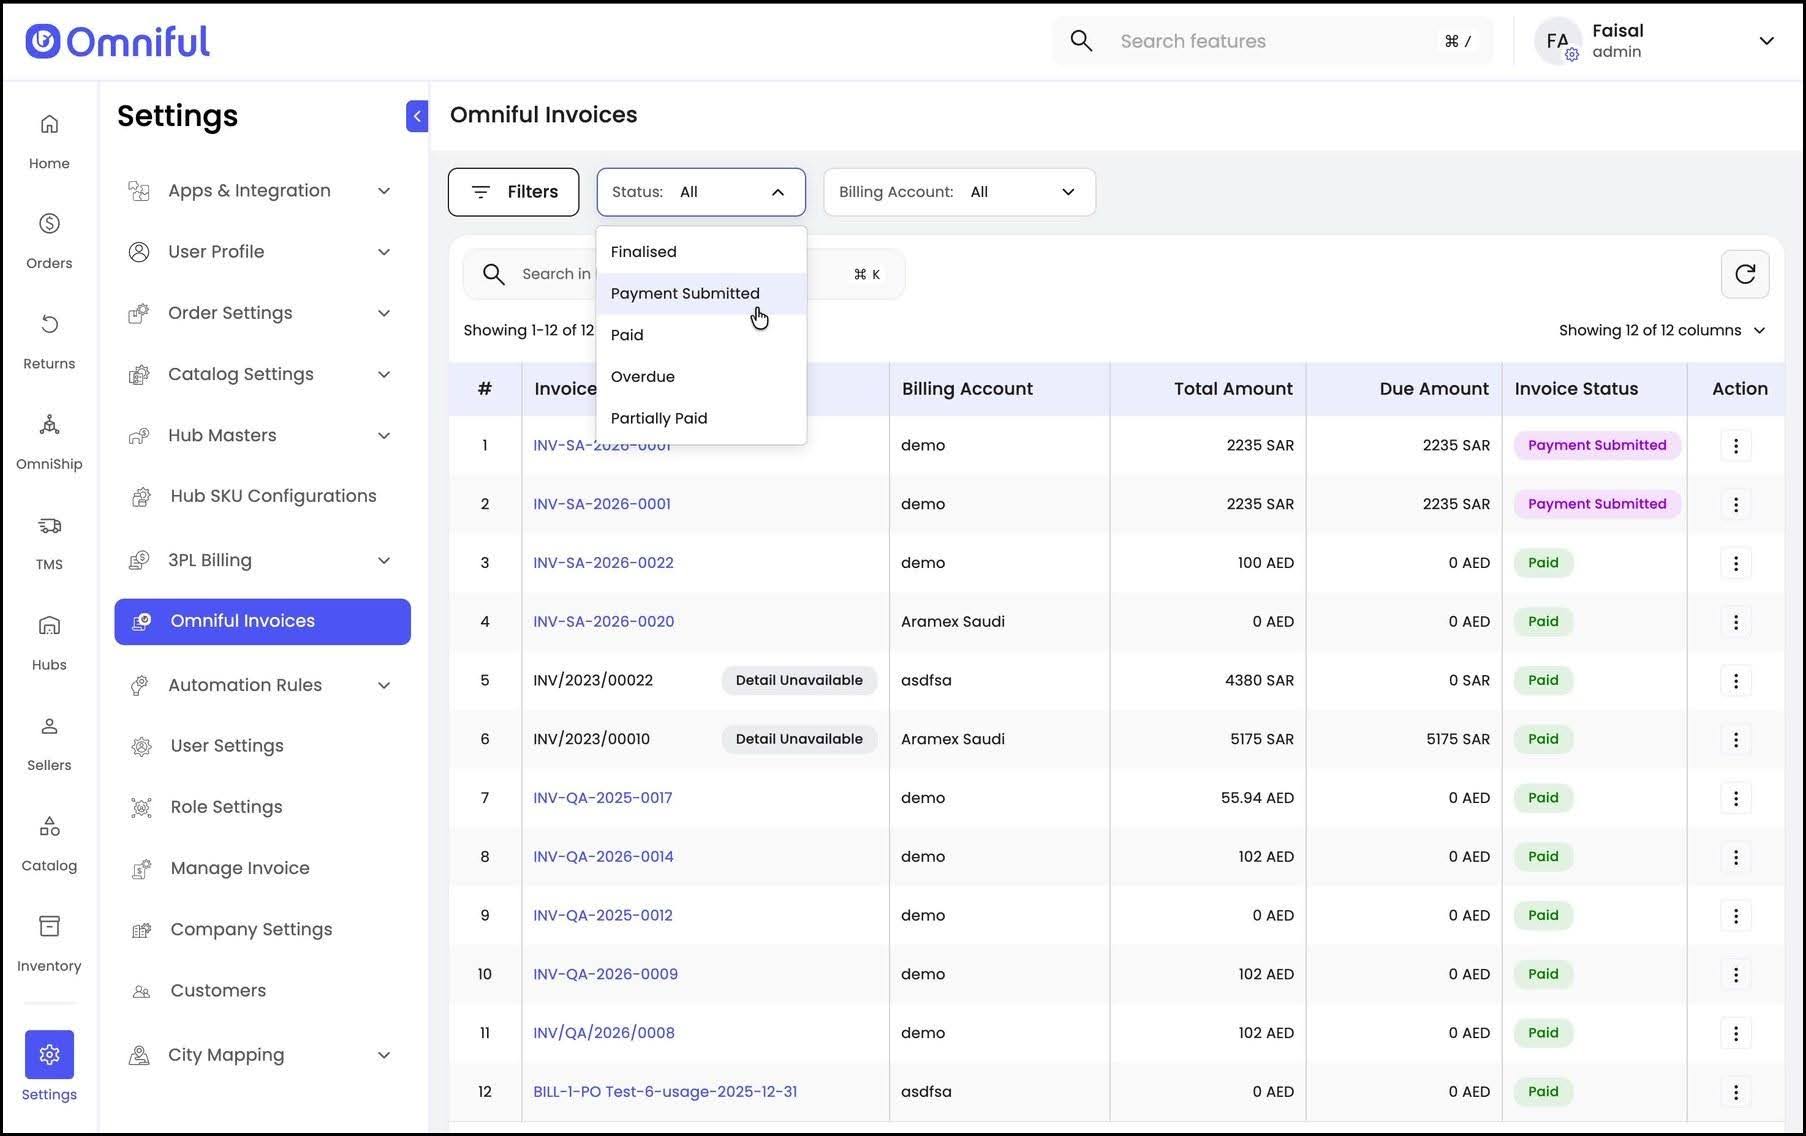
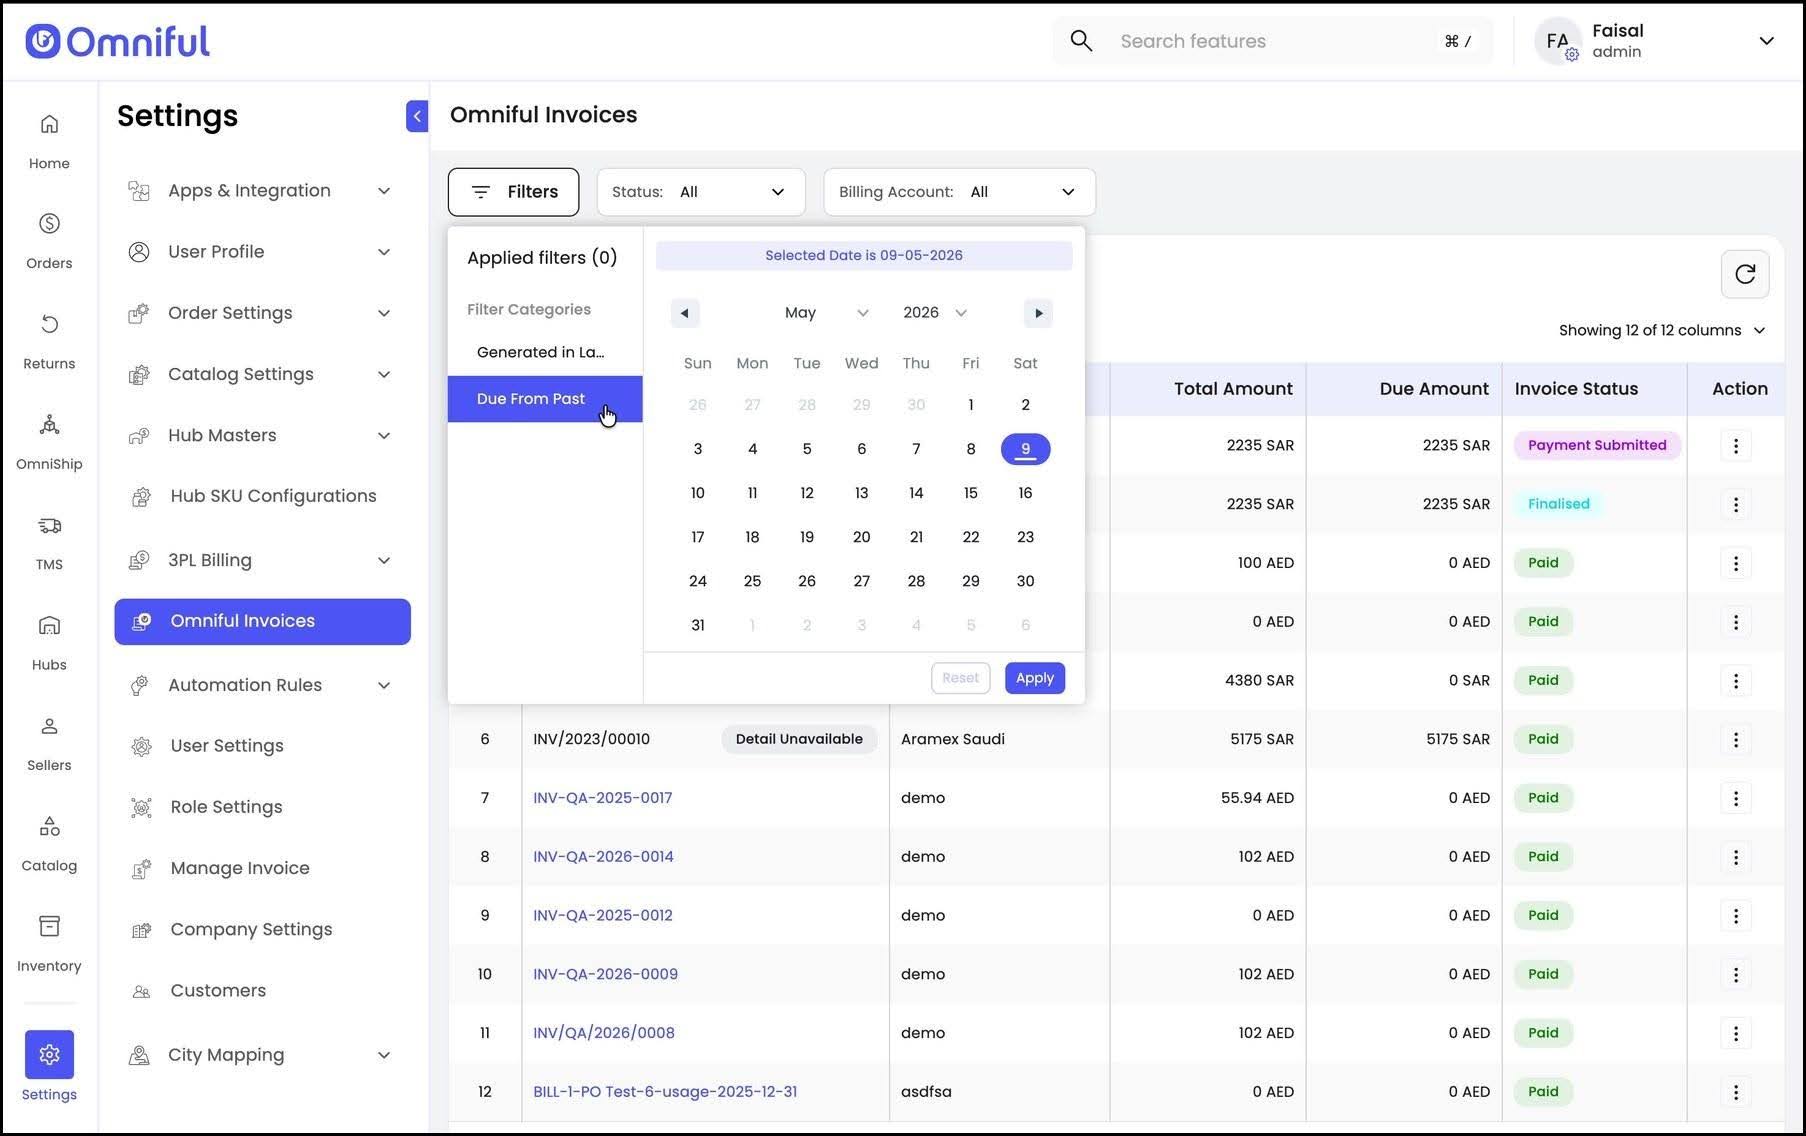
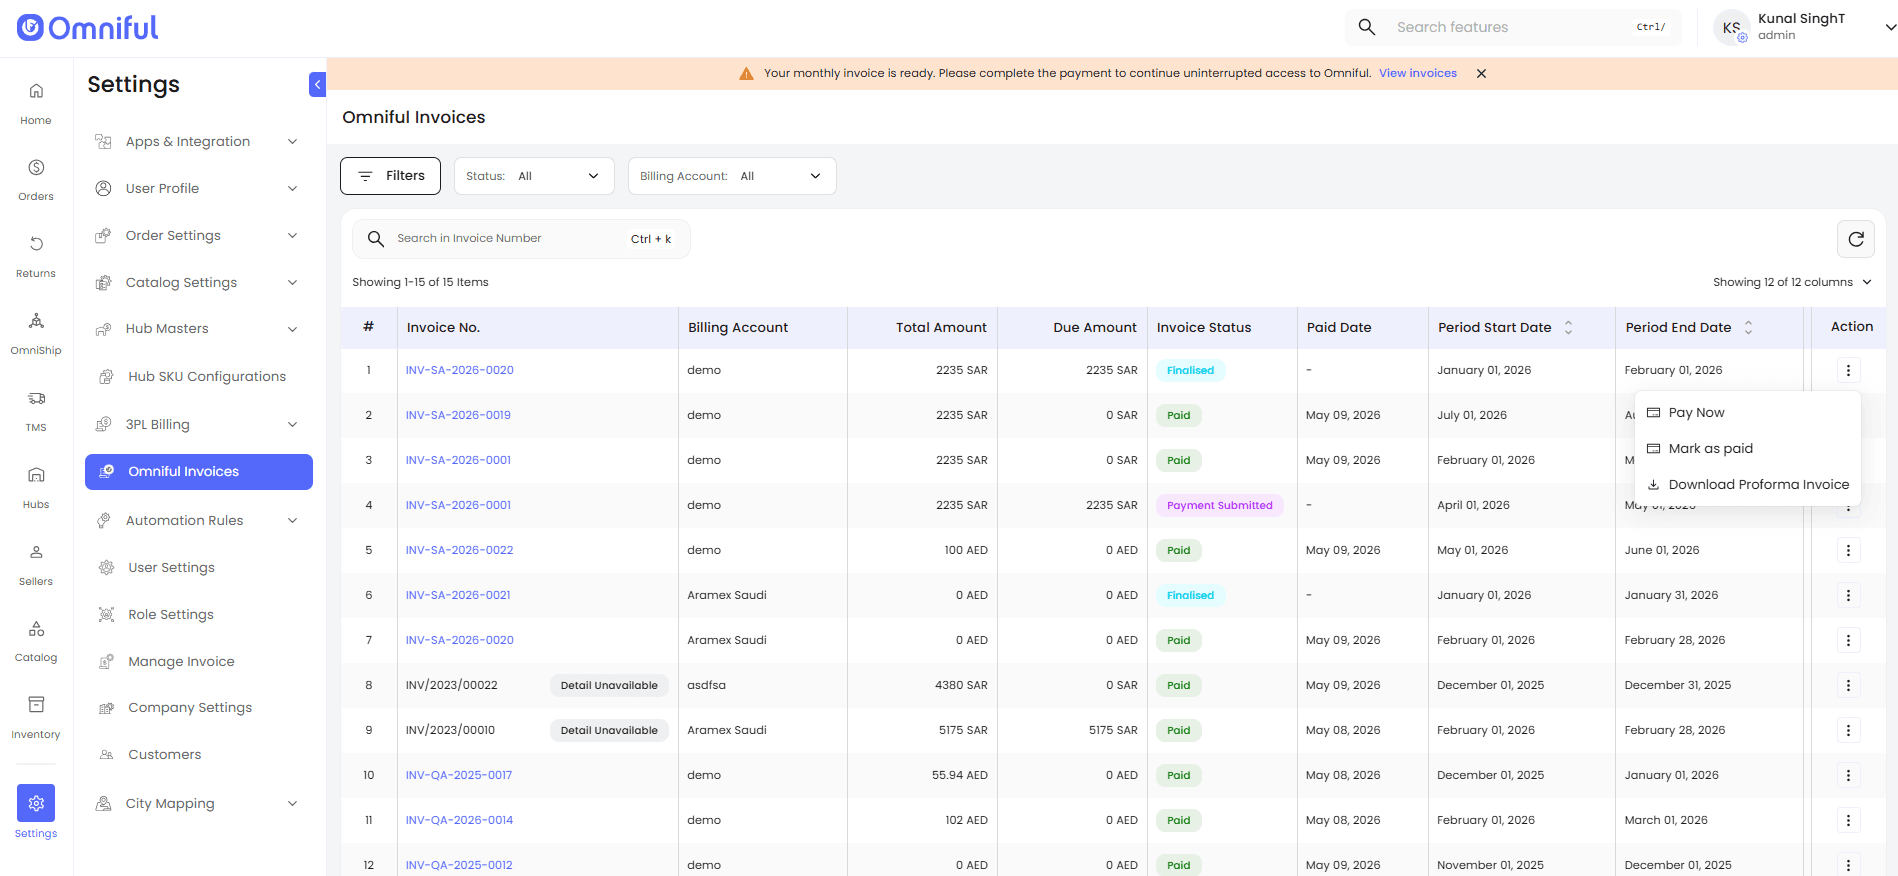
Users can review the complete list of invoices in this module. For an enhanced view, filters are available to filter invoices by status (Finalized, Payment Submitted, Paid, Overdue, Partially Paid), billing account, generation date, and due from past date.
3. Open a generated invoice.
Users can click on the invoice number to view detailed invoice information, including the overview, charge breakdown, and fee structure.
4. Review Invoice details.
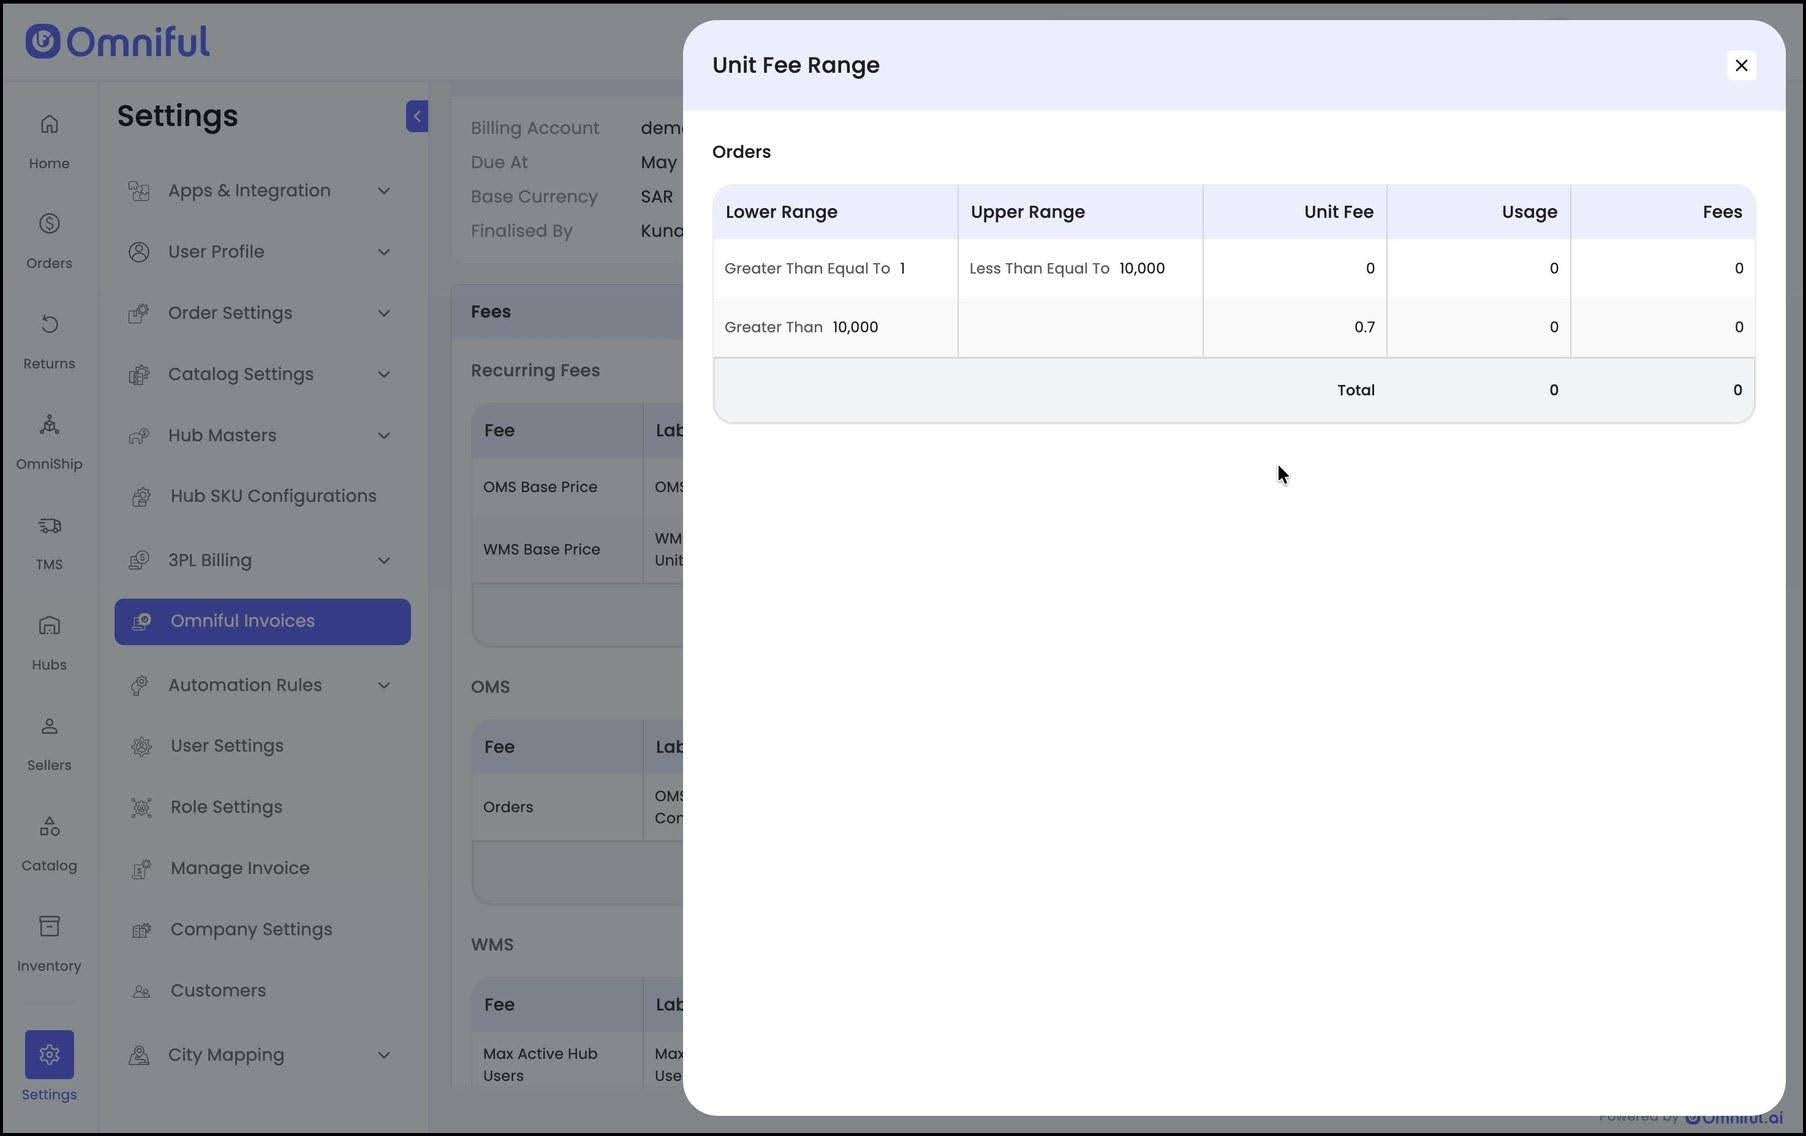
The invoice details page provides a comprehensive breakdown of all charges, including usage-based ranges, unit fees, and all billed products, along with any applicable ad hoc fees.
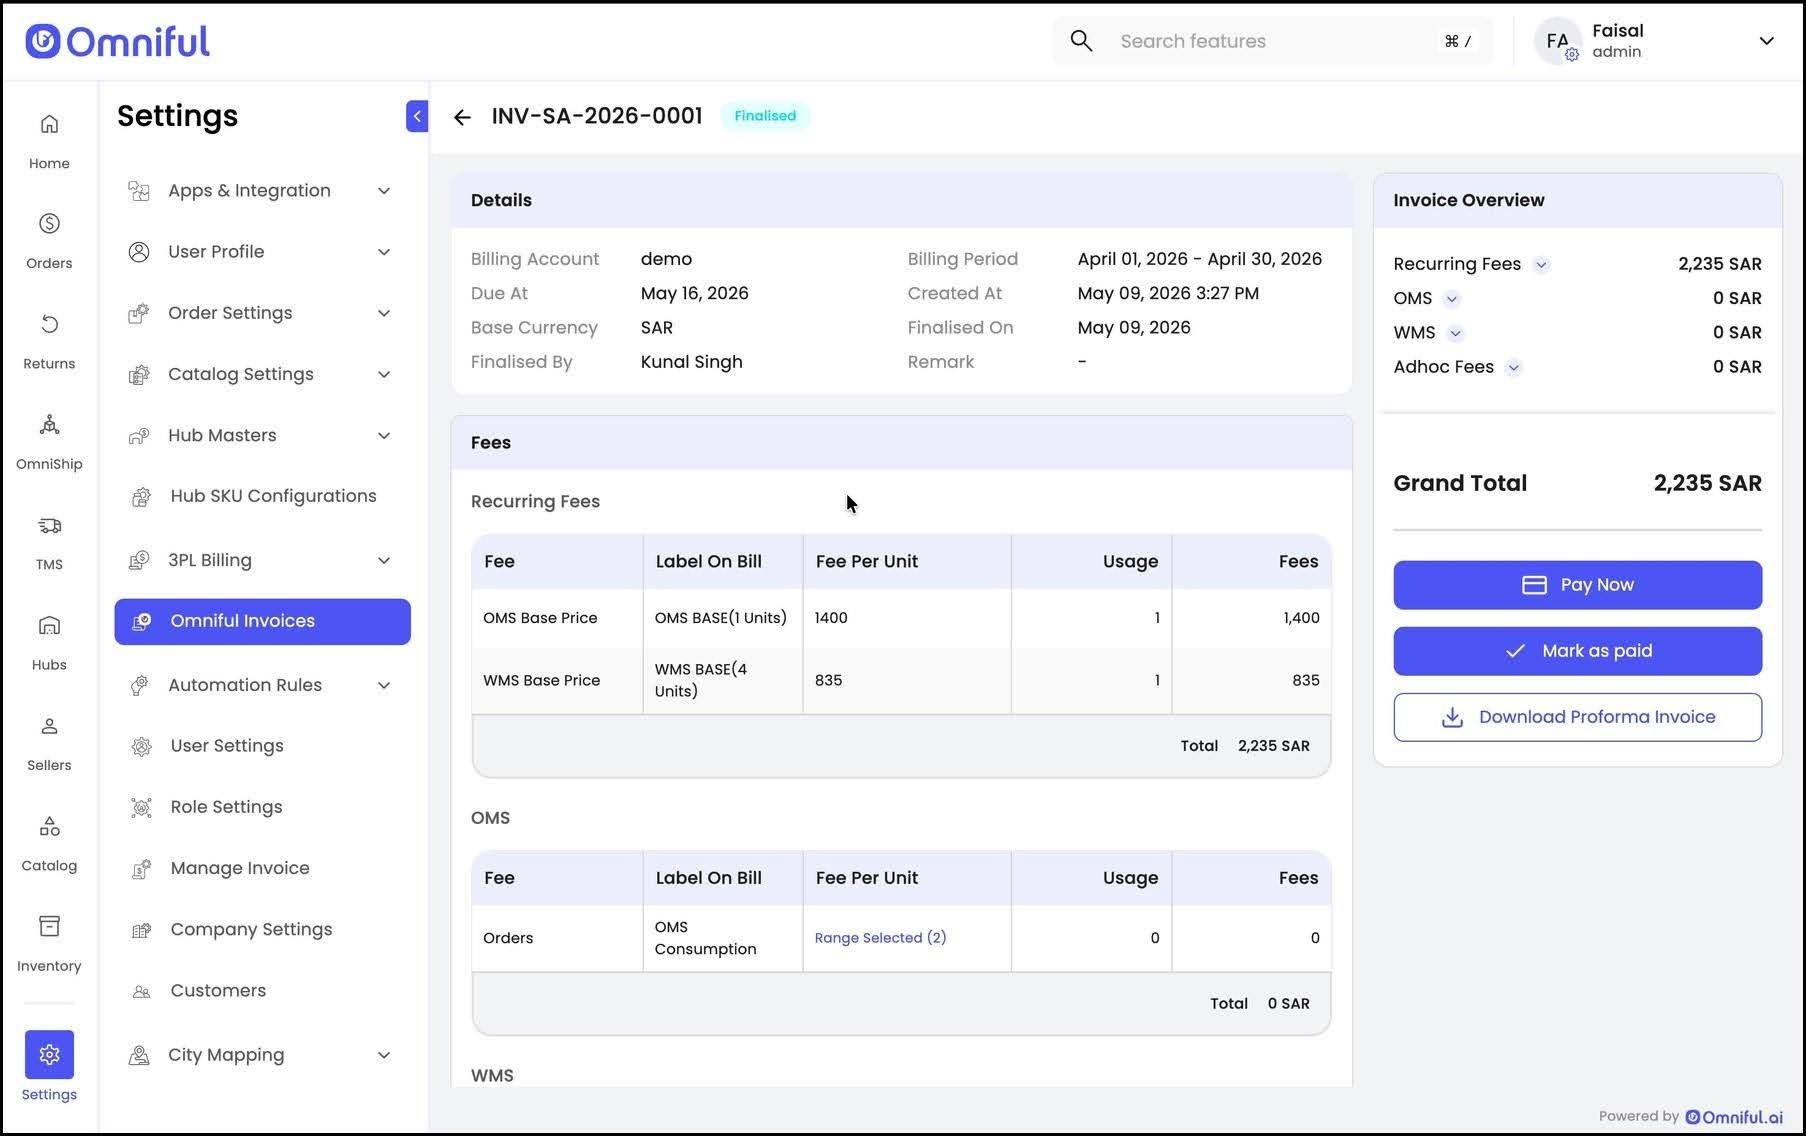
5. Make Payment & Manage Invoice Actions
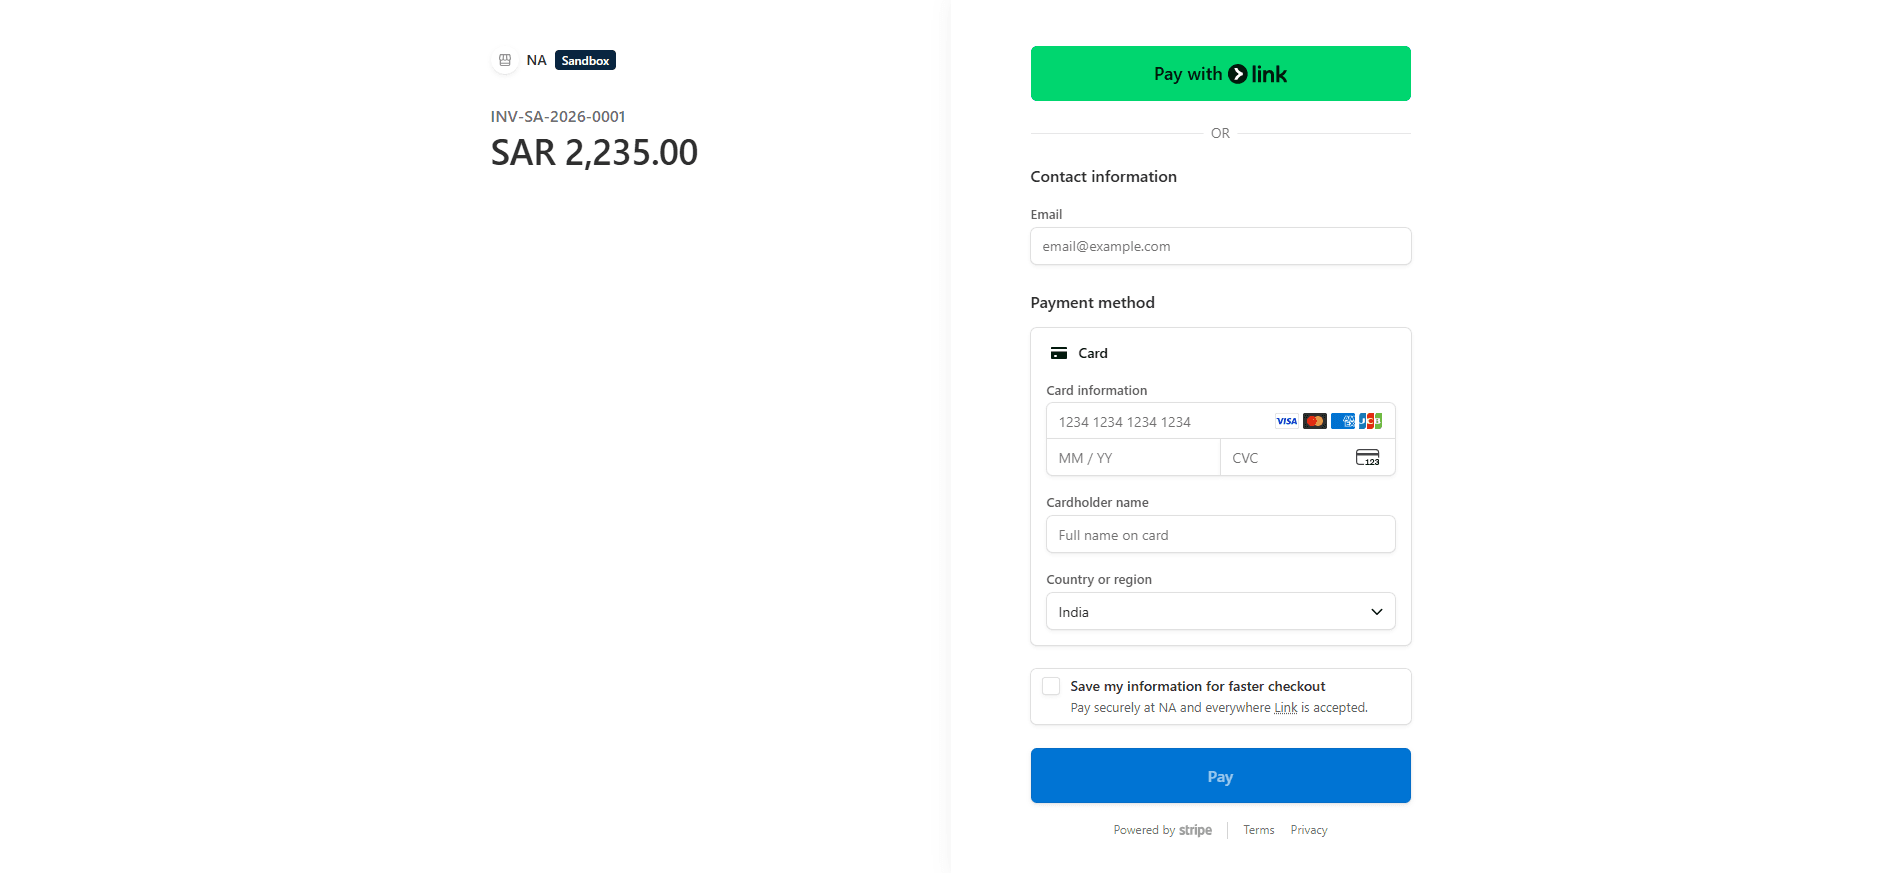
Once the invoice details are reviewed, users can complete the payment directly from the dashboard by clicking on “Pay Now.” This will redirect the user to the payment gateway to enter the required payment details and make the payment. Once the payment process is done , the invoice will be marked as Payment Submitted.
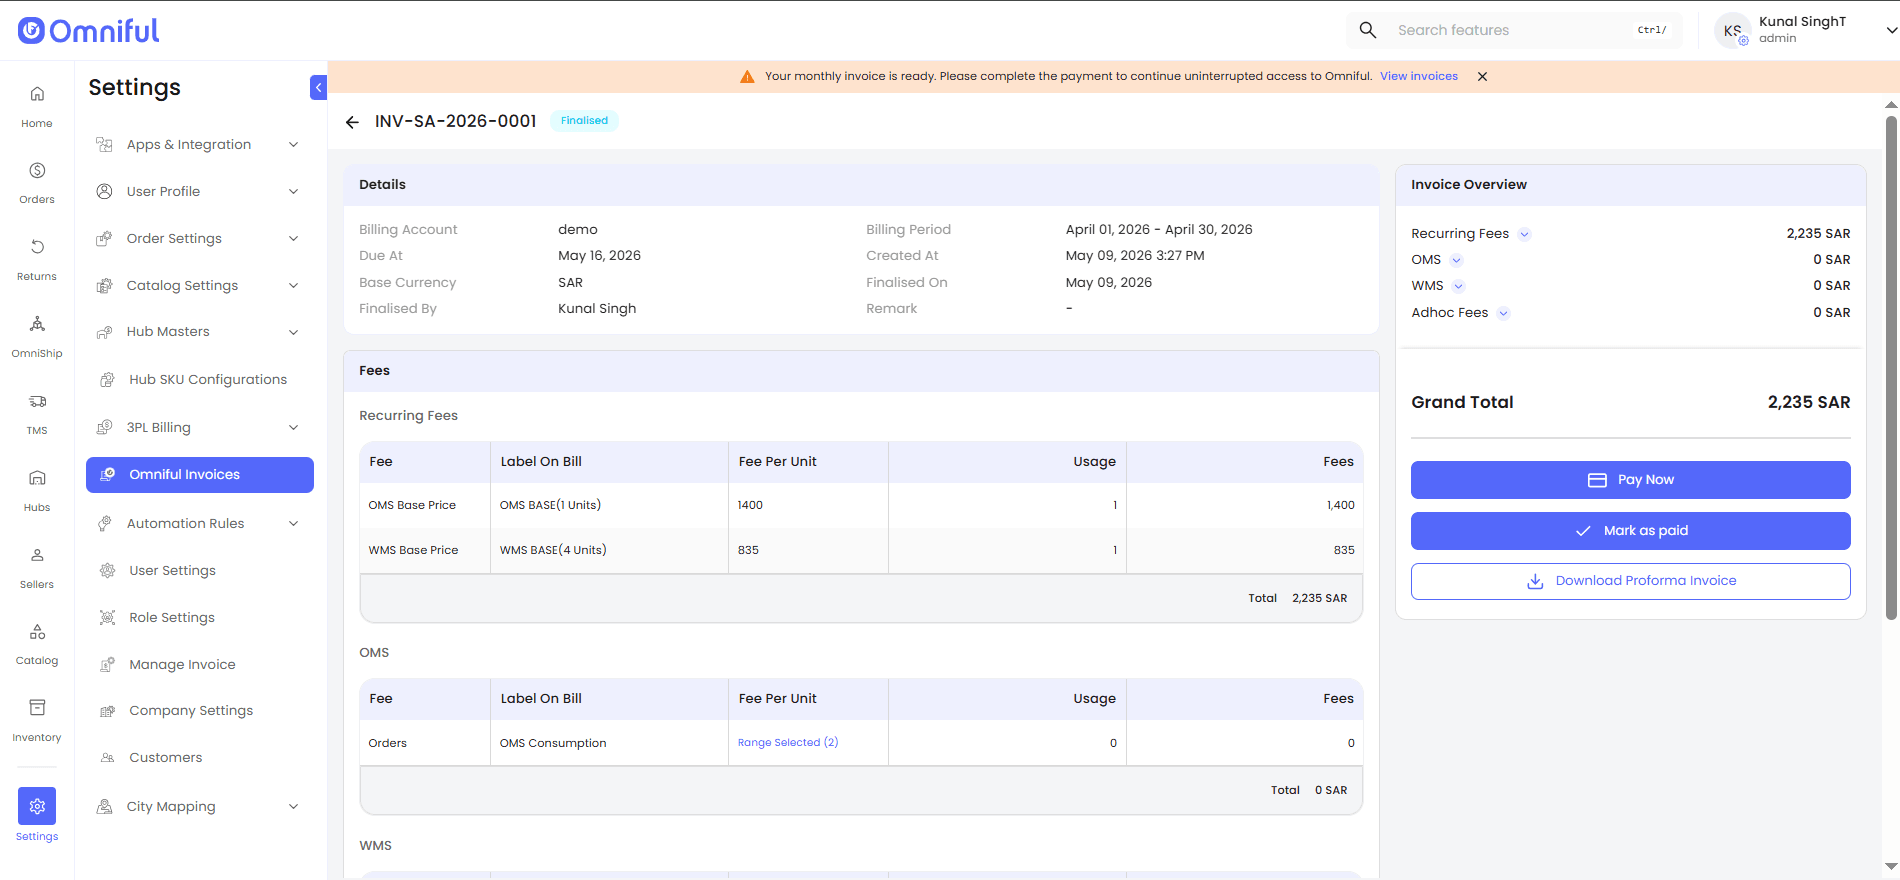
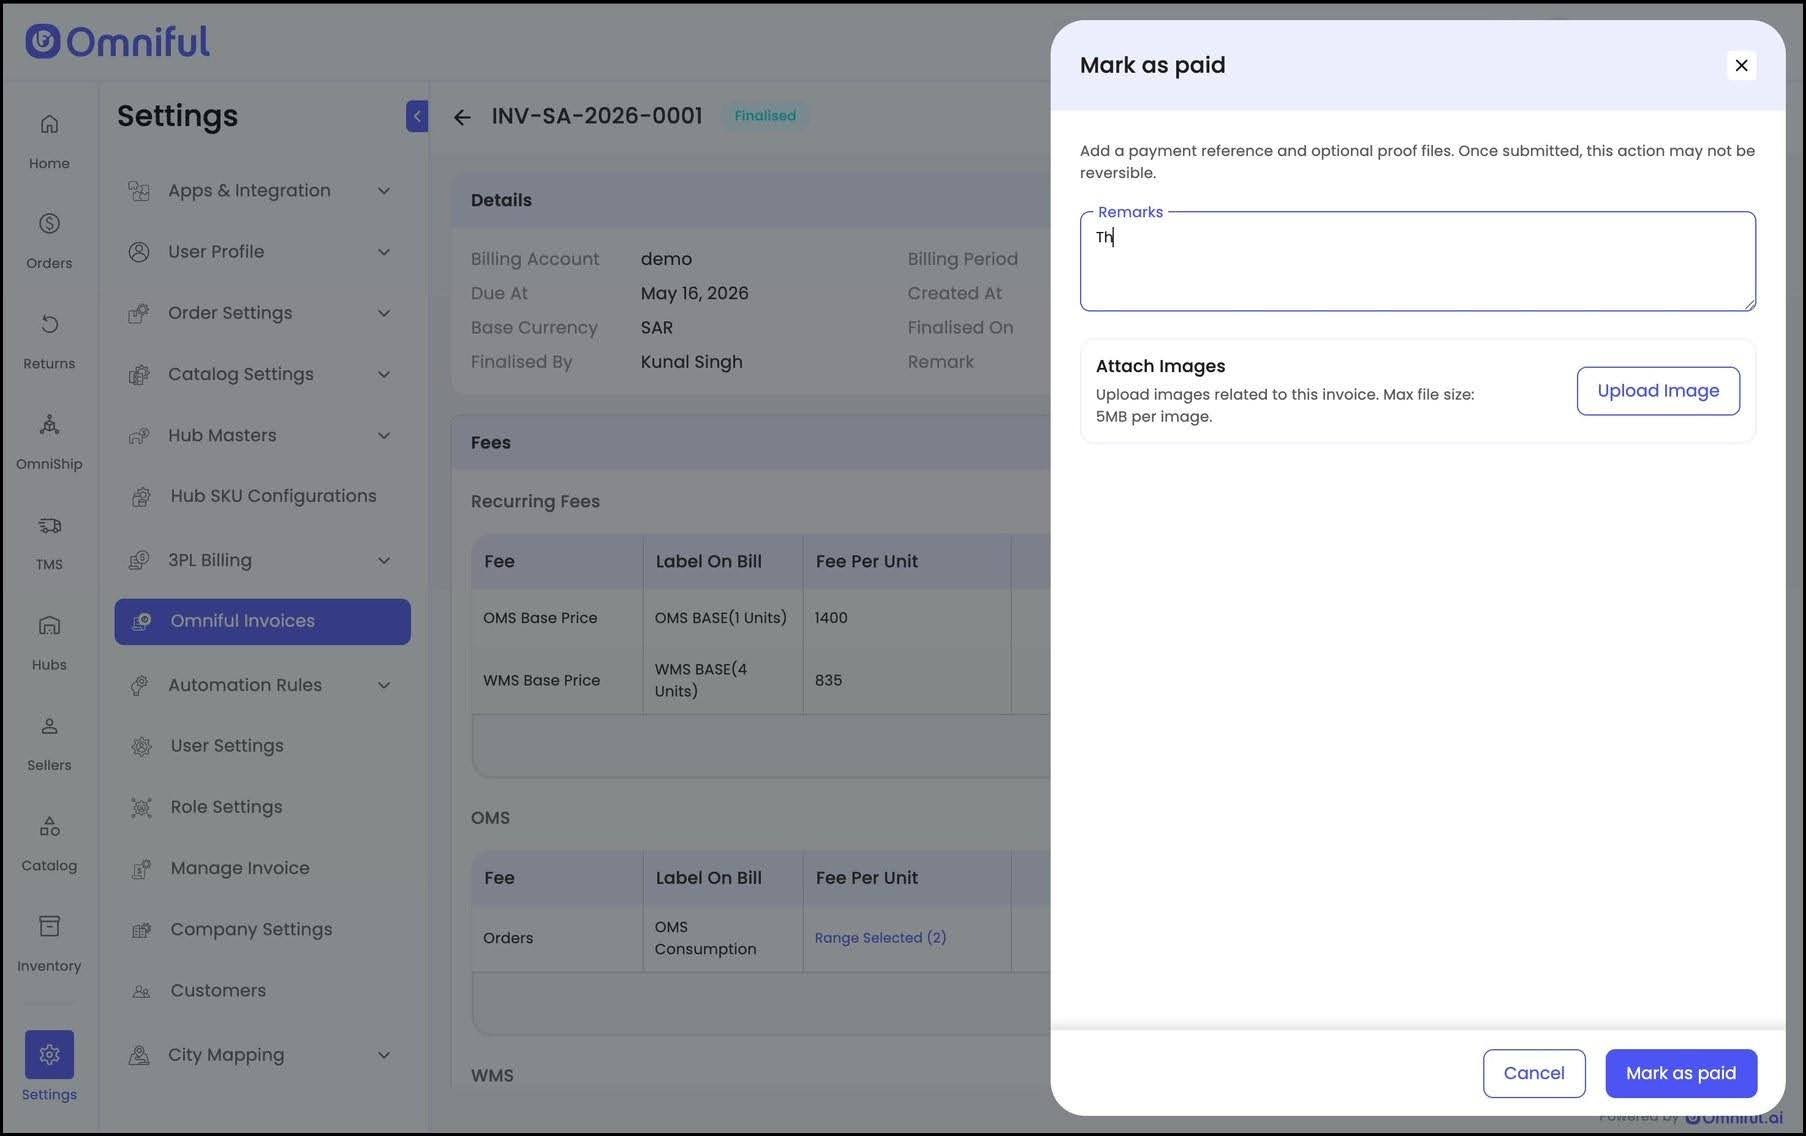
If the invoice has already been paid externally, users can update the status by clicking on “Mark as Paid” and adding relevant remarks. This invoice is then marked as Payment Submitted.
Note: Invoices marked as Payment Submitted will be updated to Paid only after the payment is received and verified by Omniful.
 Additionally, users can download the Proforma Invoice for reference or offline use as needed.
6. Track submitted and accepted payments.
Use the Payment Submitted filter to review invoices for which payment has been submitted. Use the Paid filter to view invoices accepted as paid by Omniful.
Note: All invoice actions , Pay Now, Mark as Paid, and Download Proforma Invoice can also be accessed from the action menu, providing a quick way to perform these tasks.
Invoice Status Reference
| Status | Meaning |
|---|---|
| Finalized | Invoice generated and available for review/payment |
| Payment Submitted | Payment submitted or marked as paid by user |
| Paid | Payment verified and accepted by Omniful |
| Overdue | Invoice past due date |
| Partially Paid | Partial payment received |
© 2026 Omniful. All Rights Reserved.