Table of Contents
Share On
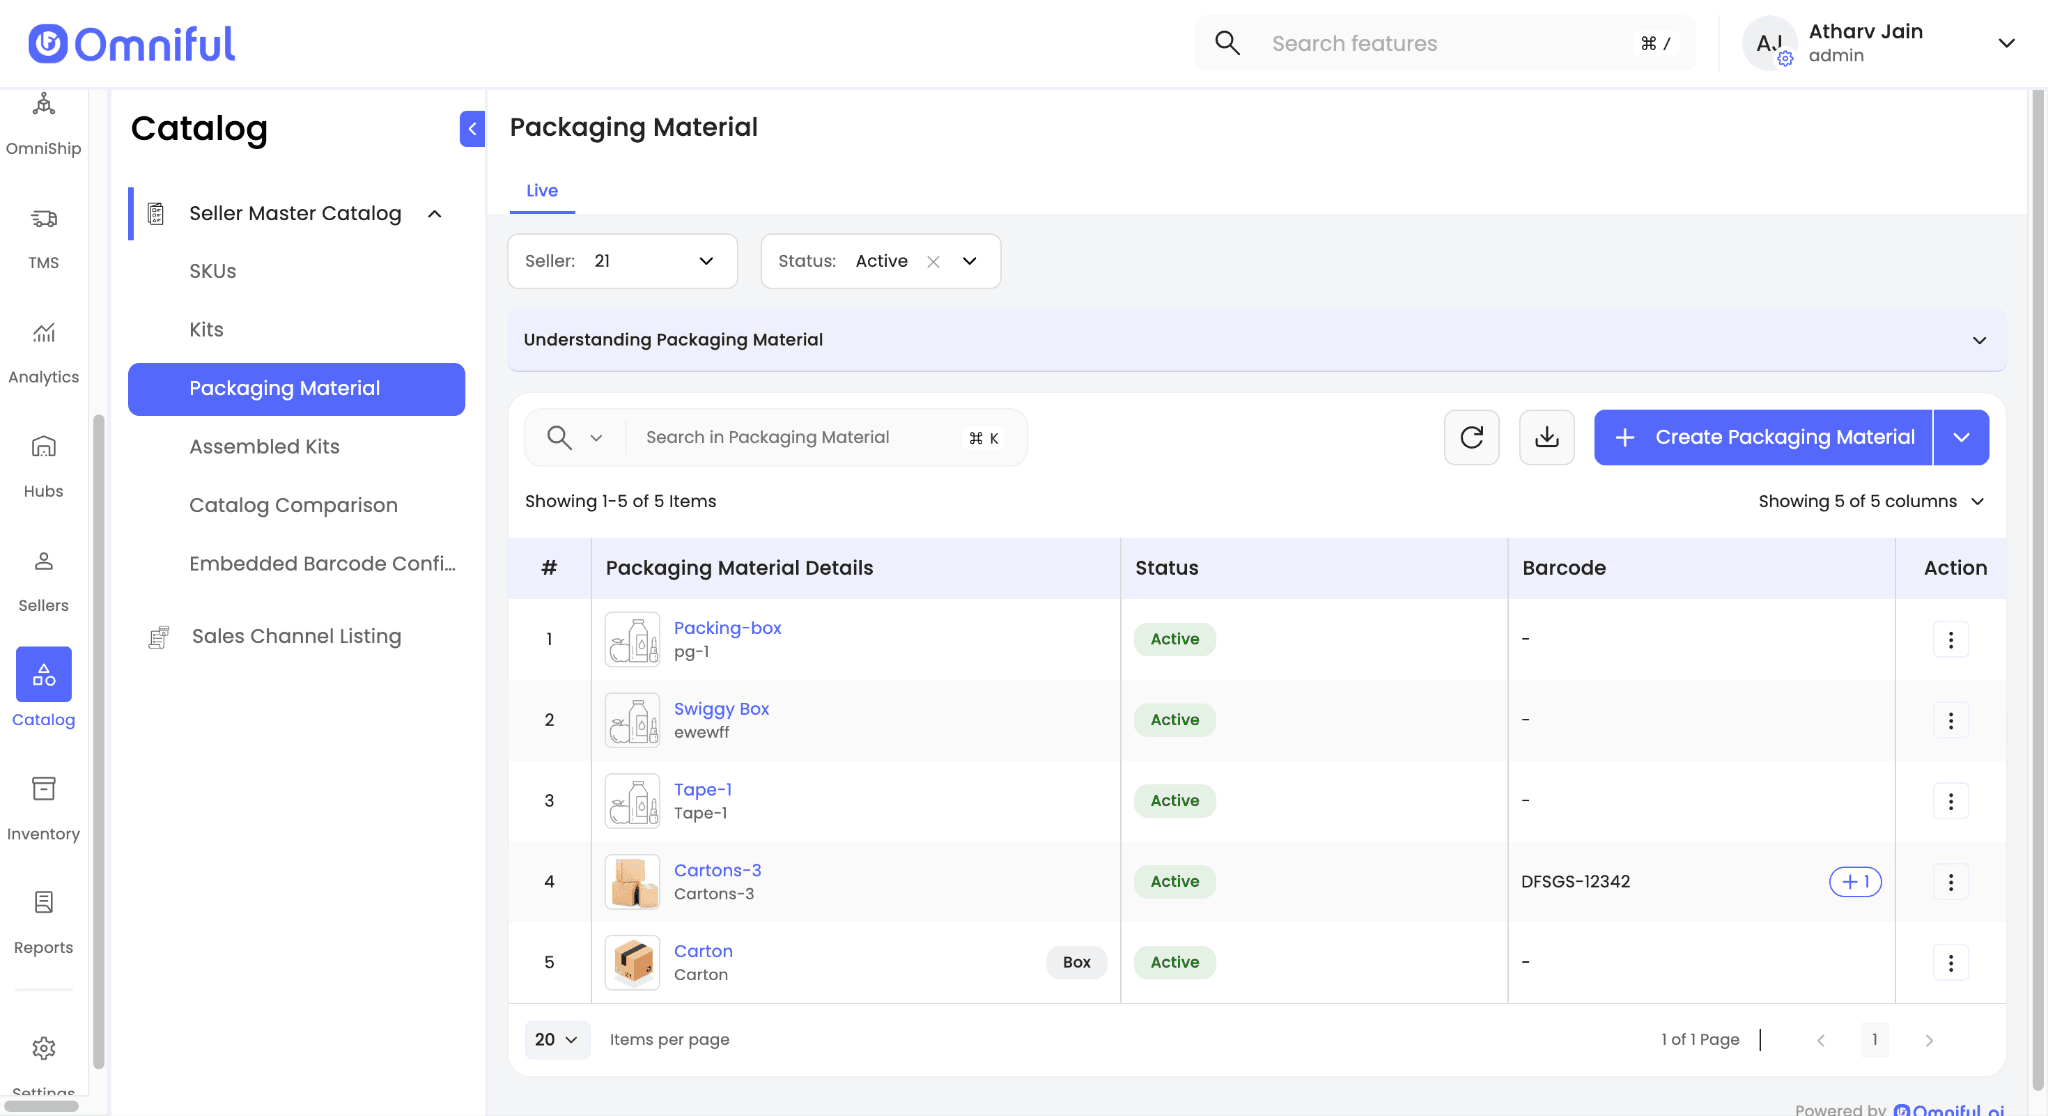
Packaging Material Inventory
Version: 1.0
Owner: Omniful Product Team
Summary
Omniful WMS now supports packaging material management to track seller white-labelled packaging materials, such as boxes and other consumables, as SKUs and consume them during the packing process.
You can receive and track packaging materials similarly to standard SKUs and use them in orders during packing.
Packaging material SKUs can only be used while packing an order and cannot be added to orders or kits.
Packaging boxes allow item-to-box mapping, which enables box-level visibility for packed order items.
Packaging materials such as tapes, fillers, and labels that are not boxes can also be attached to orders, although they do not support item-level attribution.
Configuring Packaging Material
To configure packaging material for a seller:
-
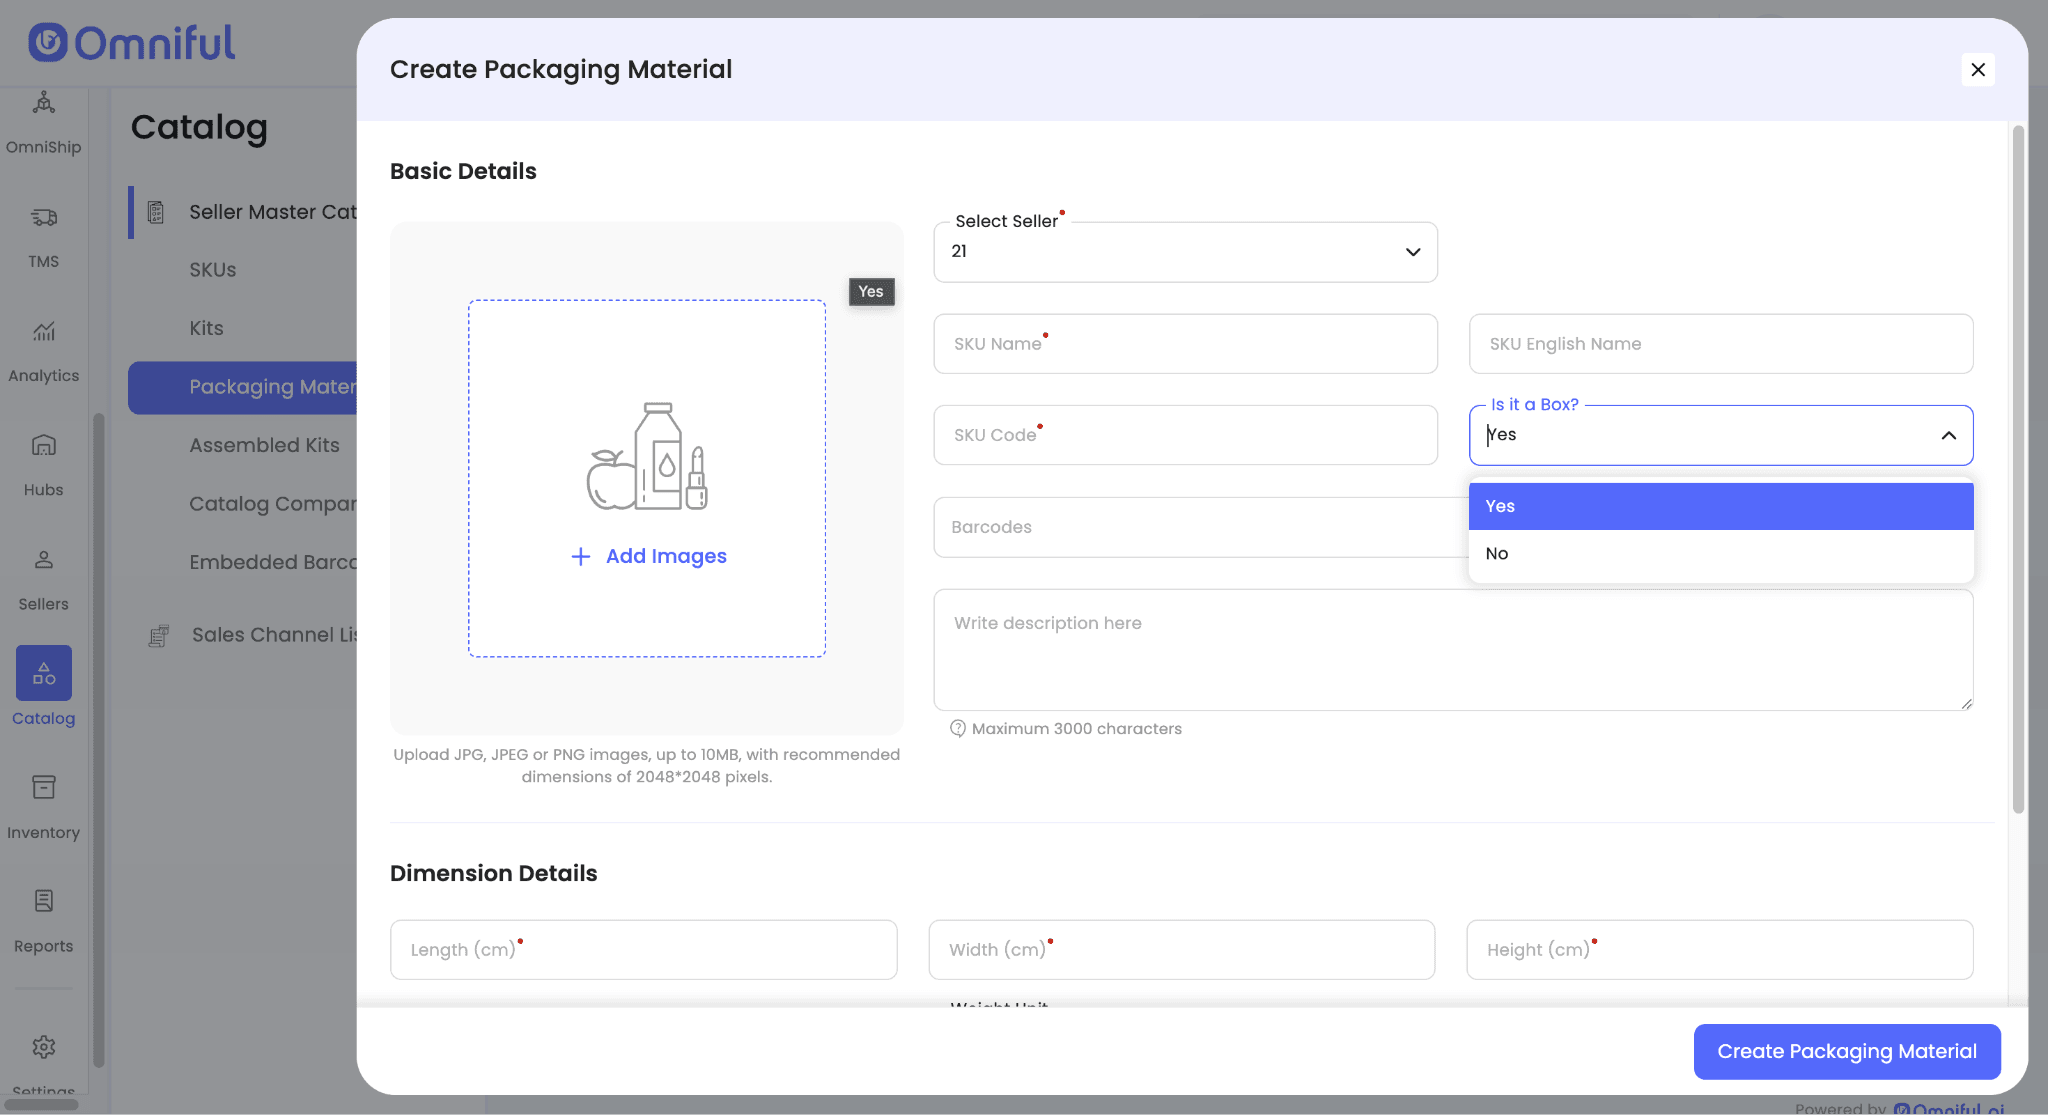
Navigate to Catalog → Packaging Material → + Create Packaging Material.
-
Enter the required packaging material details.
-
If the packaging material is a box, select Yes under Is it a box?
-
For boxes, enter length, width, and height.
-
Click Create Packaging Material.
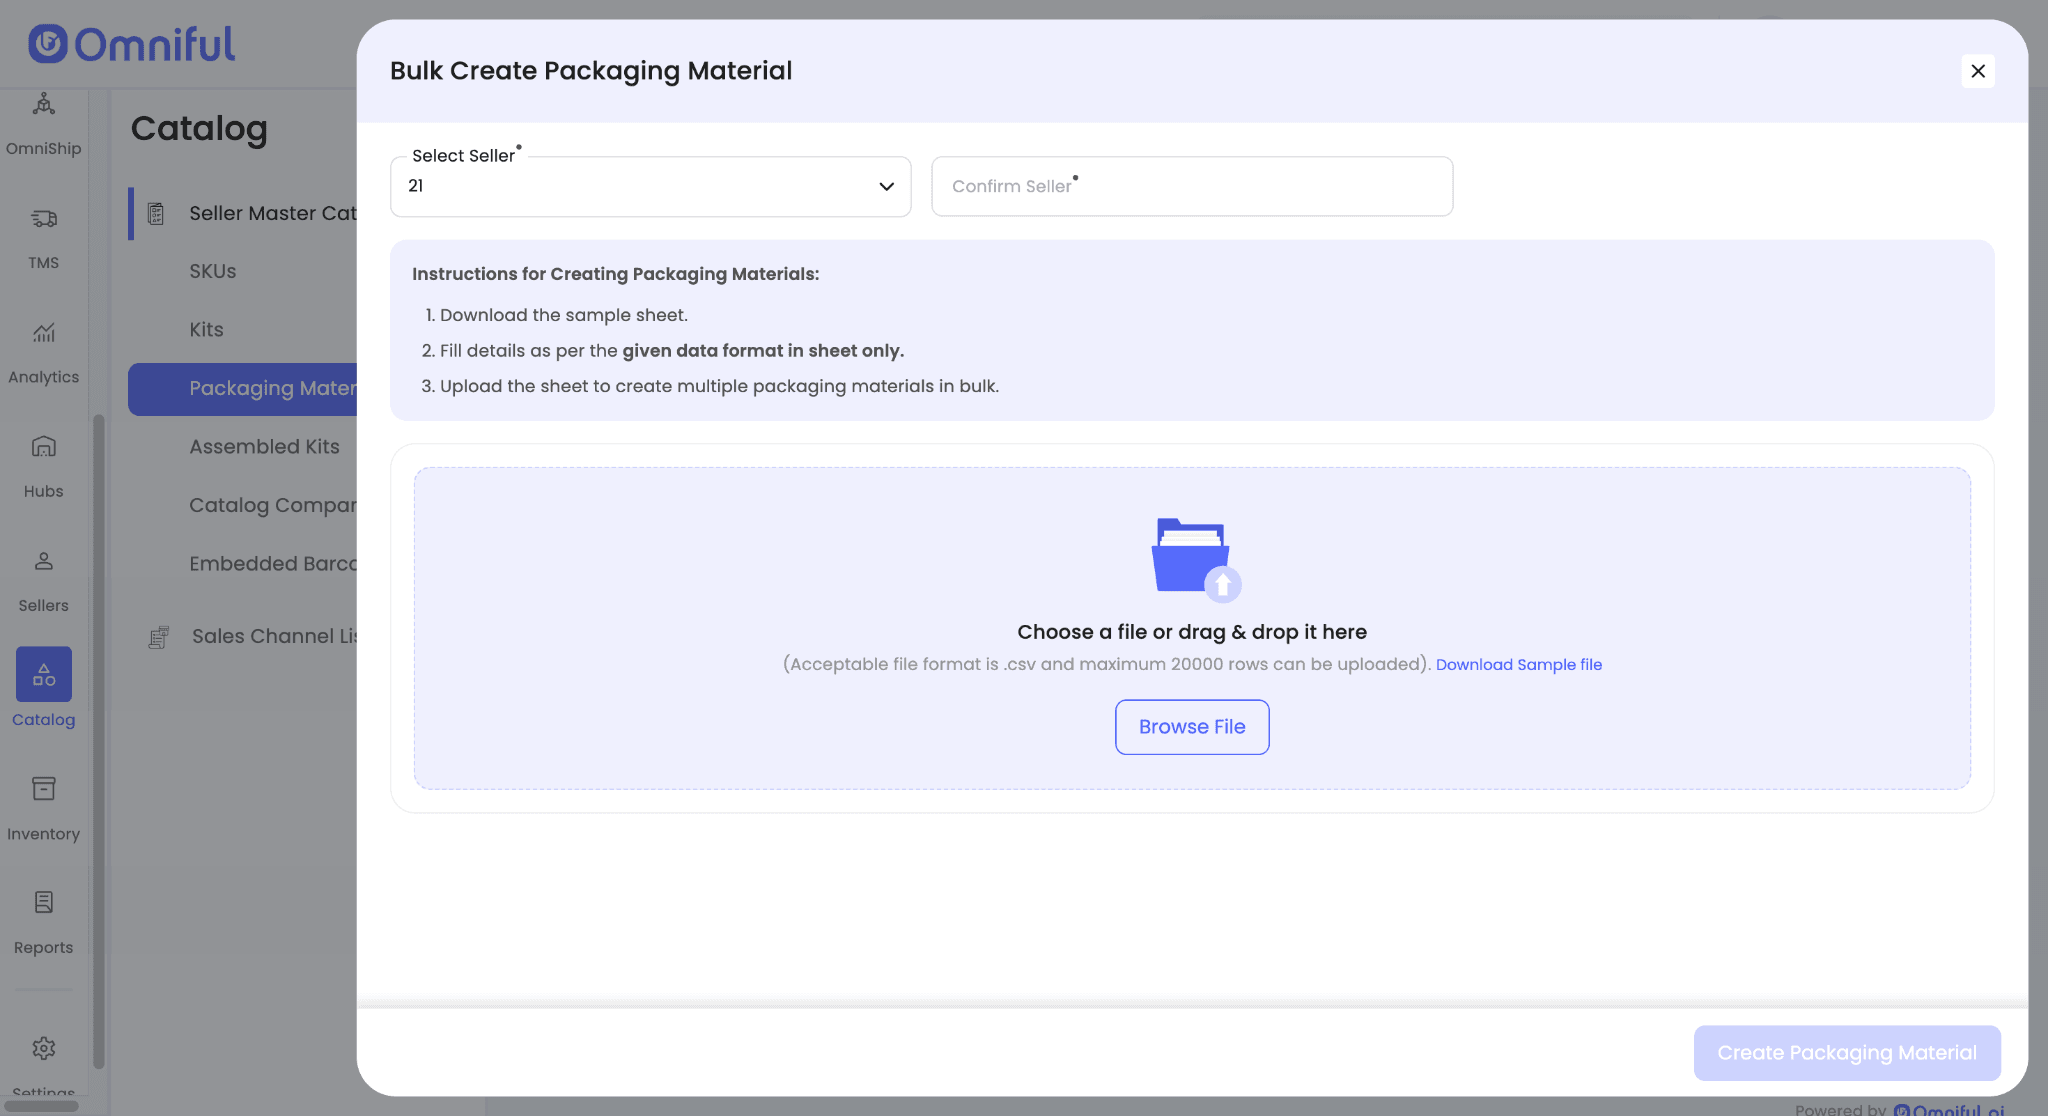
You can also create packaging materials in bulk using the bulk sheet upload option.
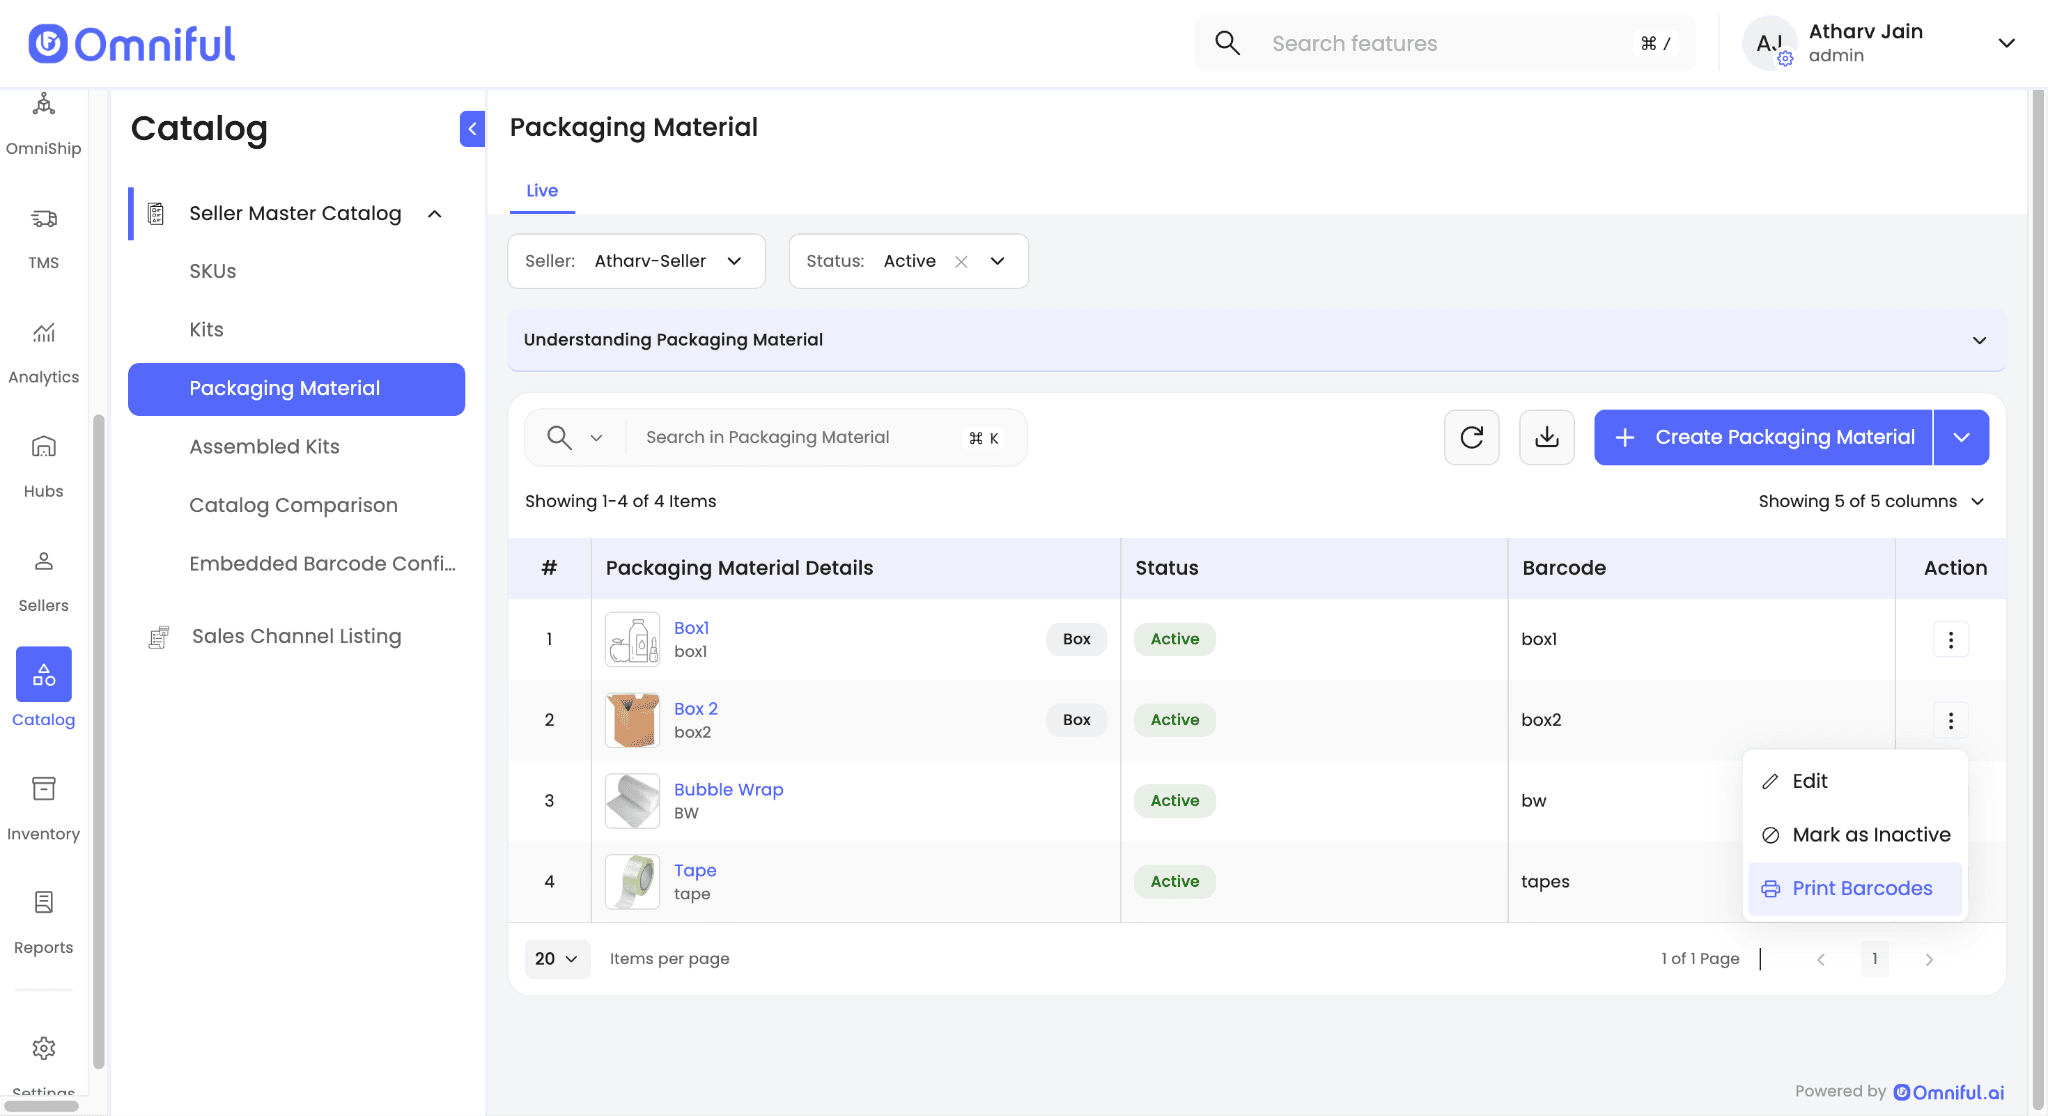
After creation, all packaging materials for a seller are visible on the Packaging Material screen. Box-type SKUs are marked with a box tag for easy identification.
Once created, the packaging material SKU barcode can be printed and scanned during packing to consume that packaging material.
Orders can also be packed in hub boxes and pallets. To create a hub box or pallet:
- Navigate to Hubs → Hub Assets → Boxes or Pallets.
- Click + Create Box or + Create Pallet.
- Use the generated barcode during packing to pack the order into that box or pallet.
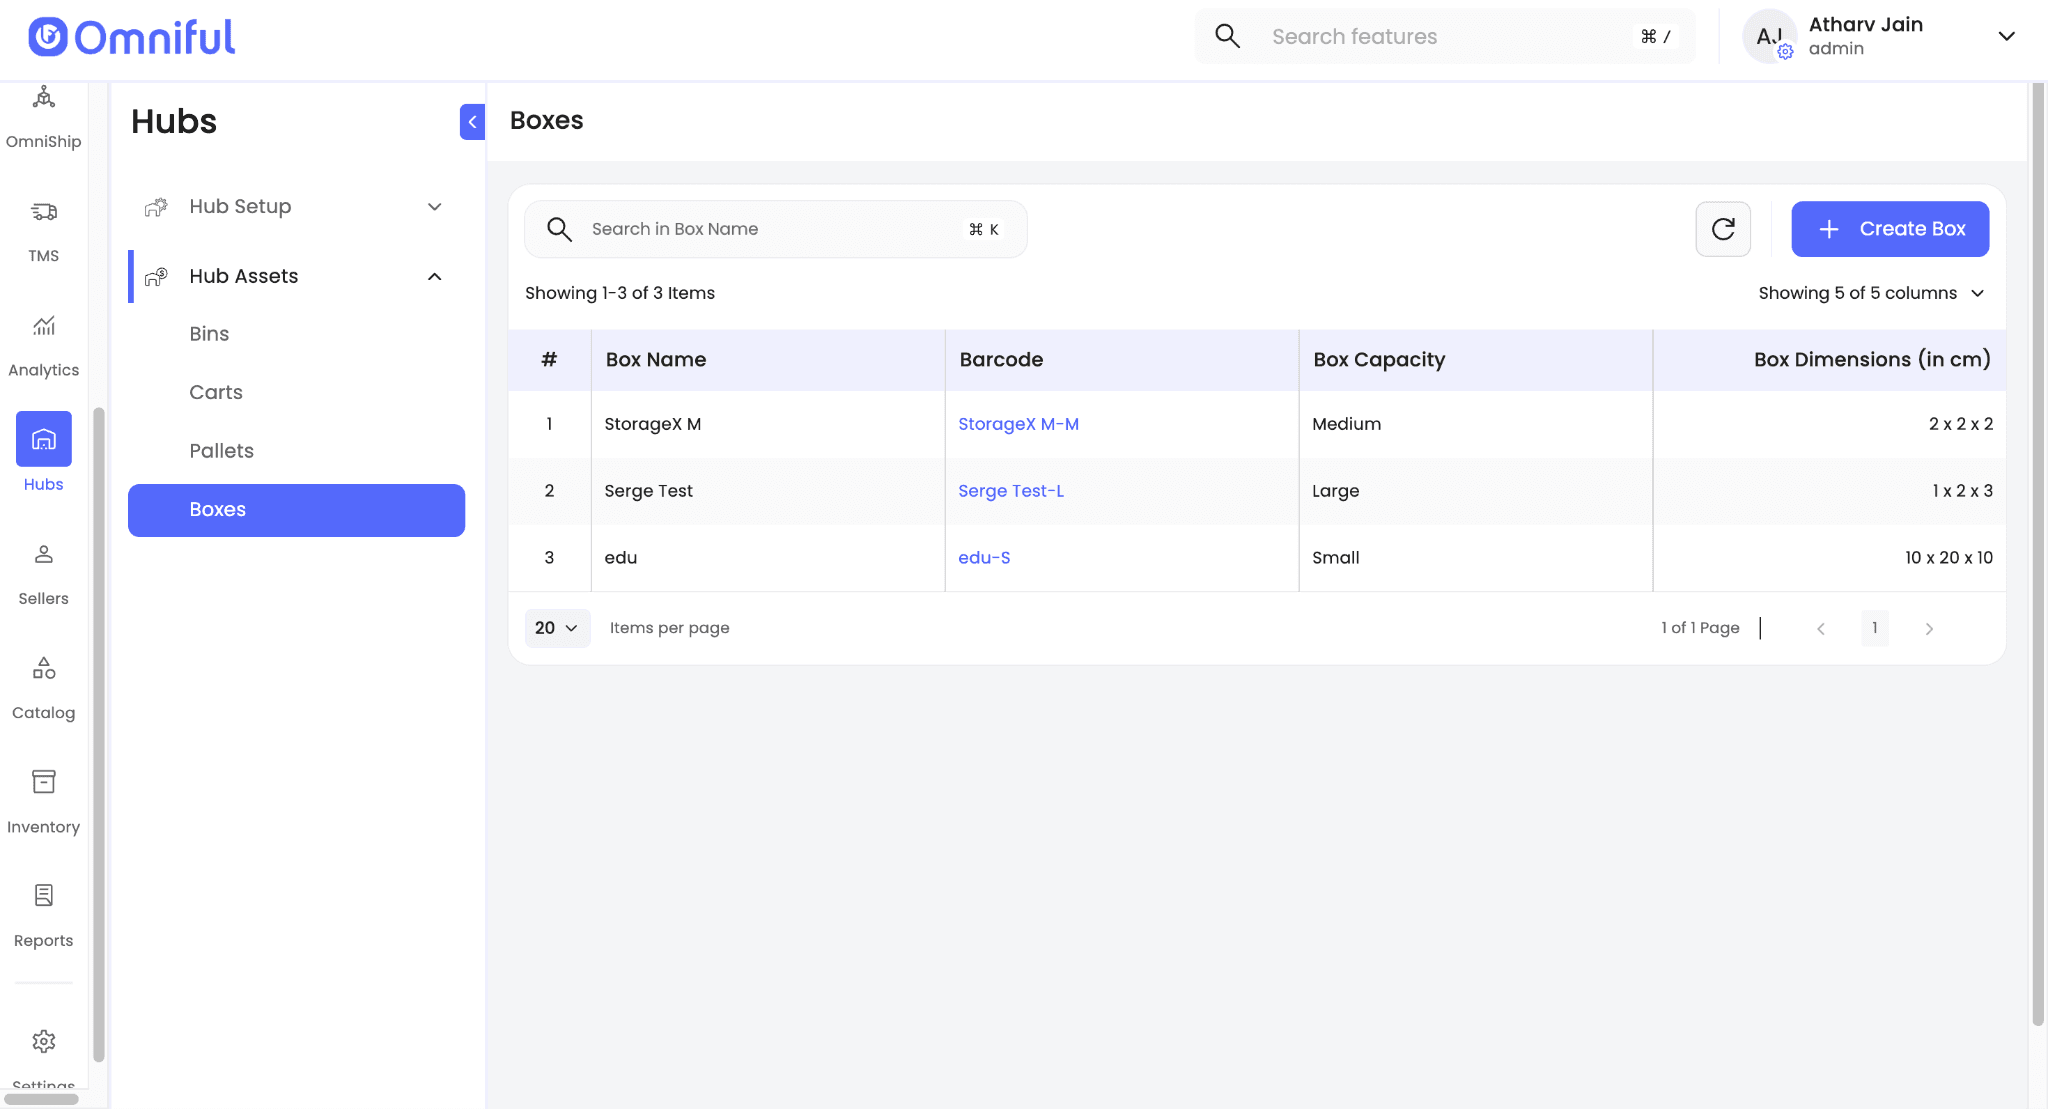
Note: Inventory for hub boxes is not tracked. Hub boxes can be used freely during packing without inventory availability constraints.
Inward Inventory for Packaging Material
Once packaging materials are created in the catalog, they can be inwarded like any other SKU.
Users can raise purchase orders and follow the standard inbound flow, including Gate Entry, GRN, and Putaway.
Packaging materials are always handled as non-serialised and non-batched inventory and cannot be configured otherwise.

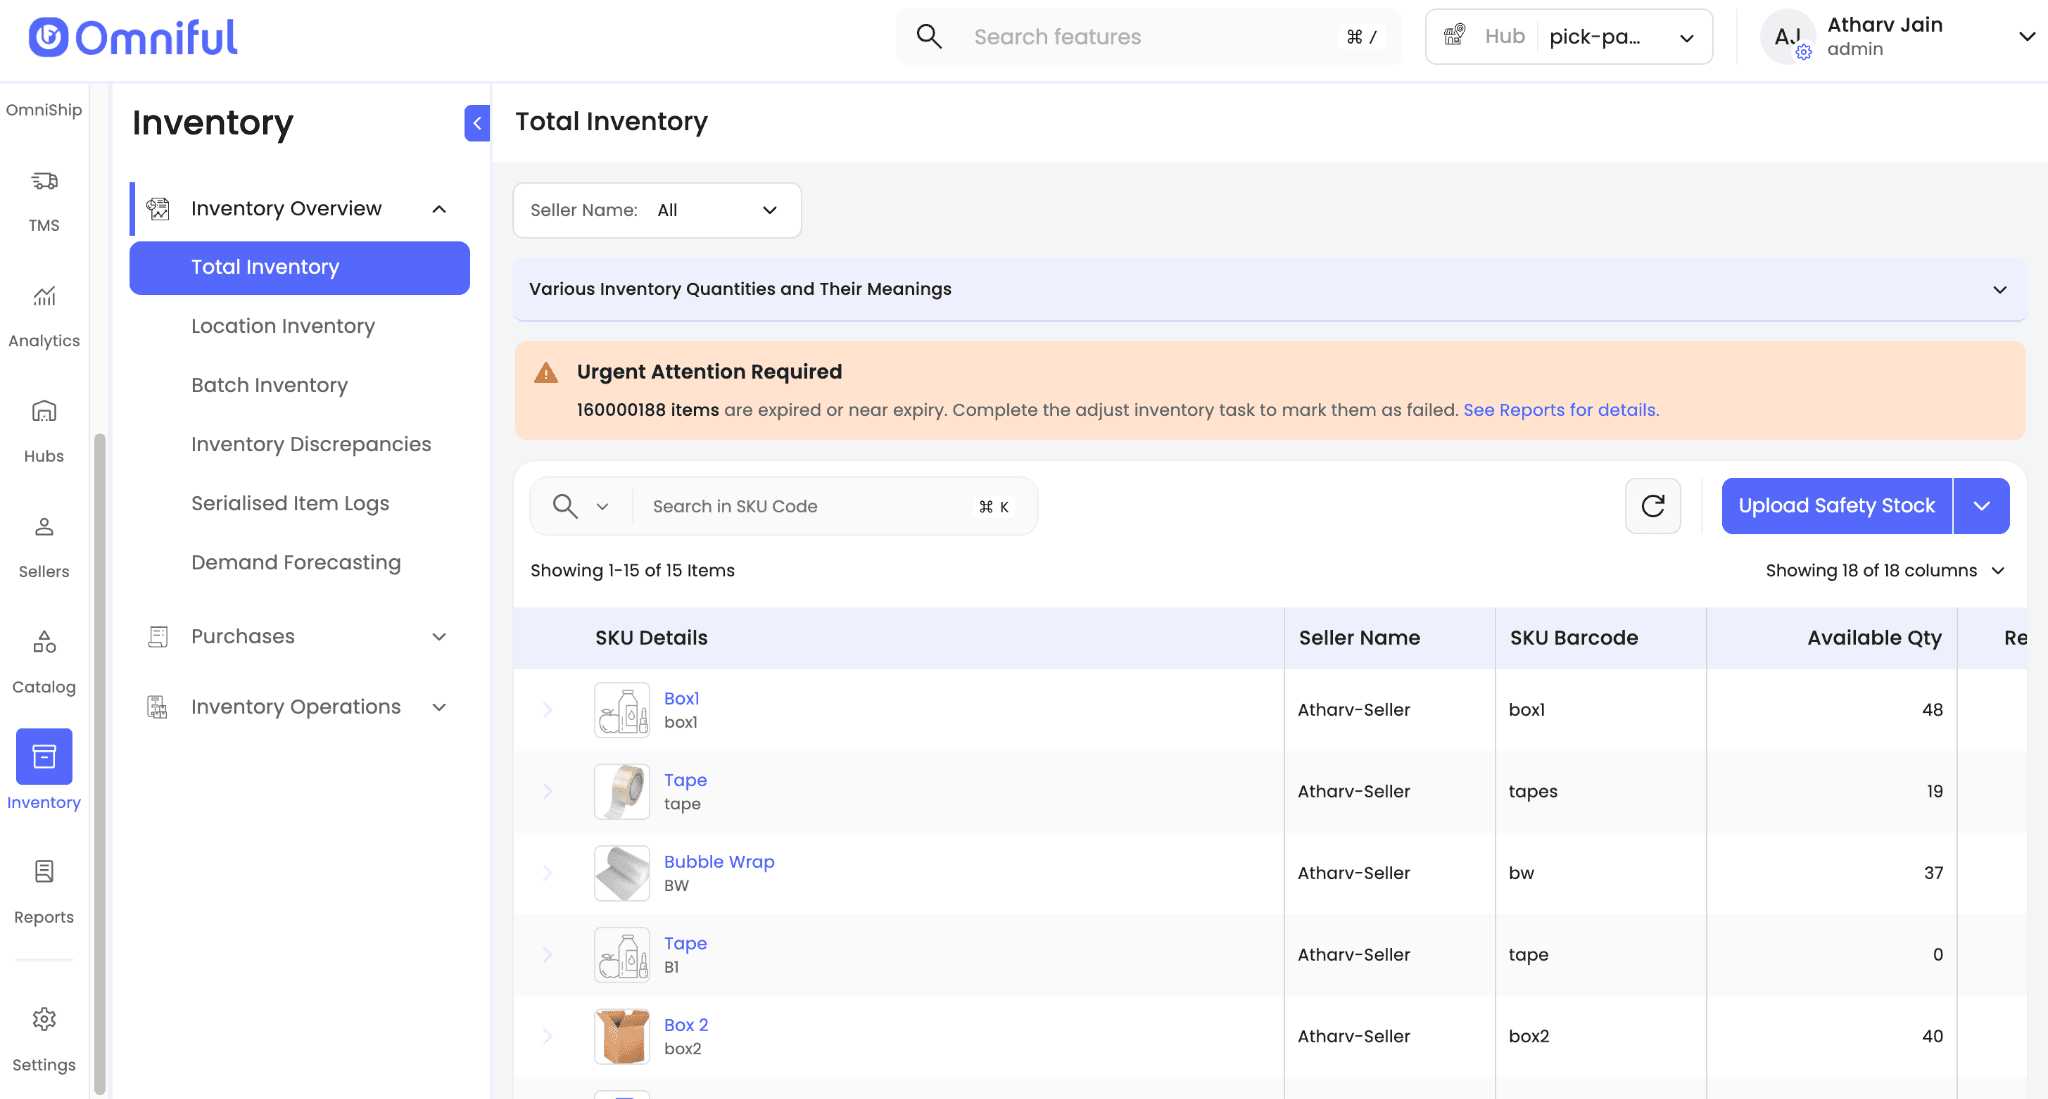
After inwarding, packaging materials are visible in the Inventory section and, like any other SKU, only quantities available at picking locations can be consumed during packing.
Mapping Packing Stations with Picking Location
If packing stations are enabled for the hub, users can map each packing station to a specific picking location. This mapping represents the inventory available at that station and ensures that packaging material inventory is deducted from the mapped picking location during packing.
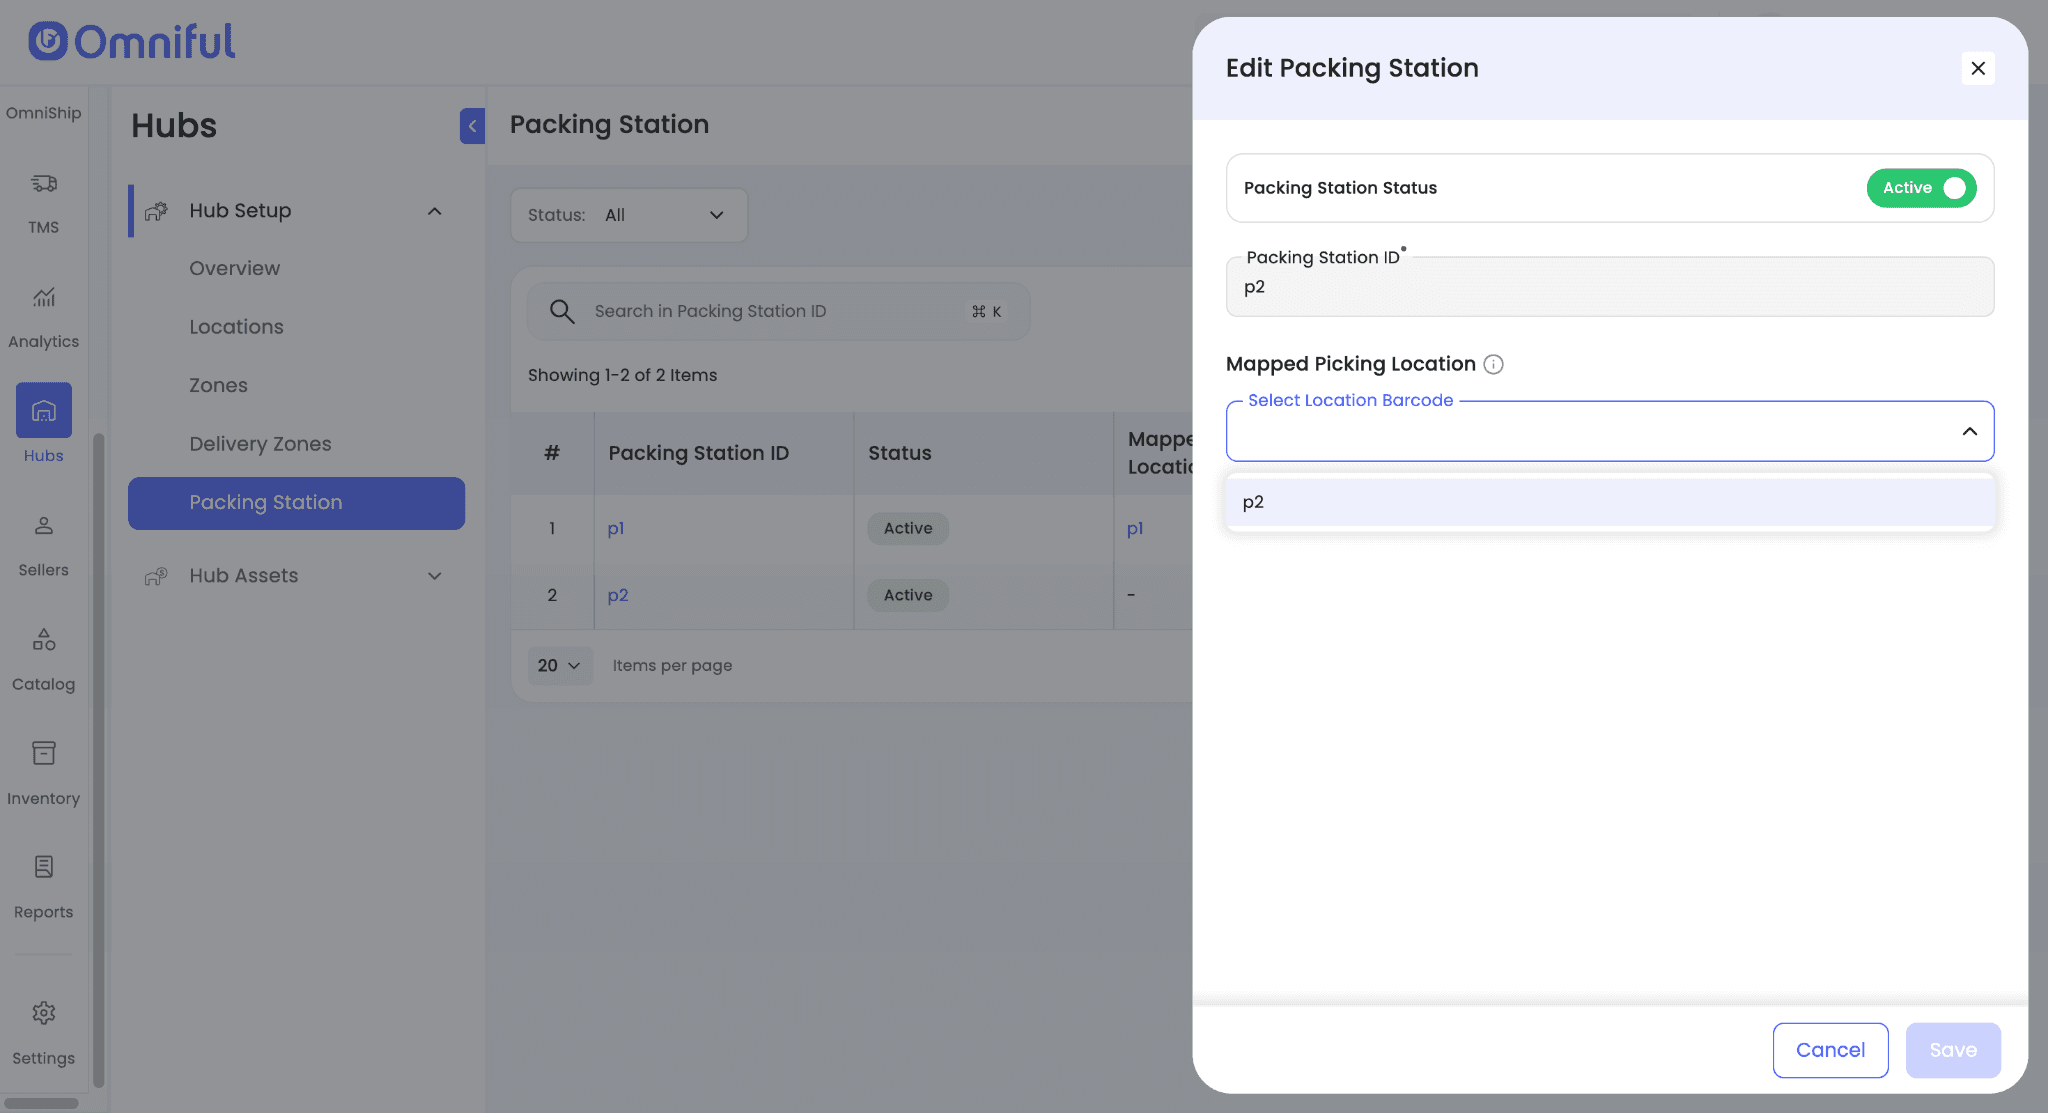
Steps to map a packing station with a picking location
- Navigate to Hubs → Hub Setup → Packing Stations.
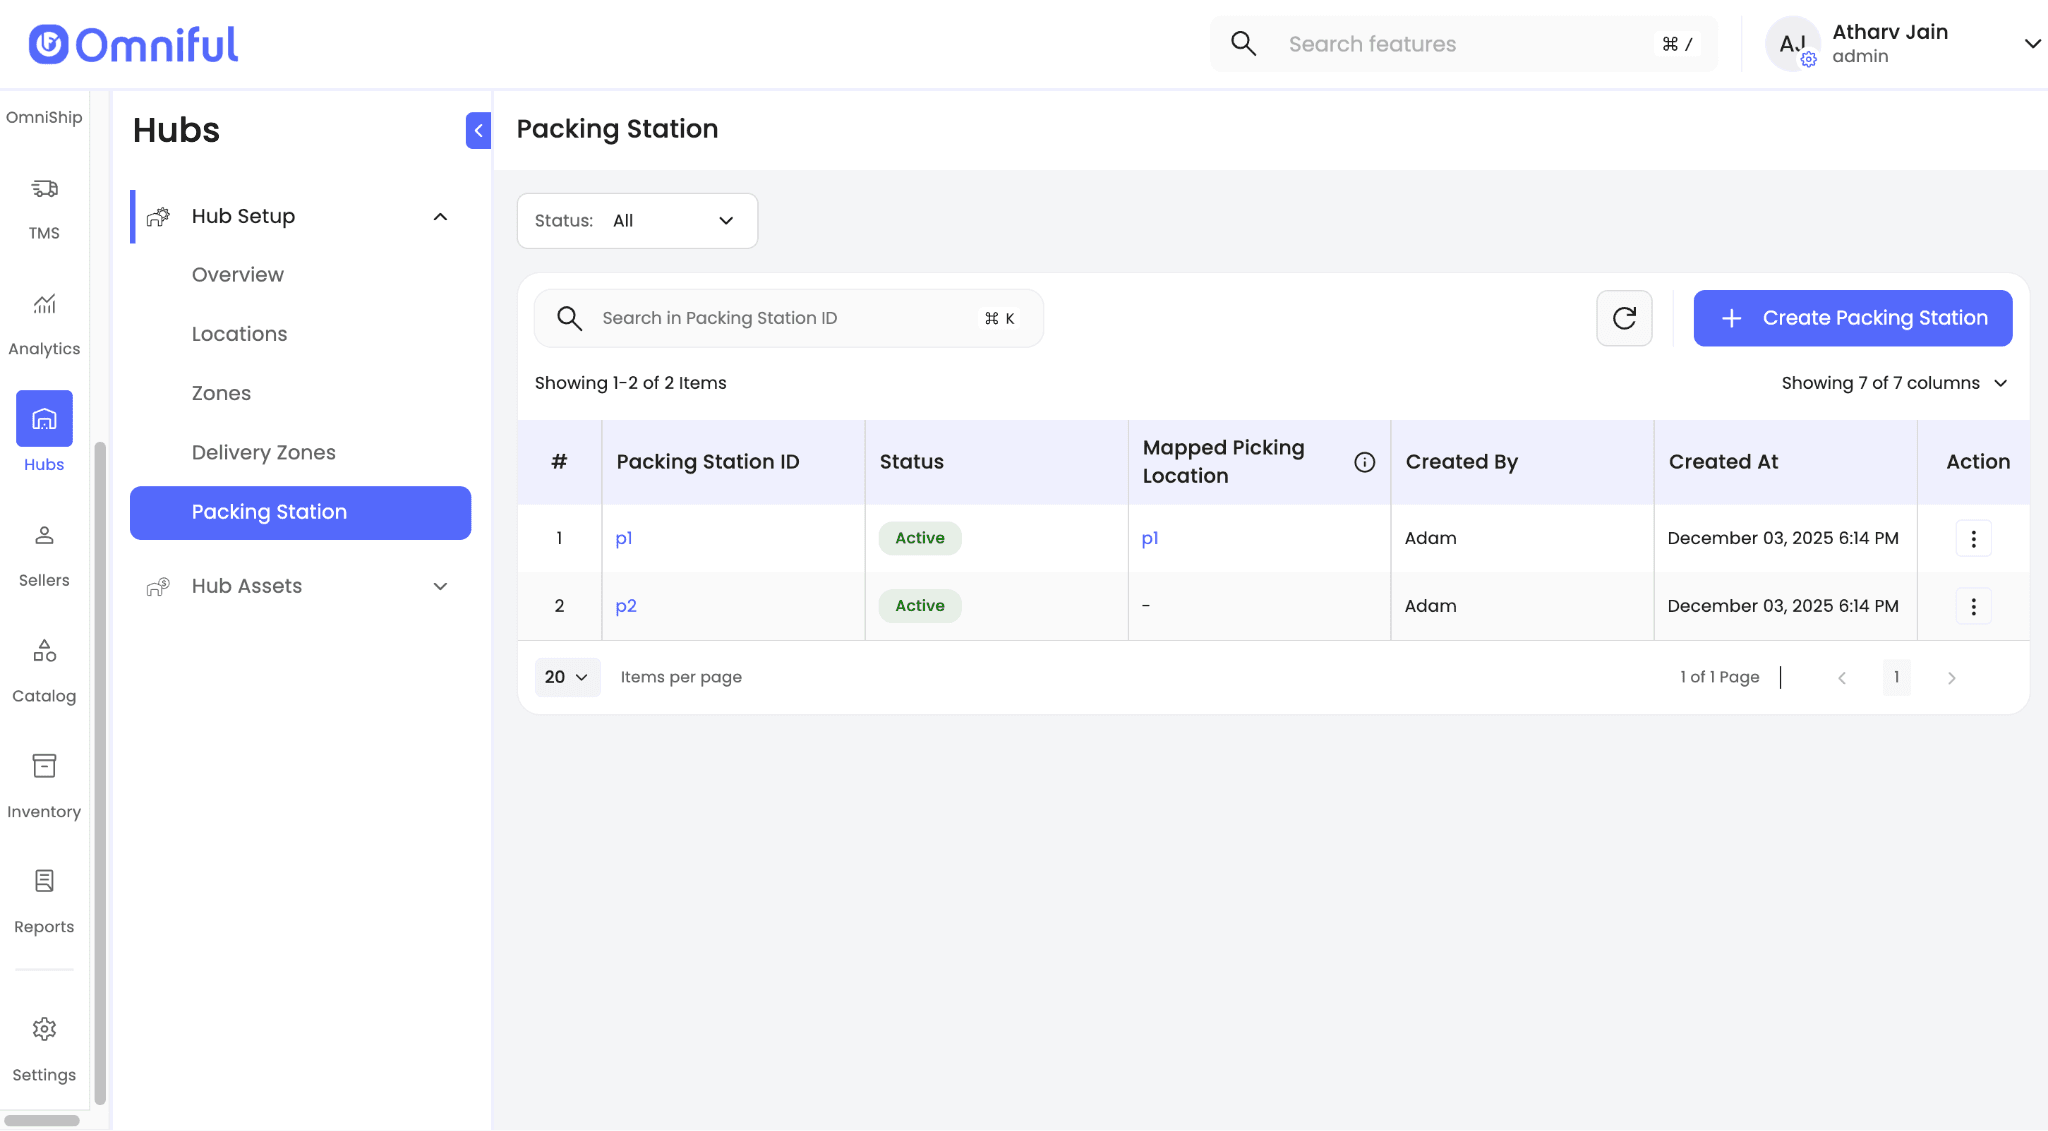
-
Create a new packing station and map it to a picking location that is not already linked to another packing station.
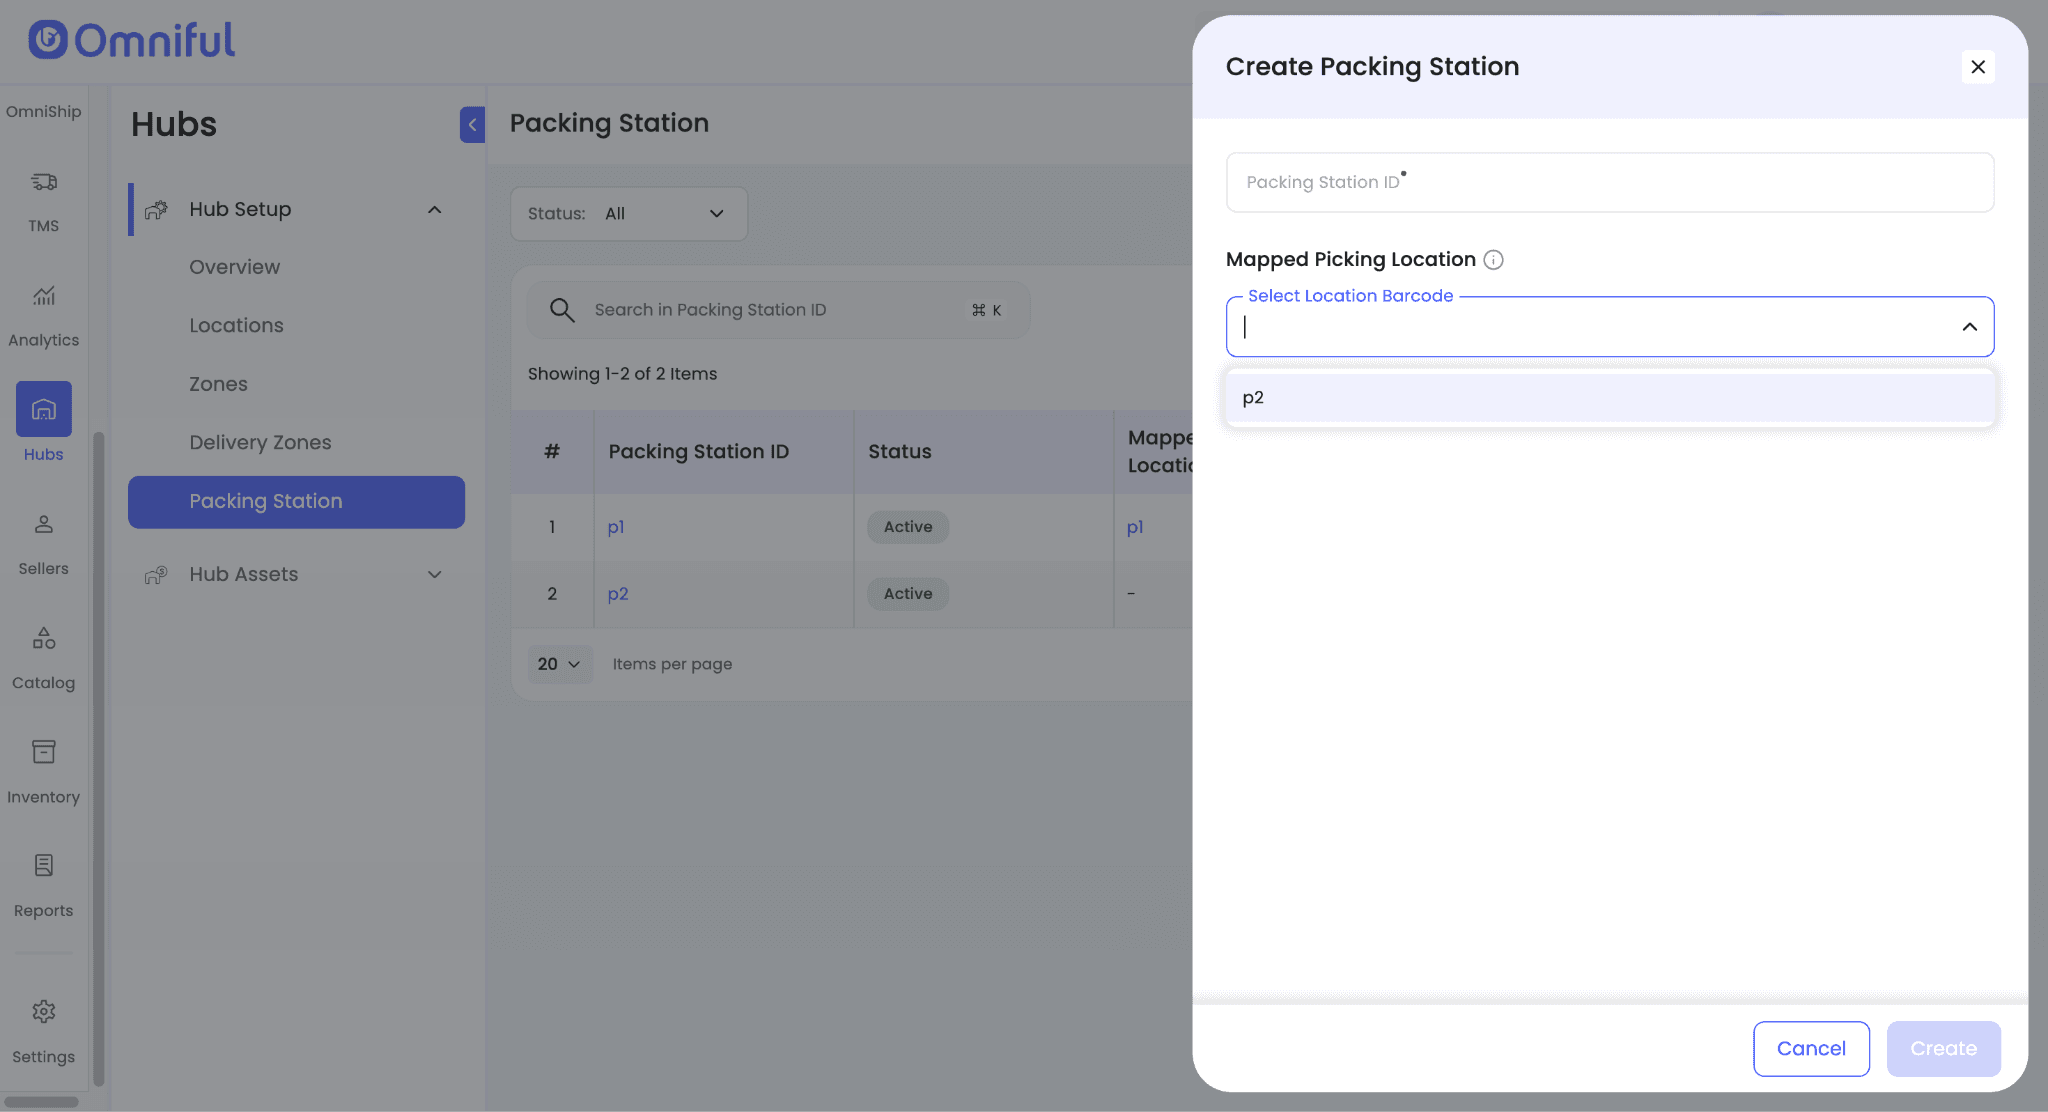
-
Save the packing station.
-
To update a mapped location later, edit the existing packing station.
-
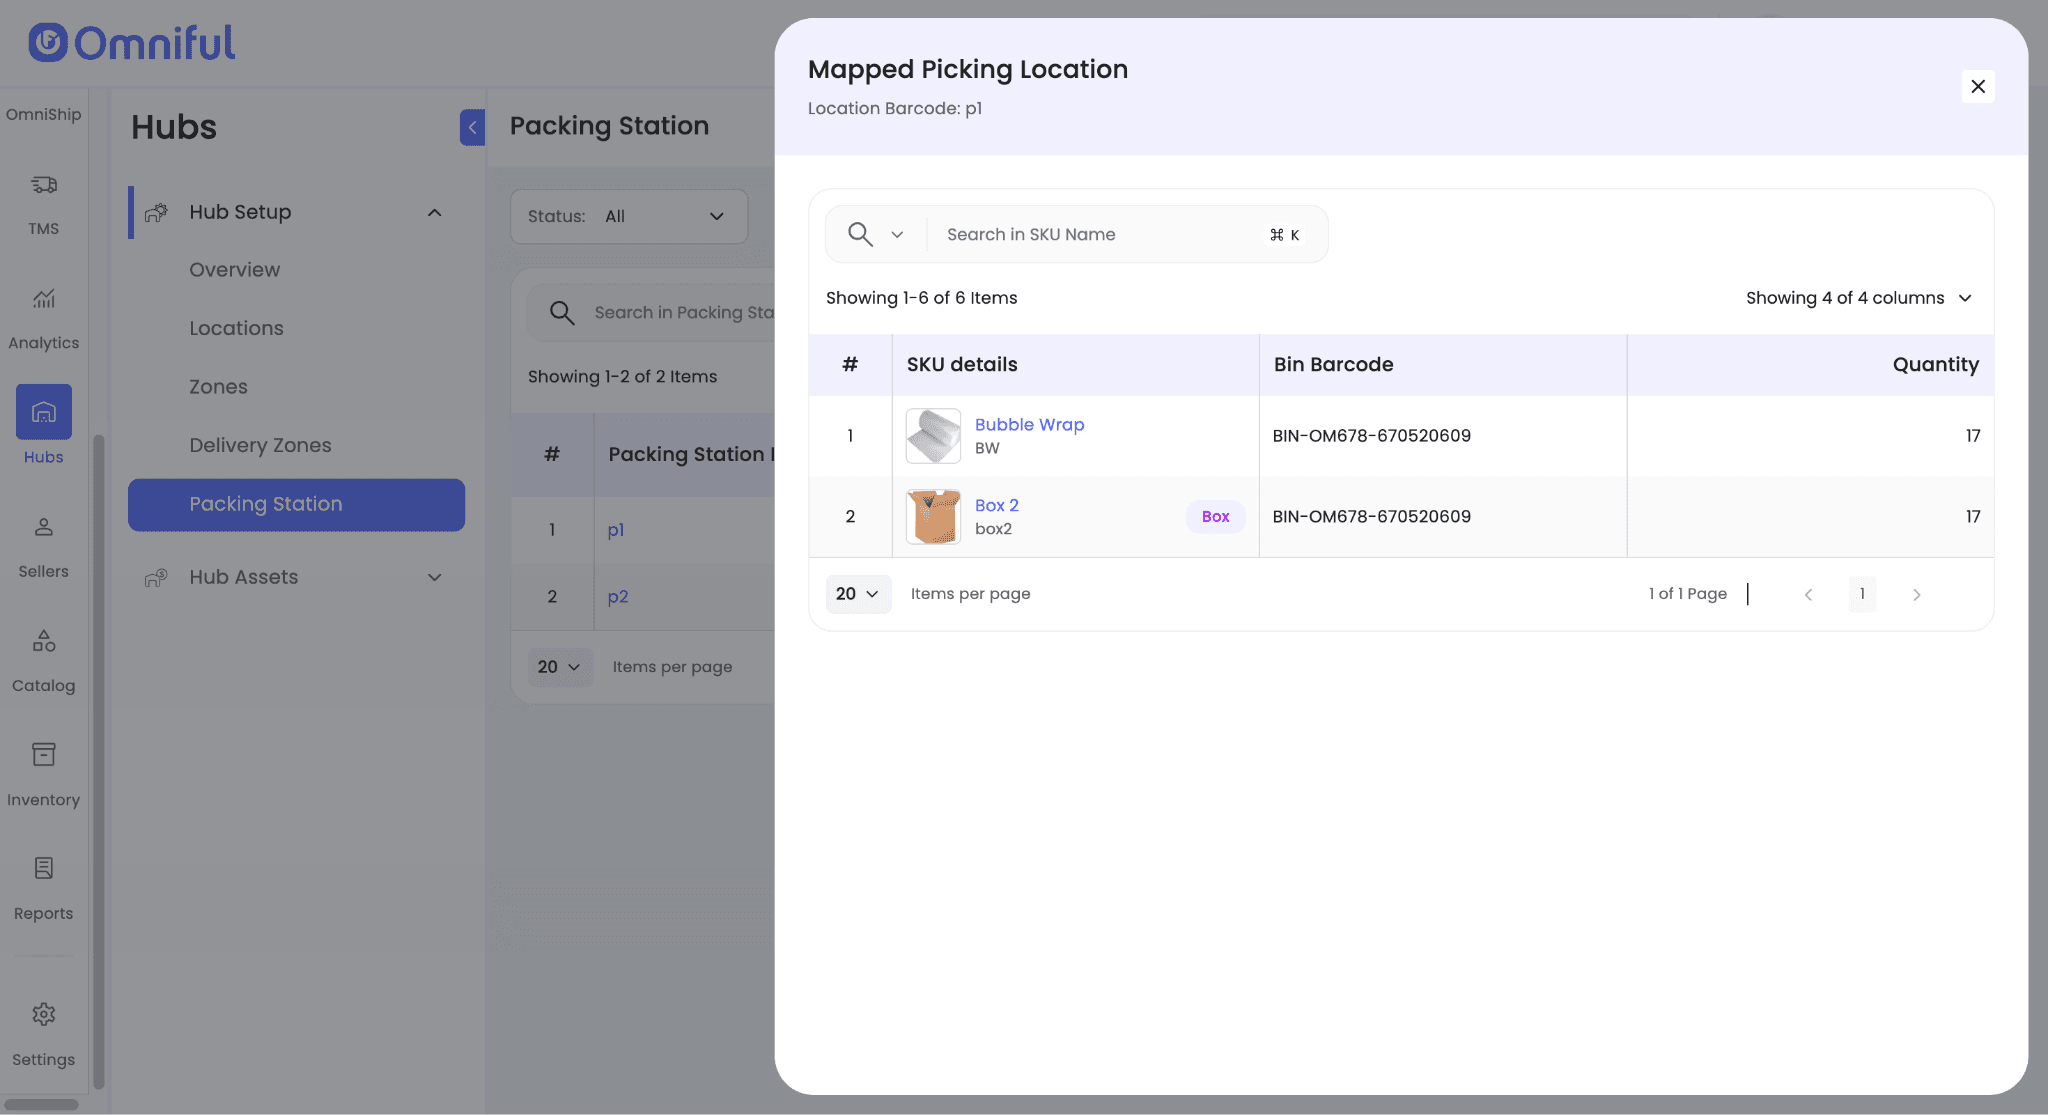
Click the mapped picking location to view the packaging material inventory available at that location.
Recommended Setup for Optimal Packing Flow
There are three packing scenarios in a hub:
- Packing at a station mapped to a picking location.
- Packing at a station without a mapped picking location.
- Packing in hubs where packing stations are disabled.
The most efficient setup is a packing station mapped to a picking location with sufficient inventory. In this flow, the packer only needs to scan the packaging material barcode to continue packing, with minimal system interaction.
If the packing station is not mapped to a picking location, if the mapped location has no available inventory, or if packing stations are disabled for the hub, the packer is prompted to select a picking location on screen before the system deducts inventory.
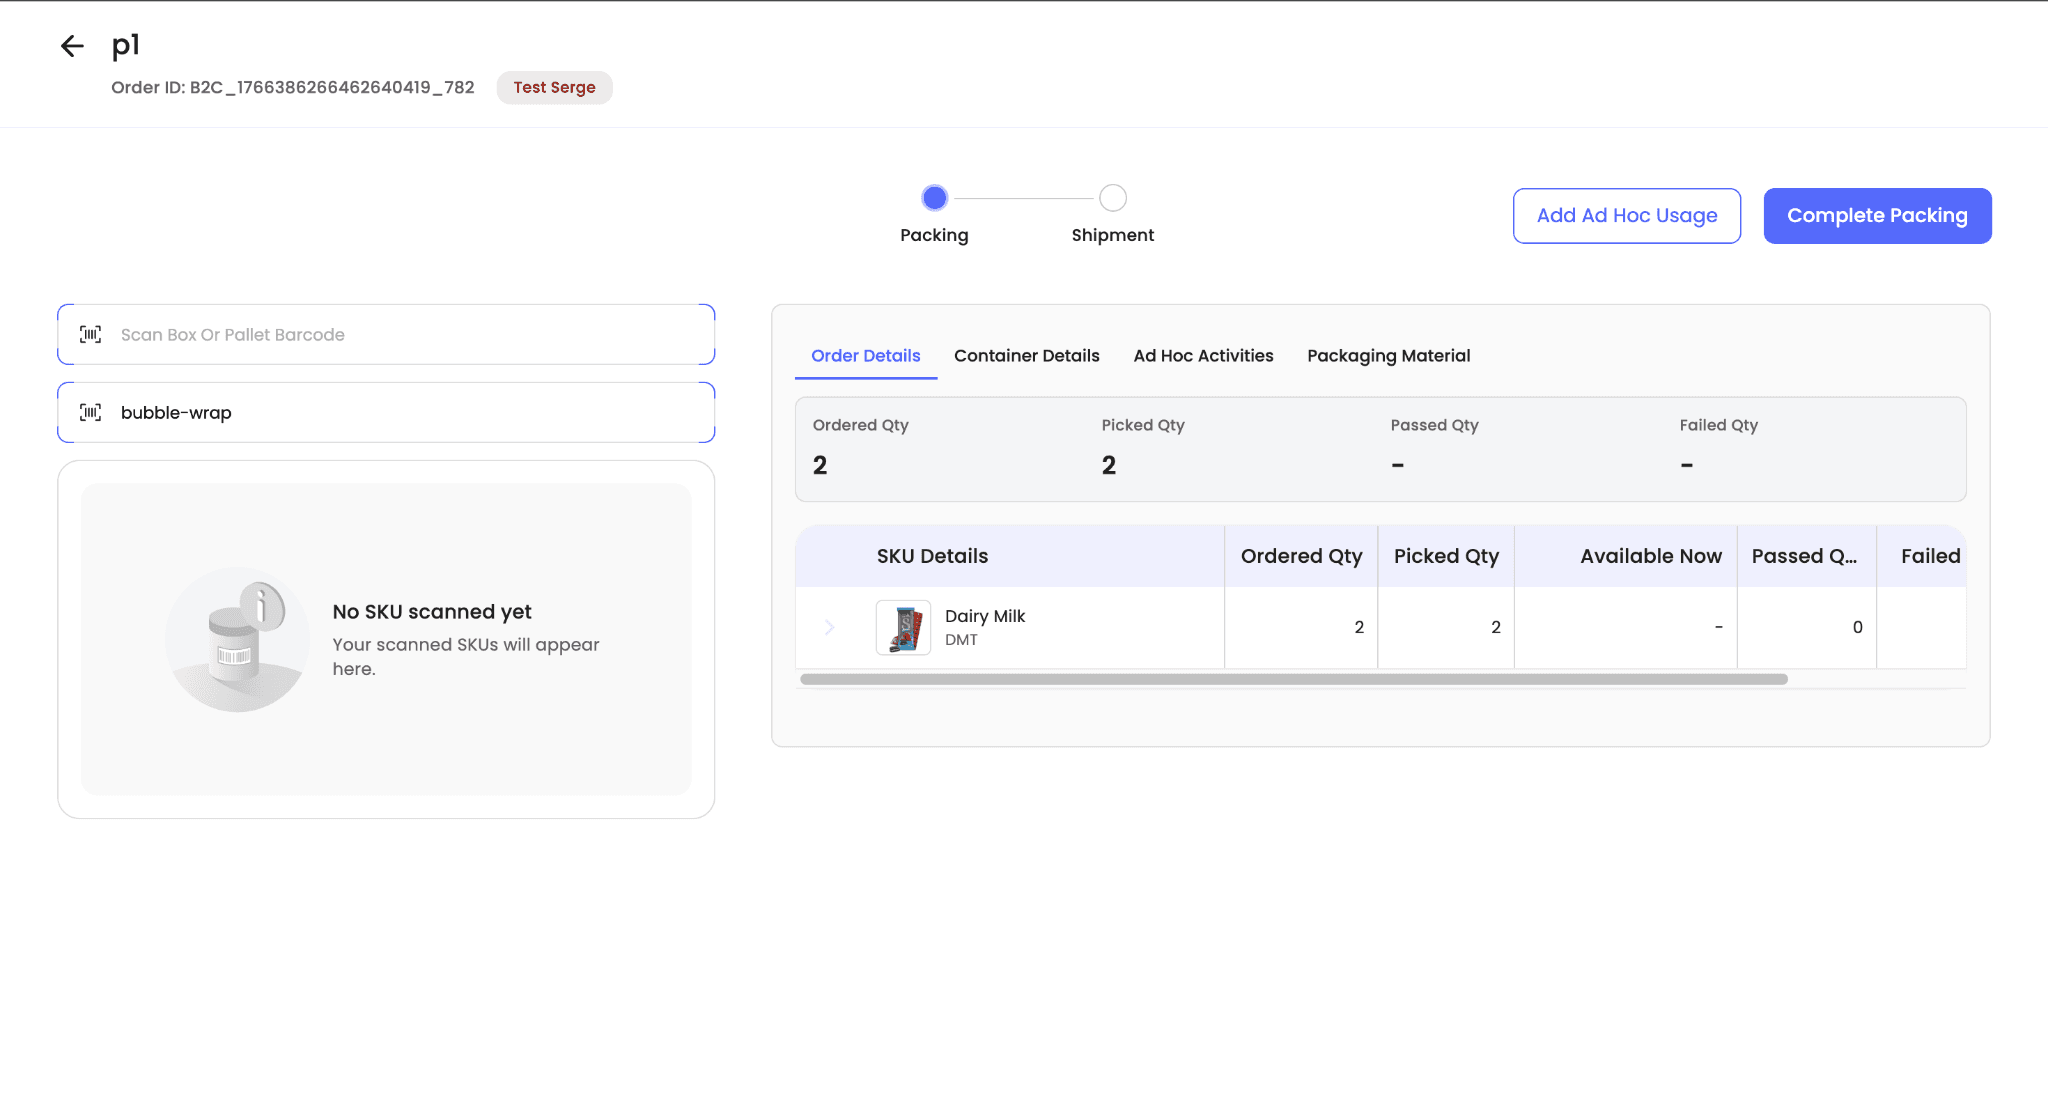
Packing Flow
Packing station with a mapped picking location
-
Open the packing station you will use.

-
Start packing an order.
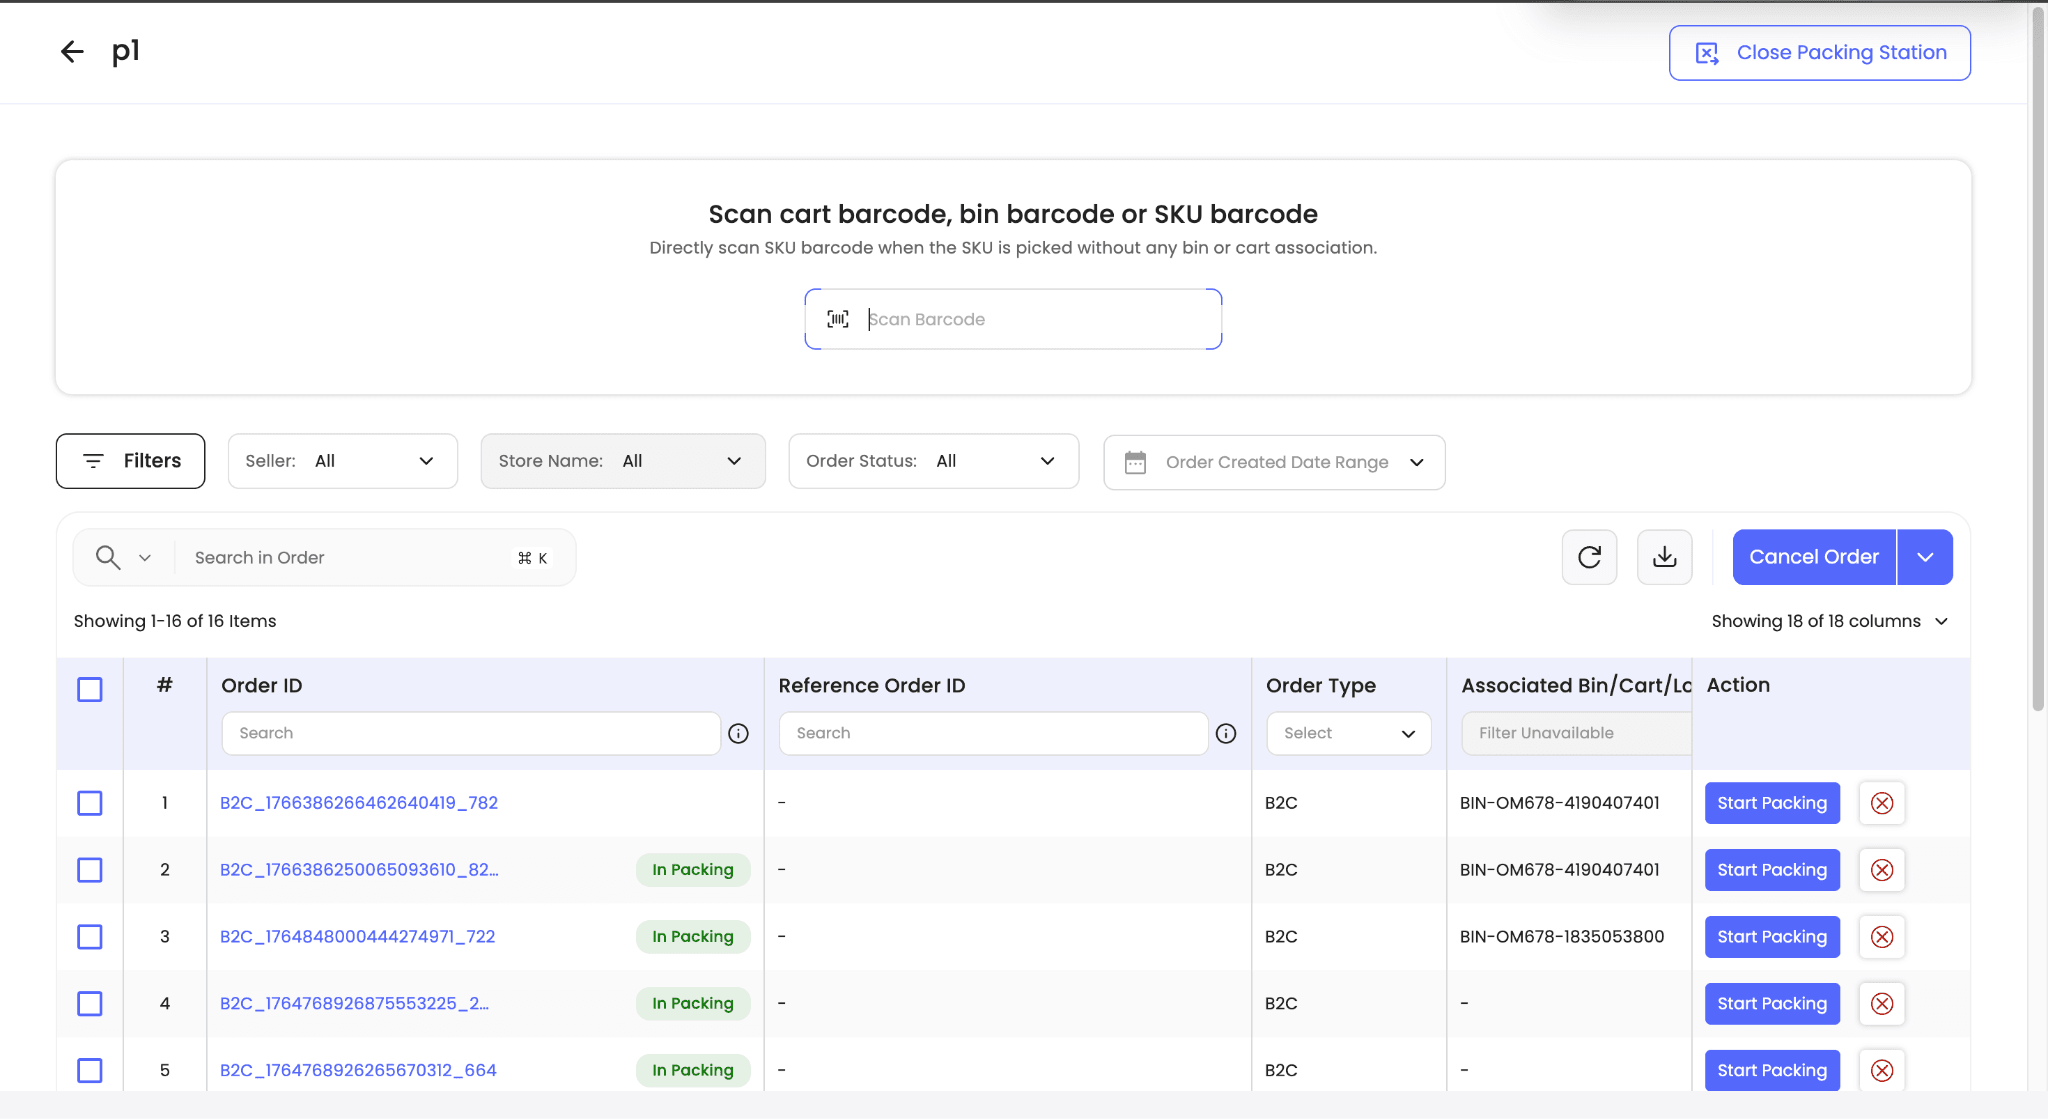
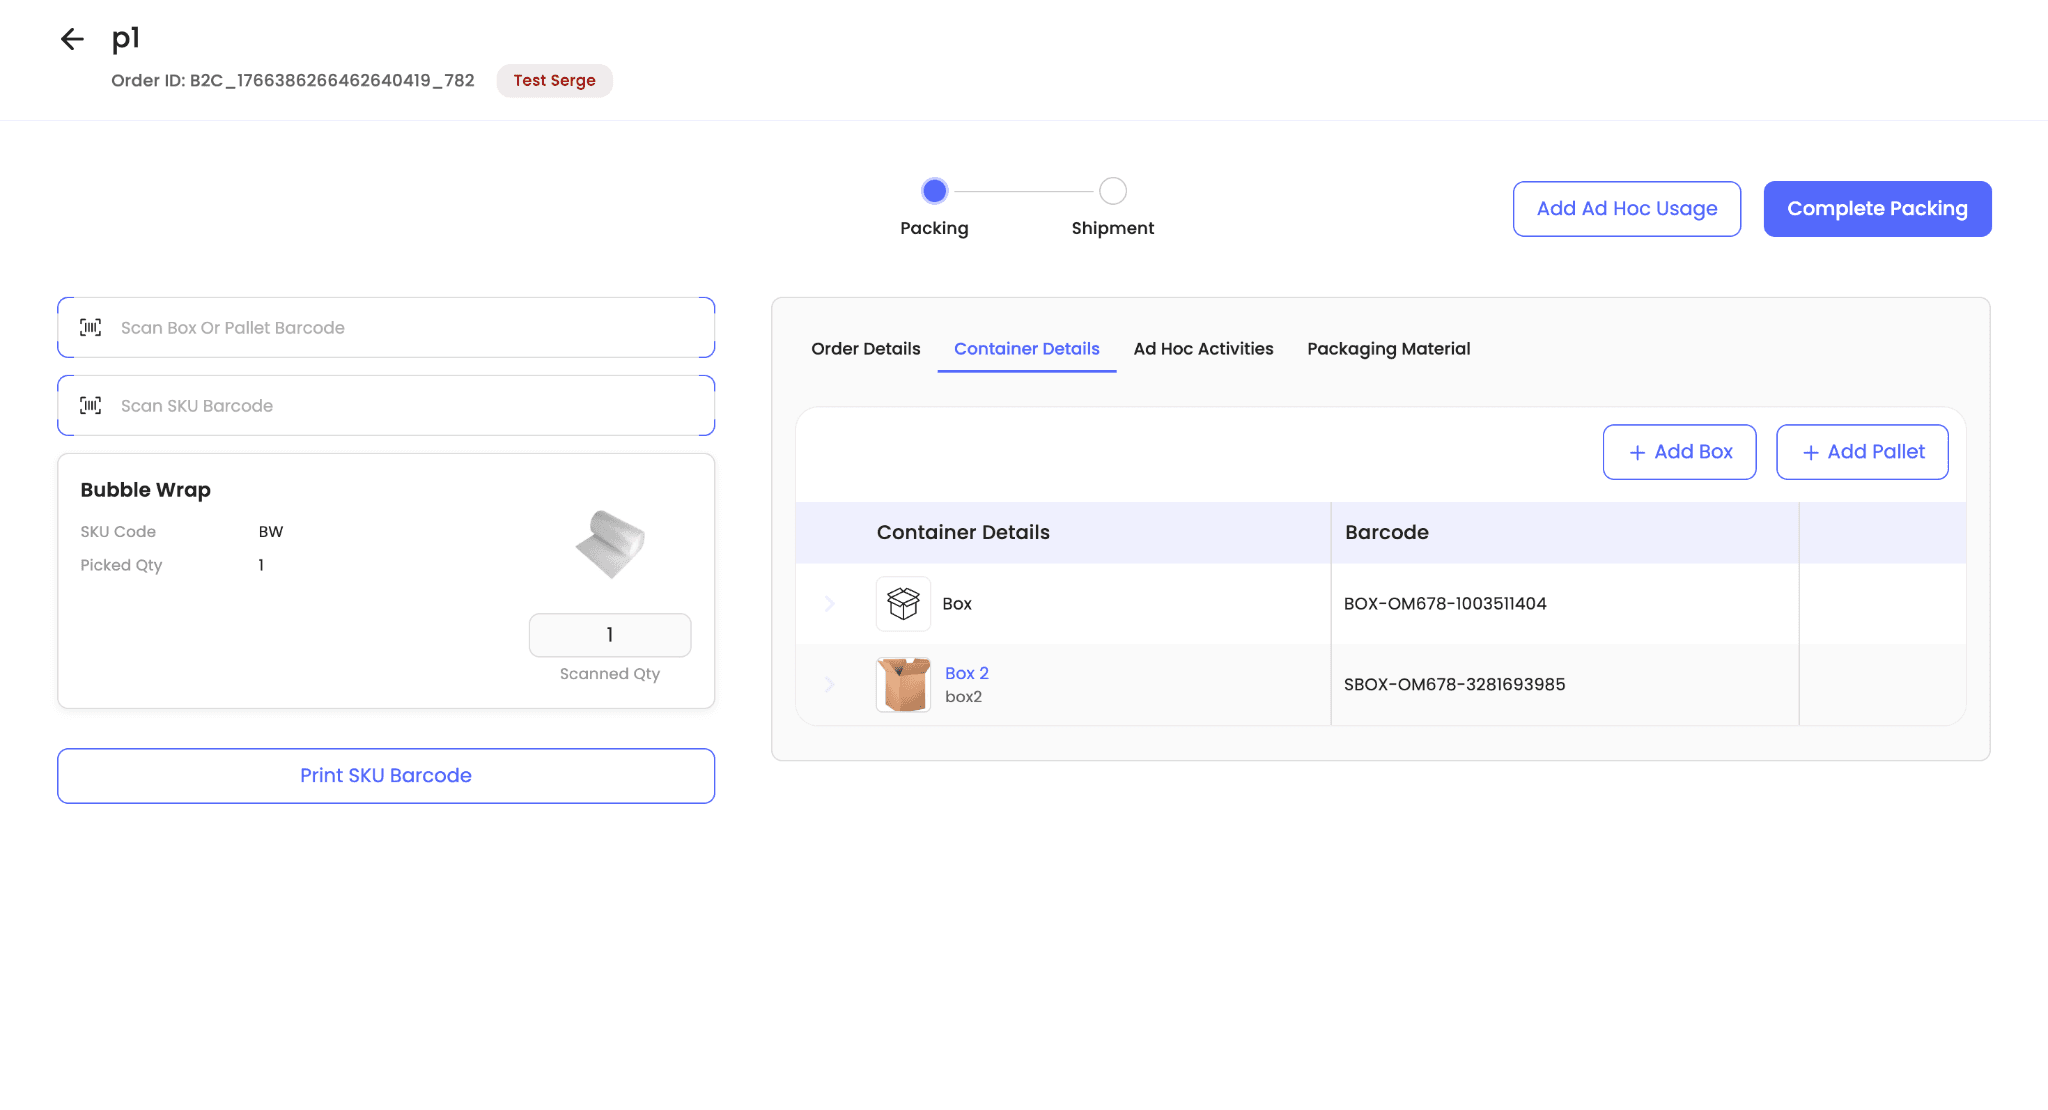
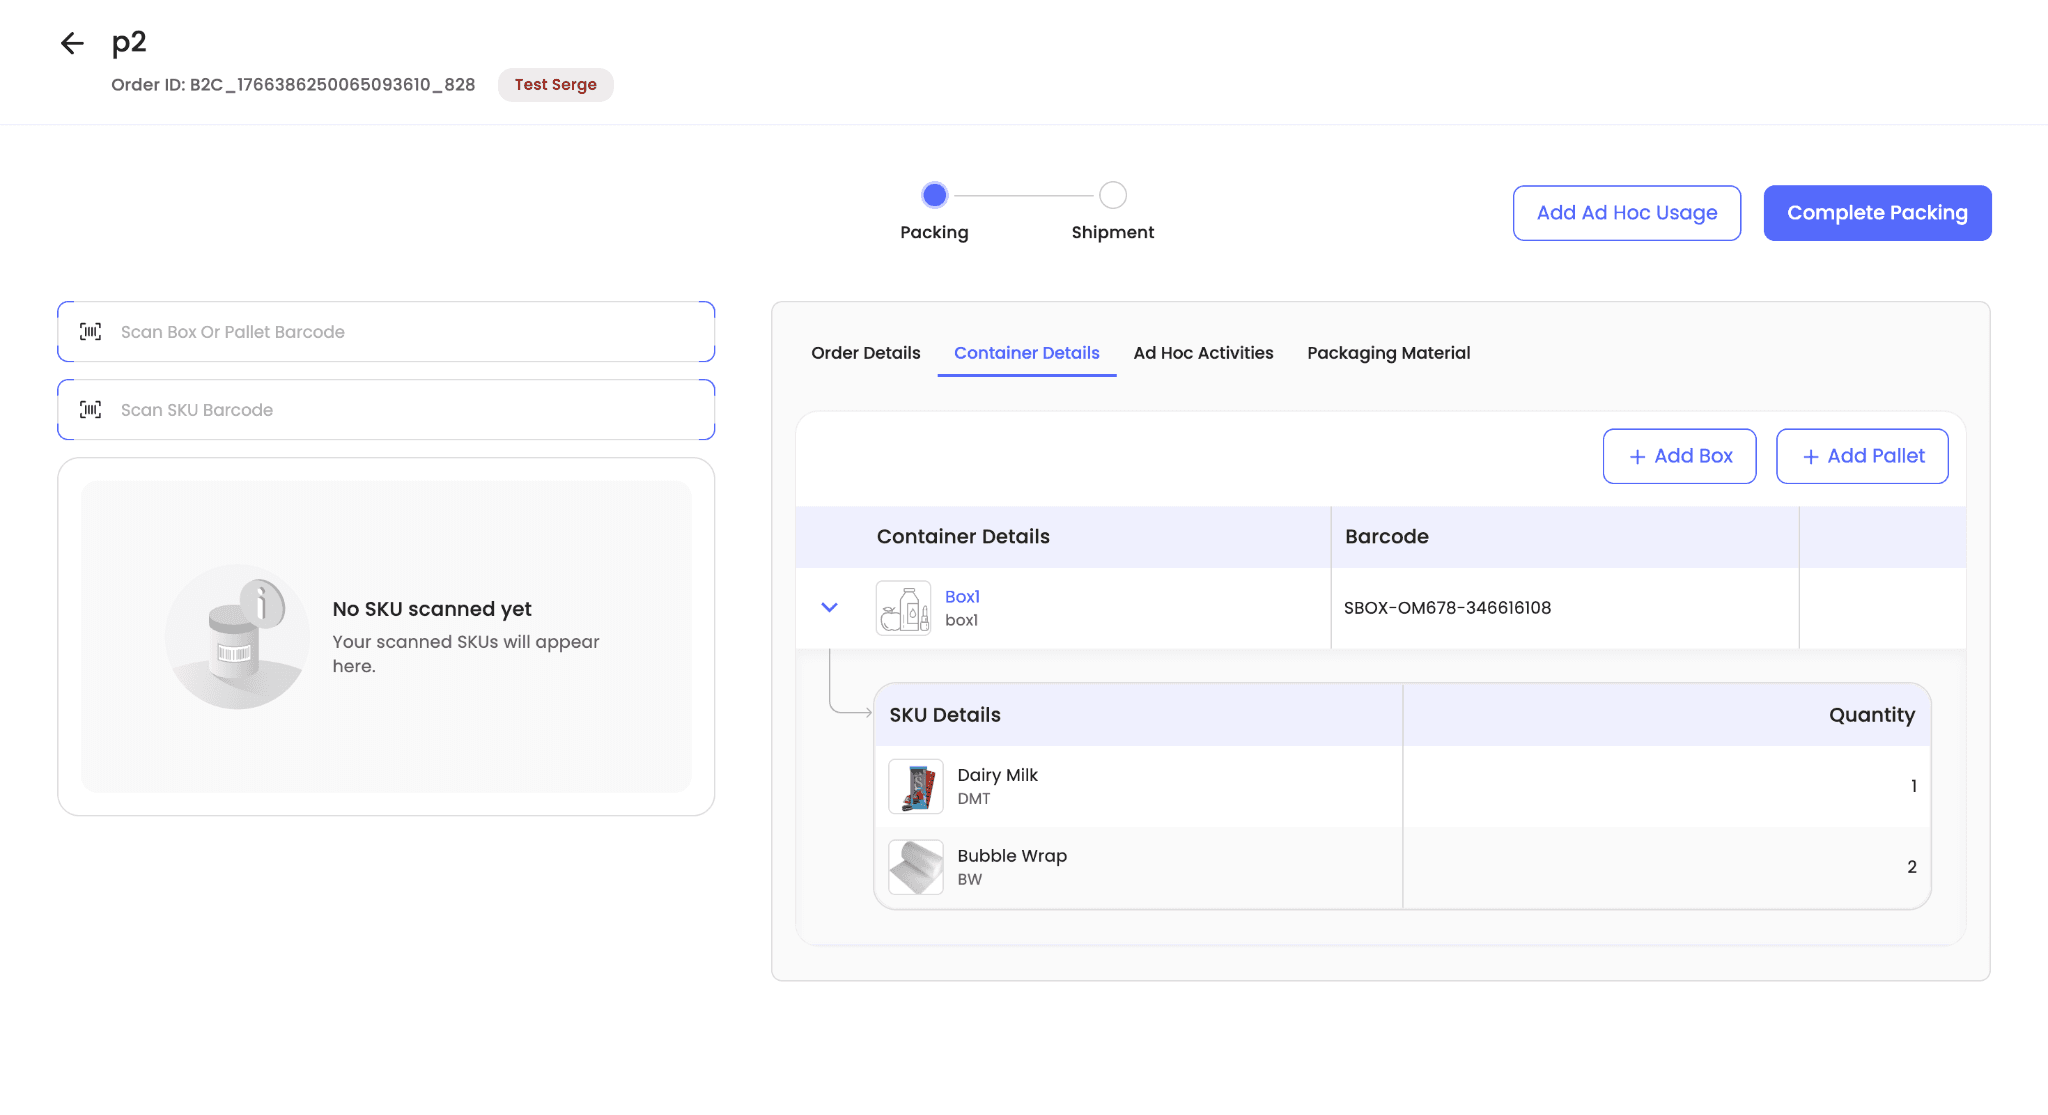
- Add boxes, pallets, and other packaging materials using scanning or UI-based actions.
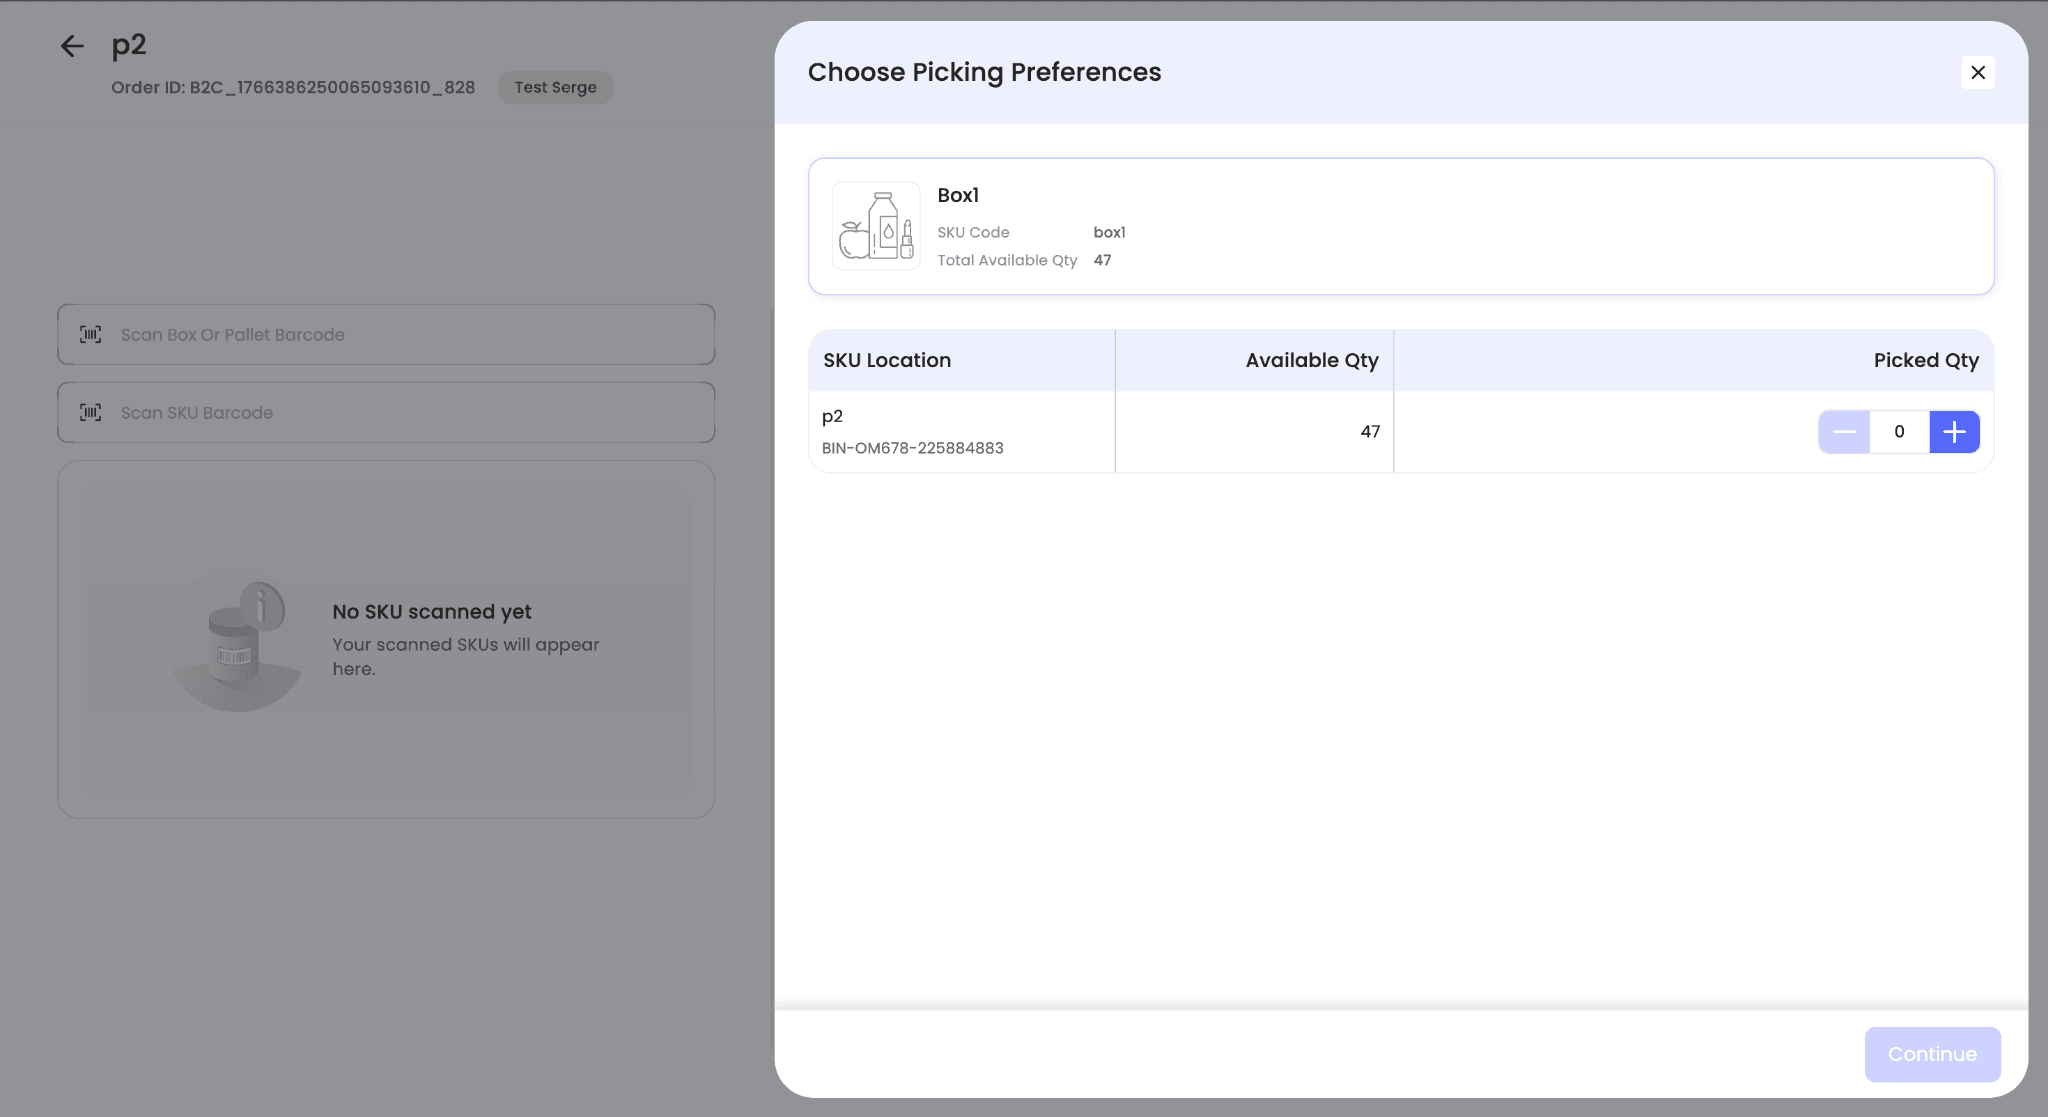
Boxes or pallets can be used for packing in either of these ways:
-
Scan or manually enter the catalog box barcode in the Scan Box or Pallet Barcode field when using a new box or pallet item.
-
Enter the unique barcode to use an existing item.
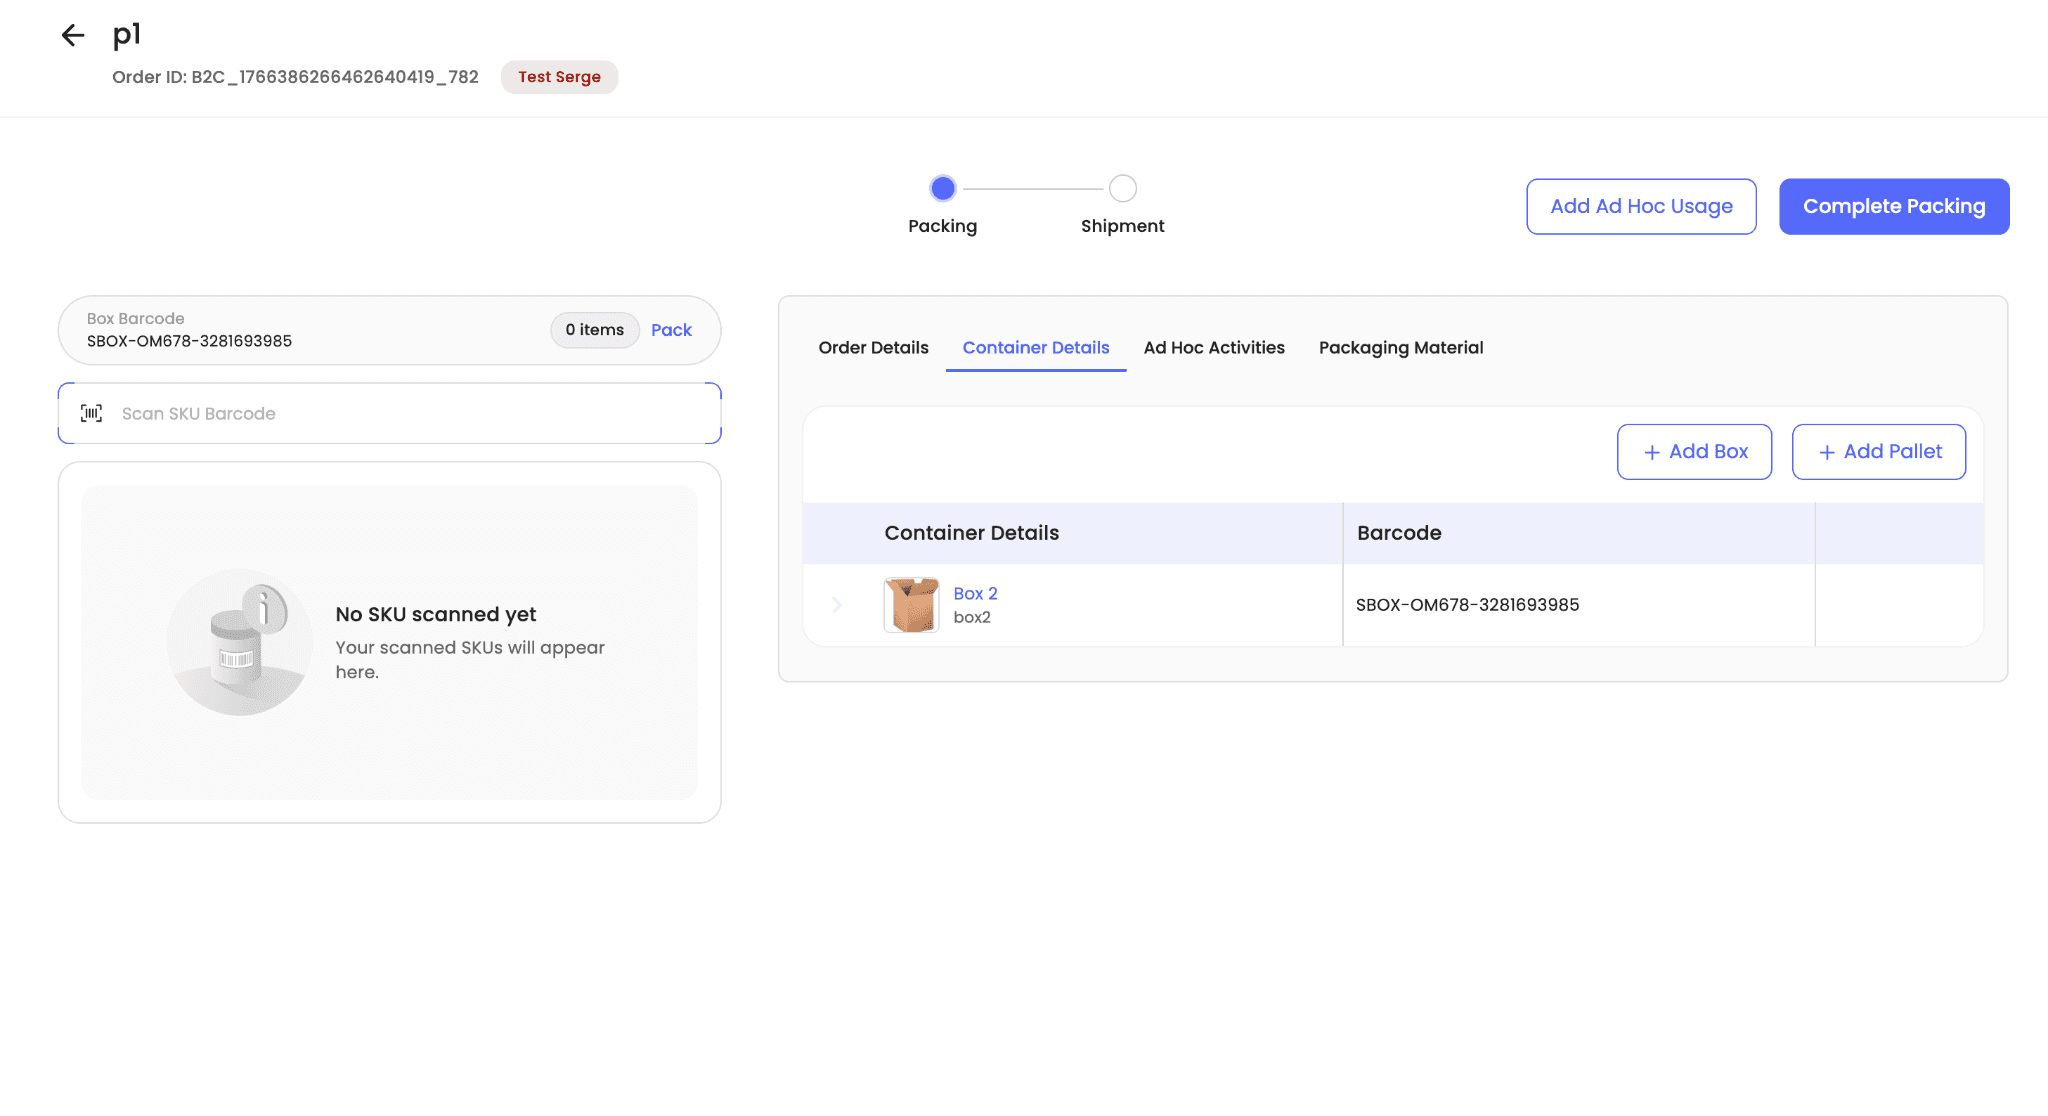
-
Use Add Box or Add Pallet from the Container Details tab.
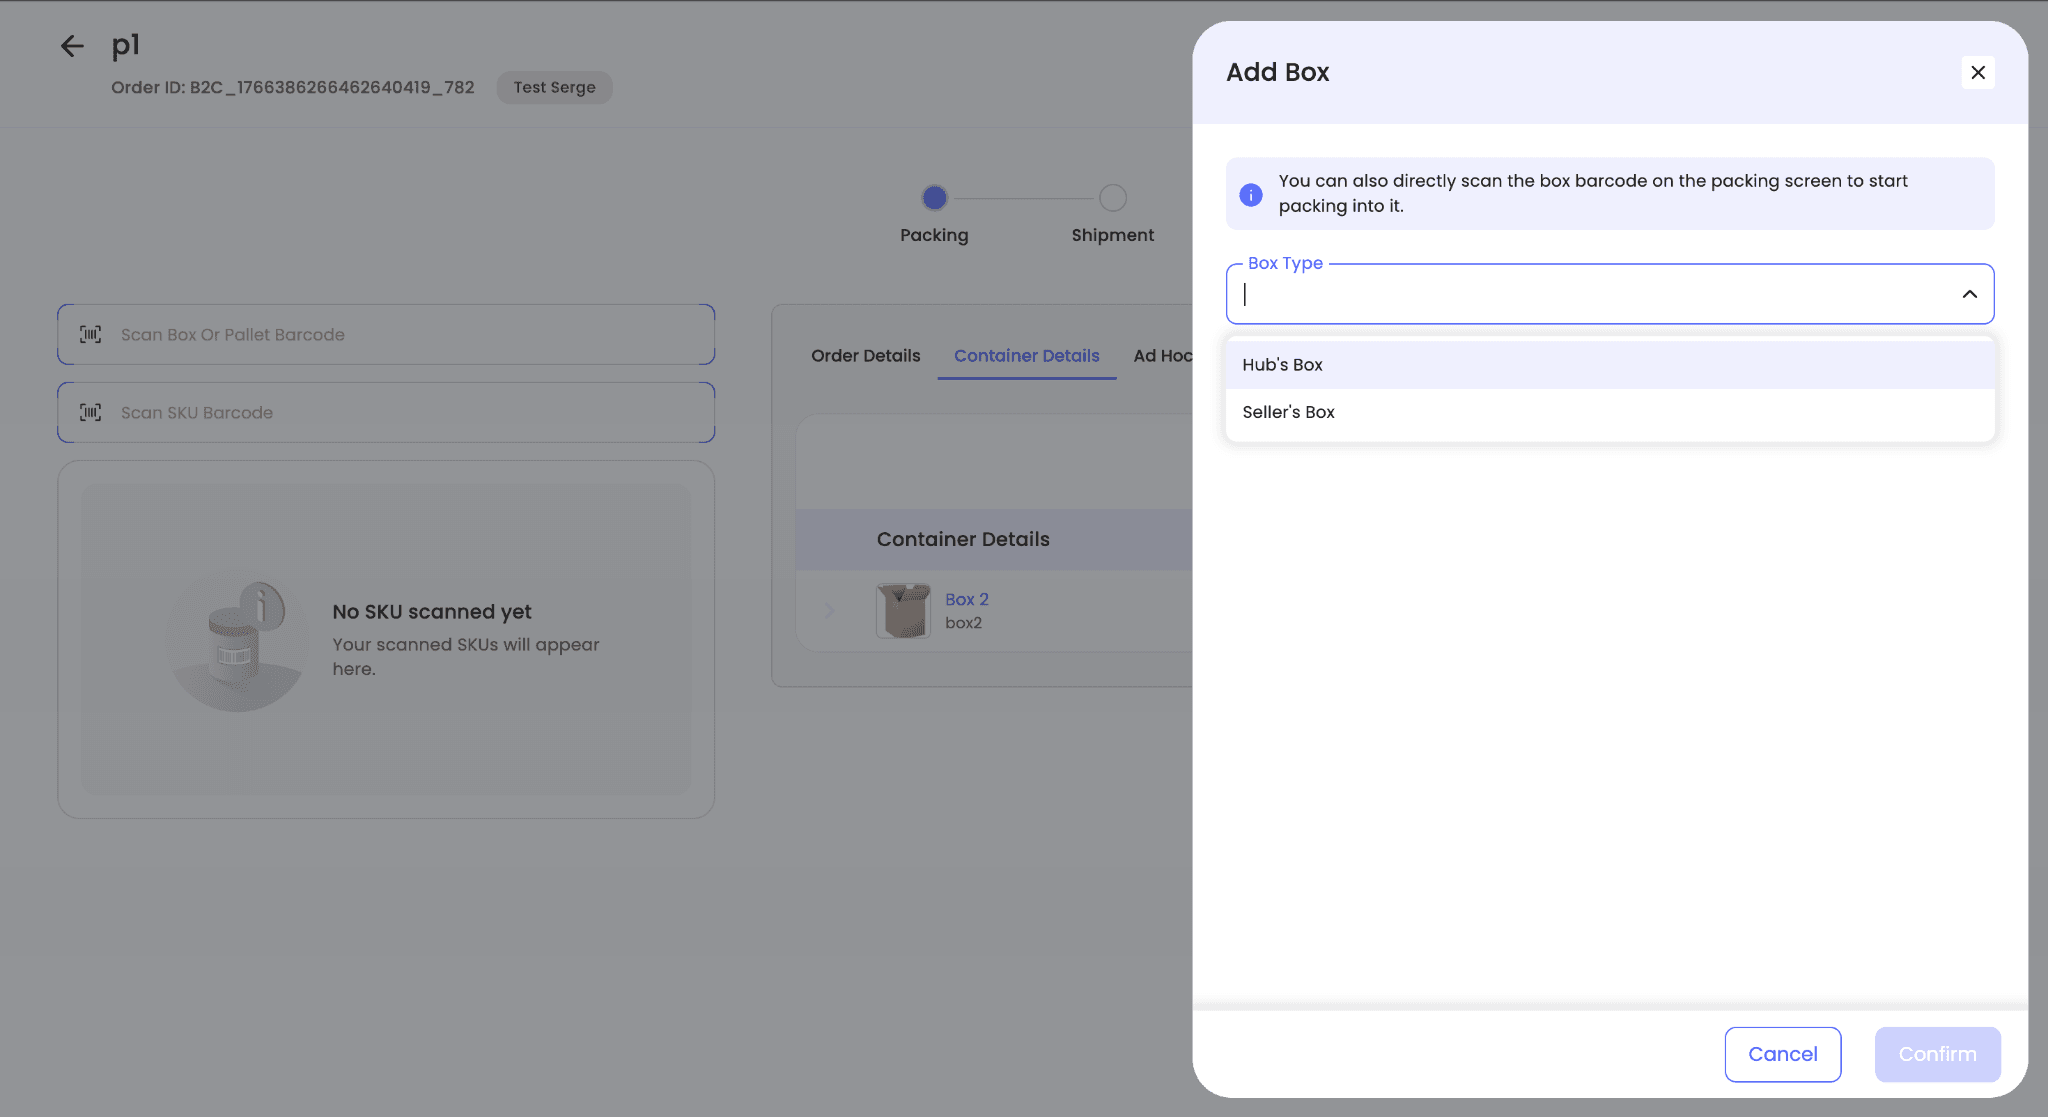
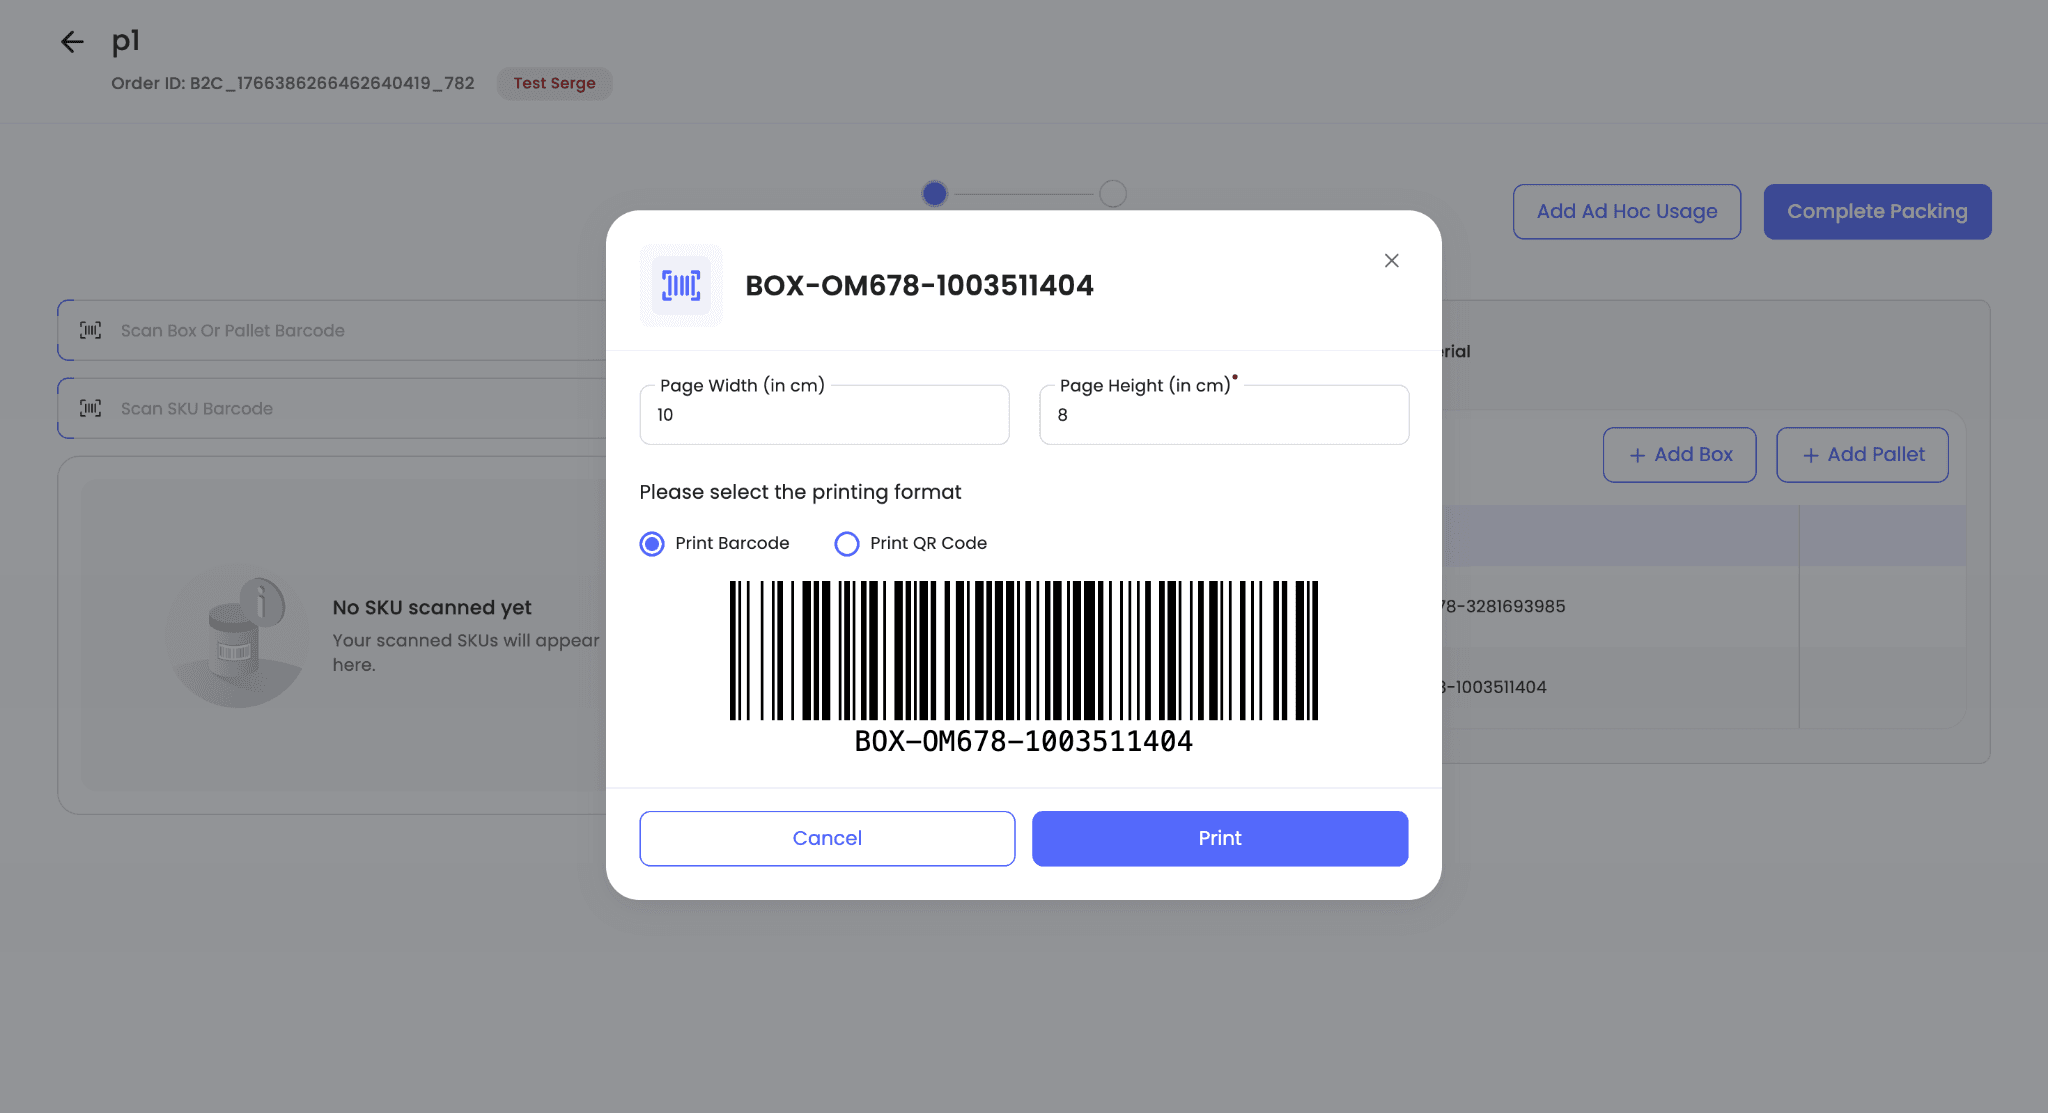
Note: When you add a box manually from the UI, a unique barcode is automatically generated for that box. Scan that generated barcode in the Scan Box or Pallet Barcode field to link it to the order and pack items into it.
Non-box packaging materials can be used for packing in either of these ways:
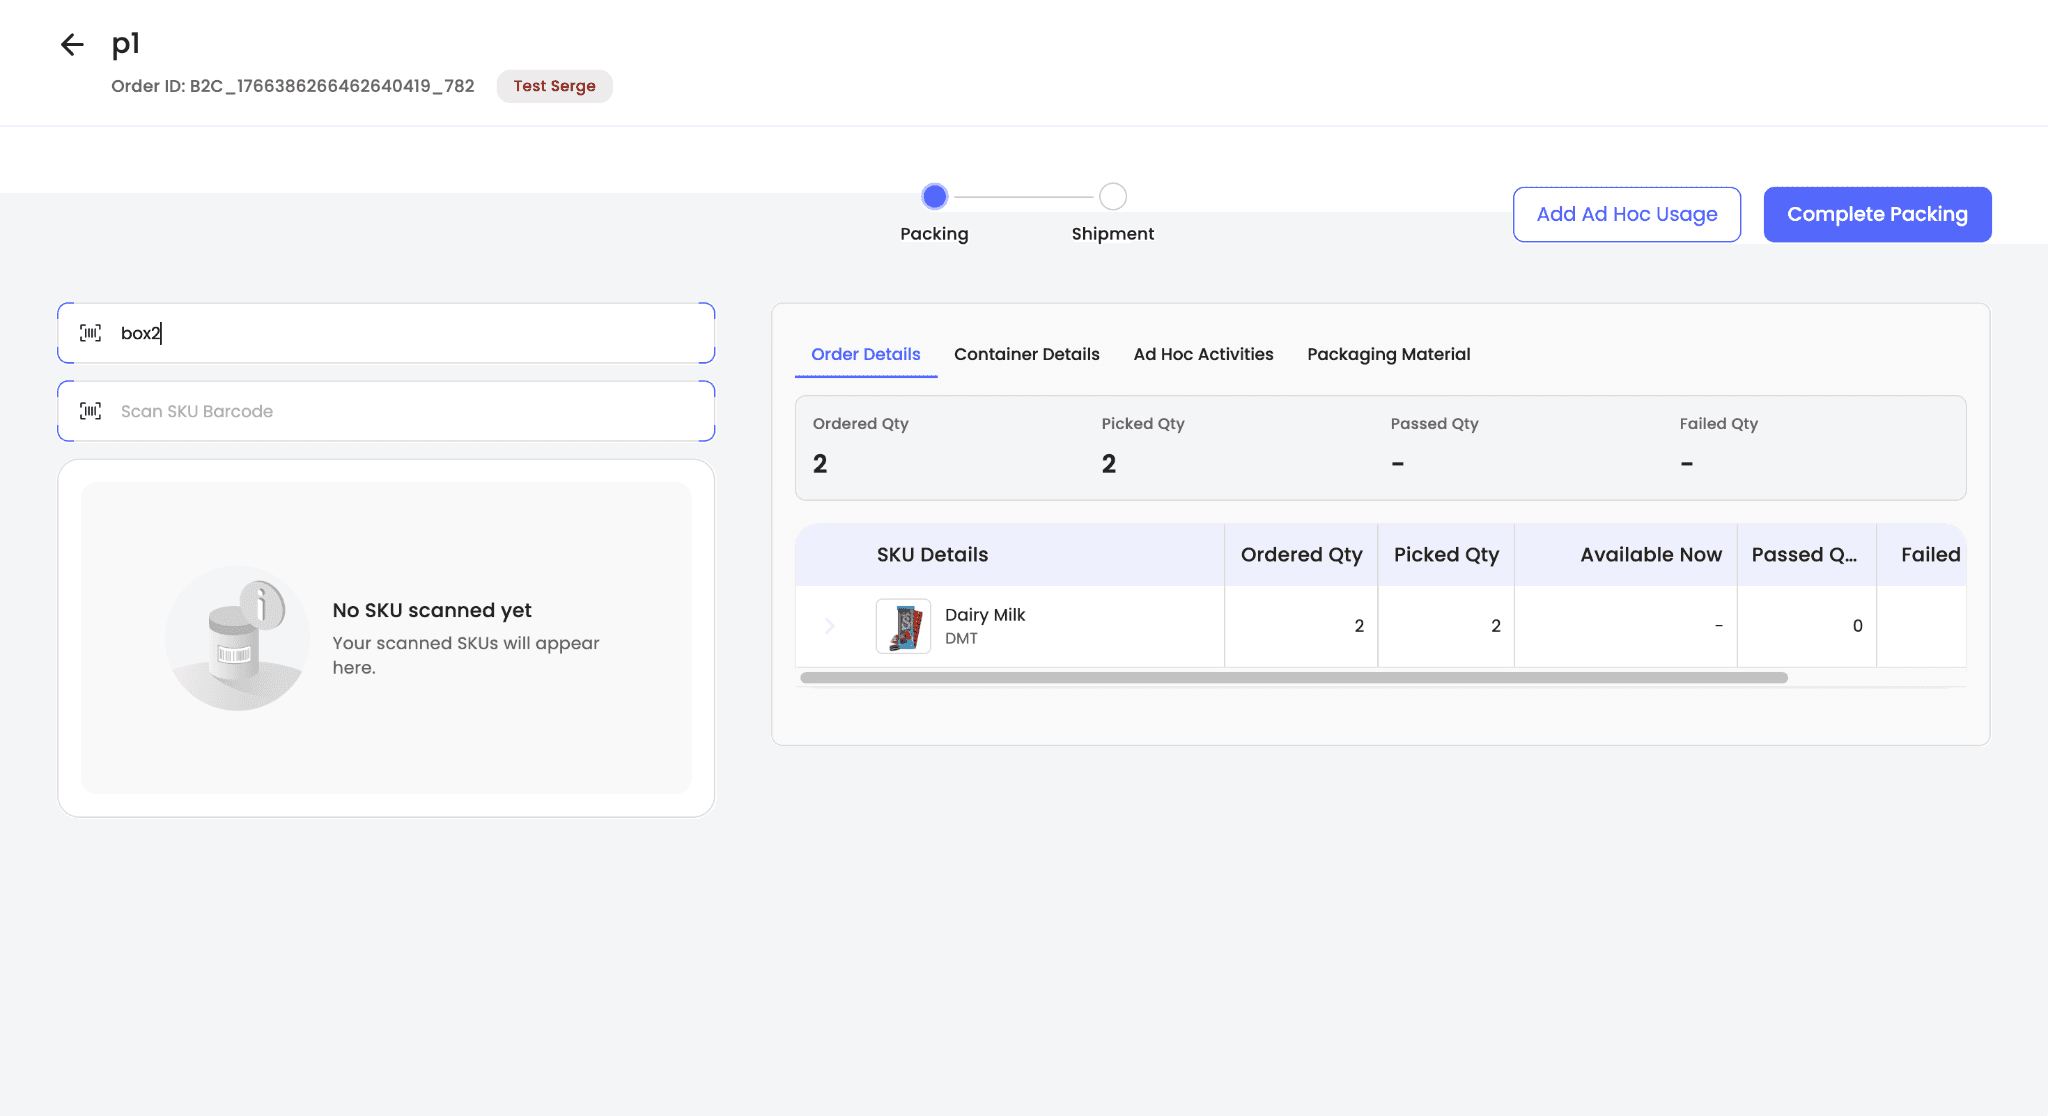
- Scan or enter the SKU barcode in the Scan SKU Barcode field.
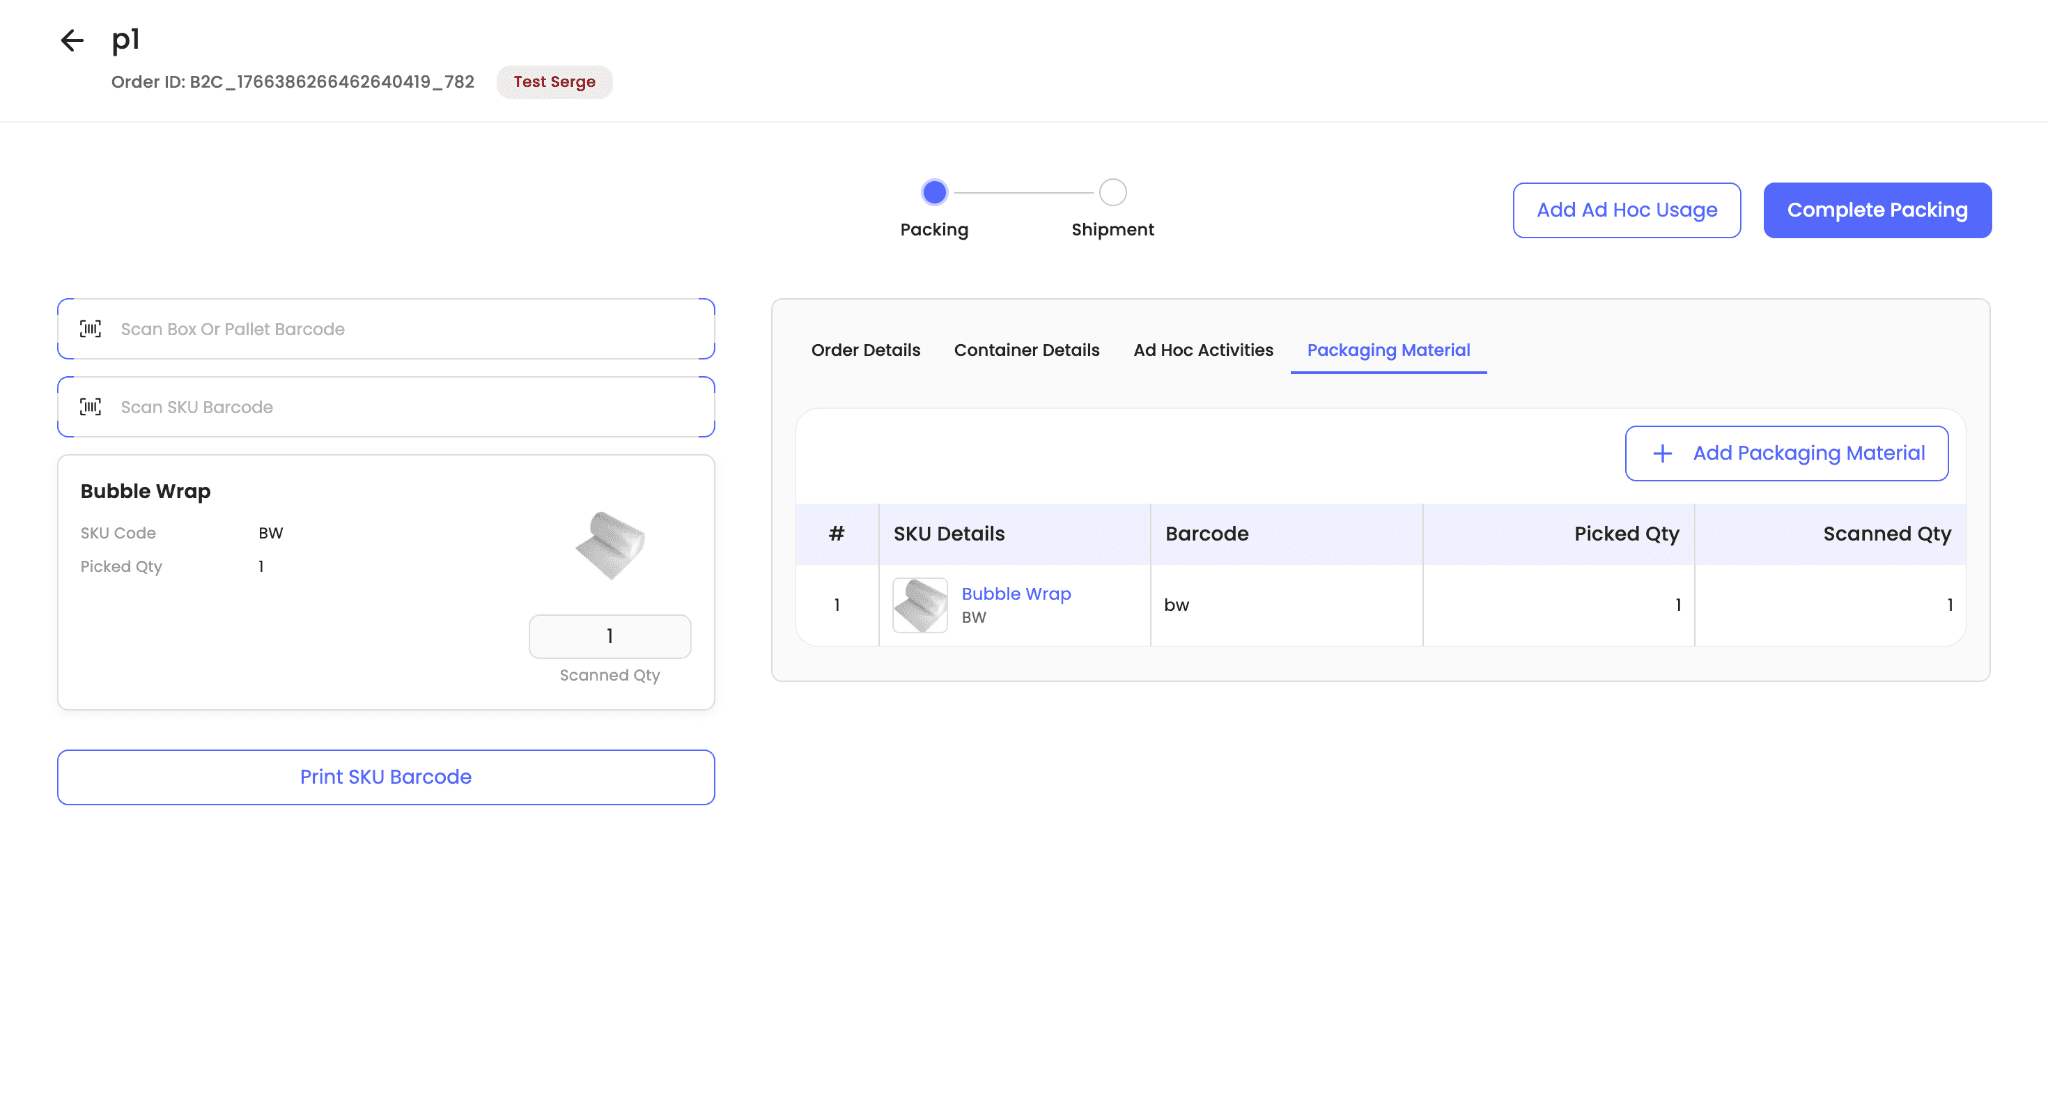
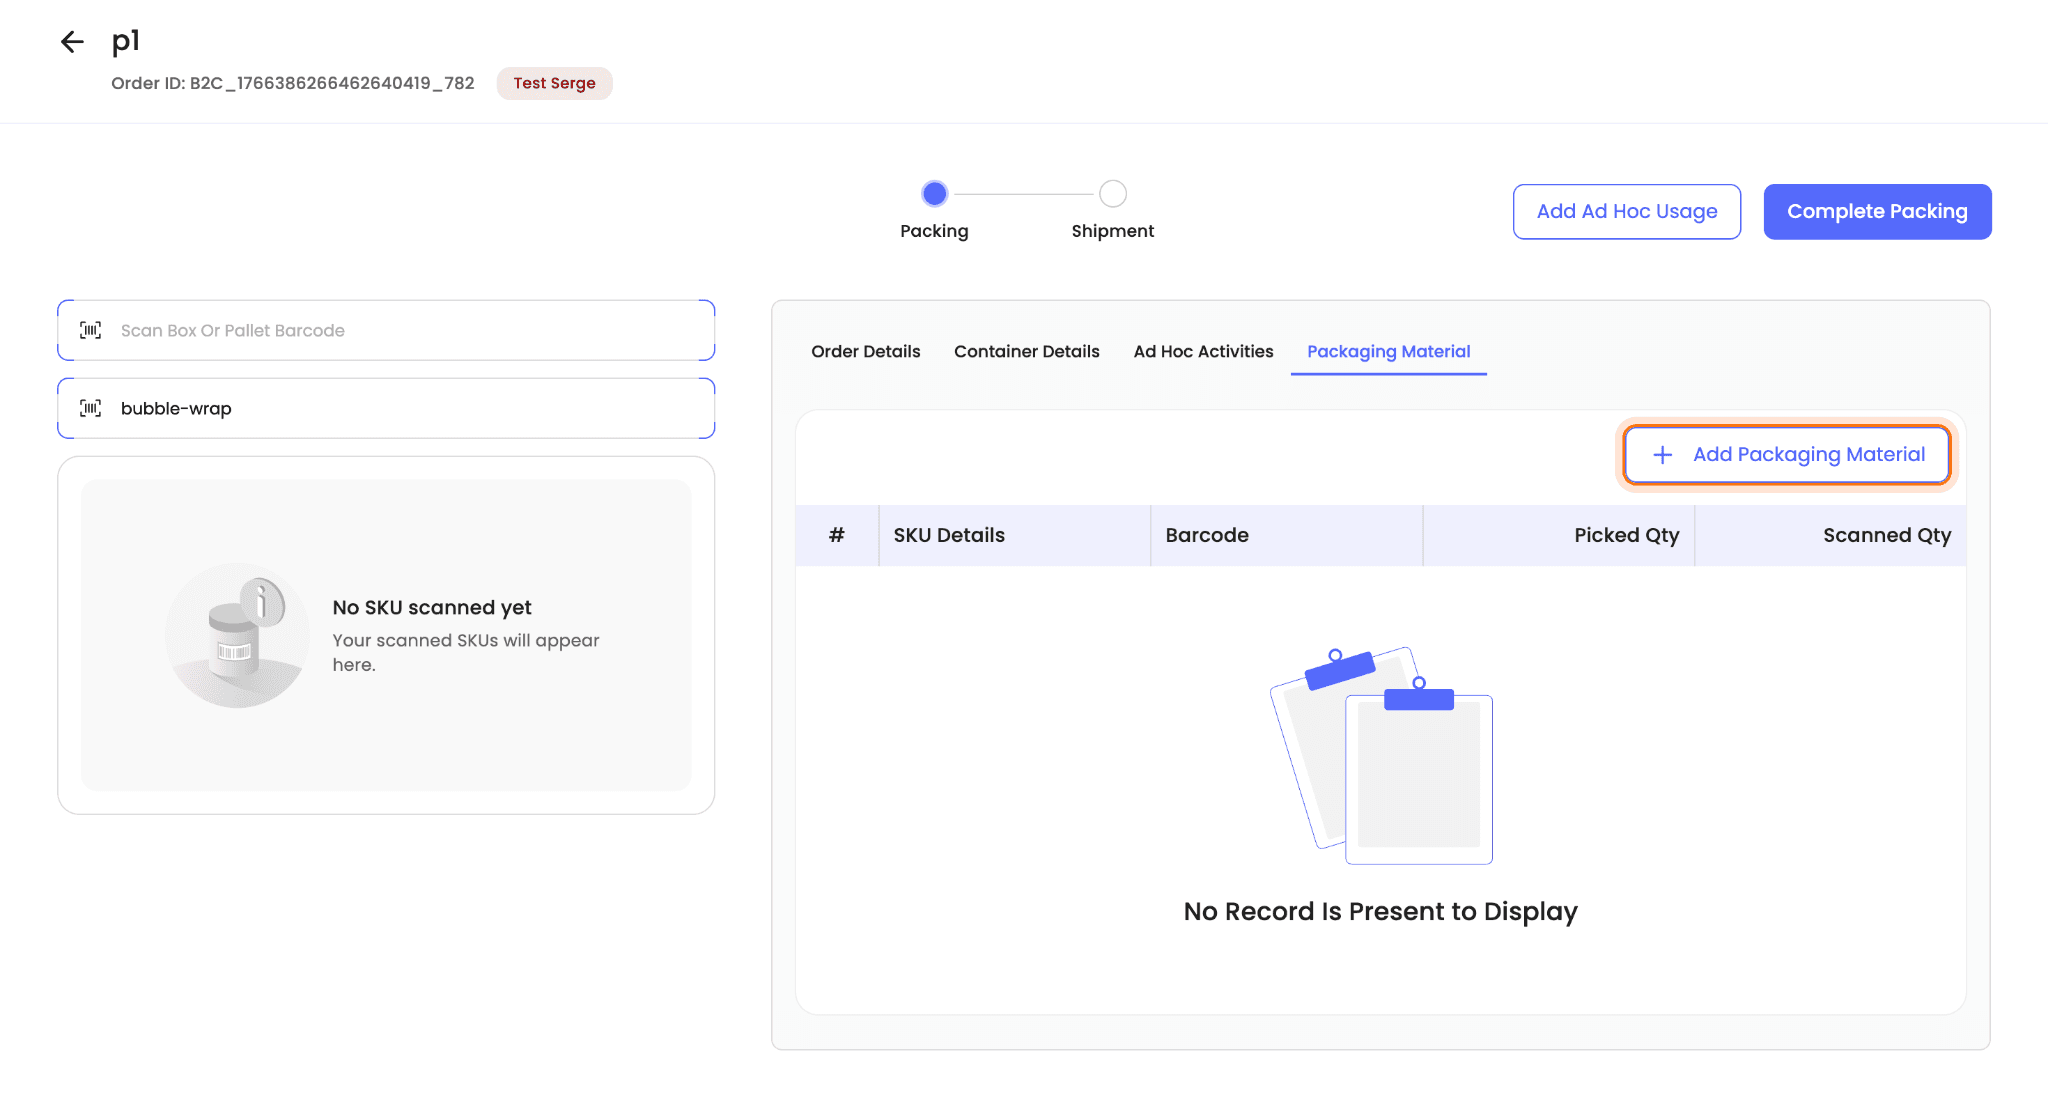
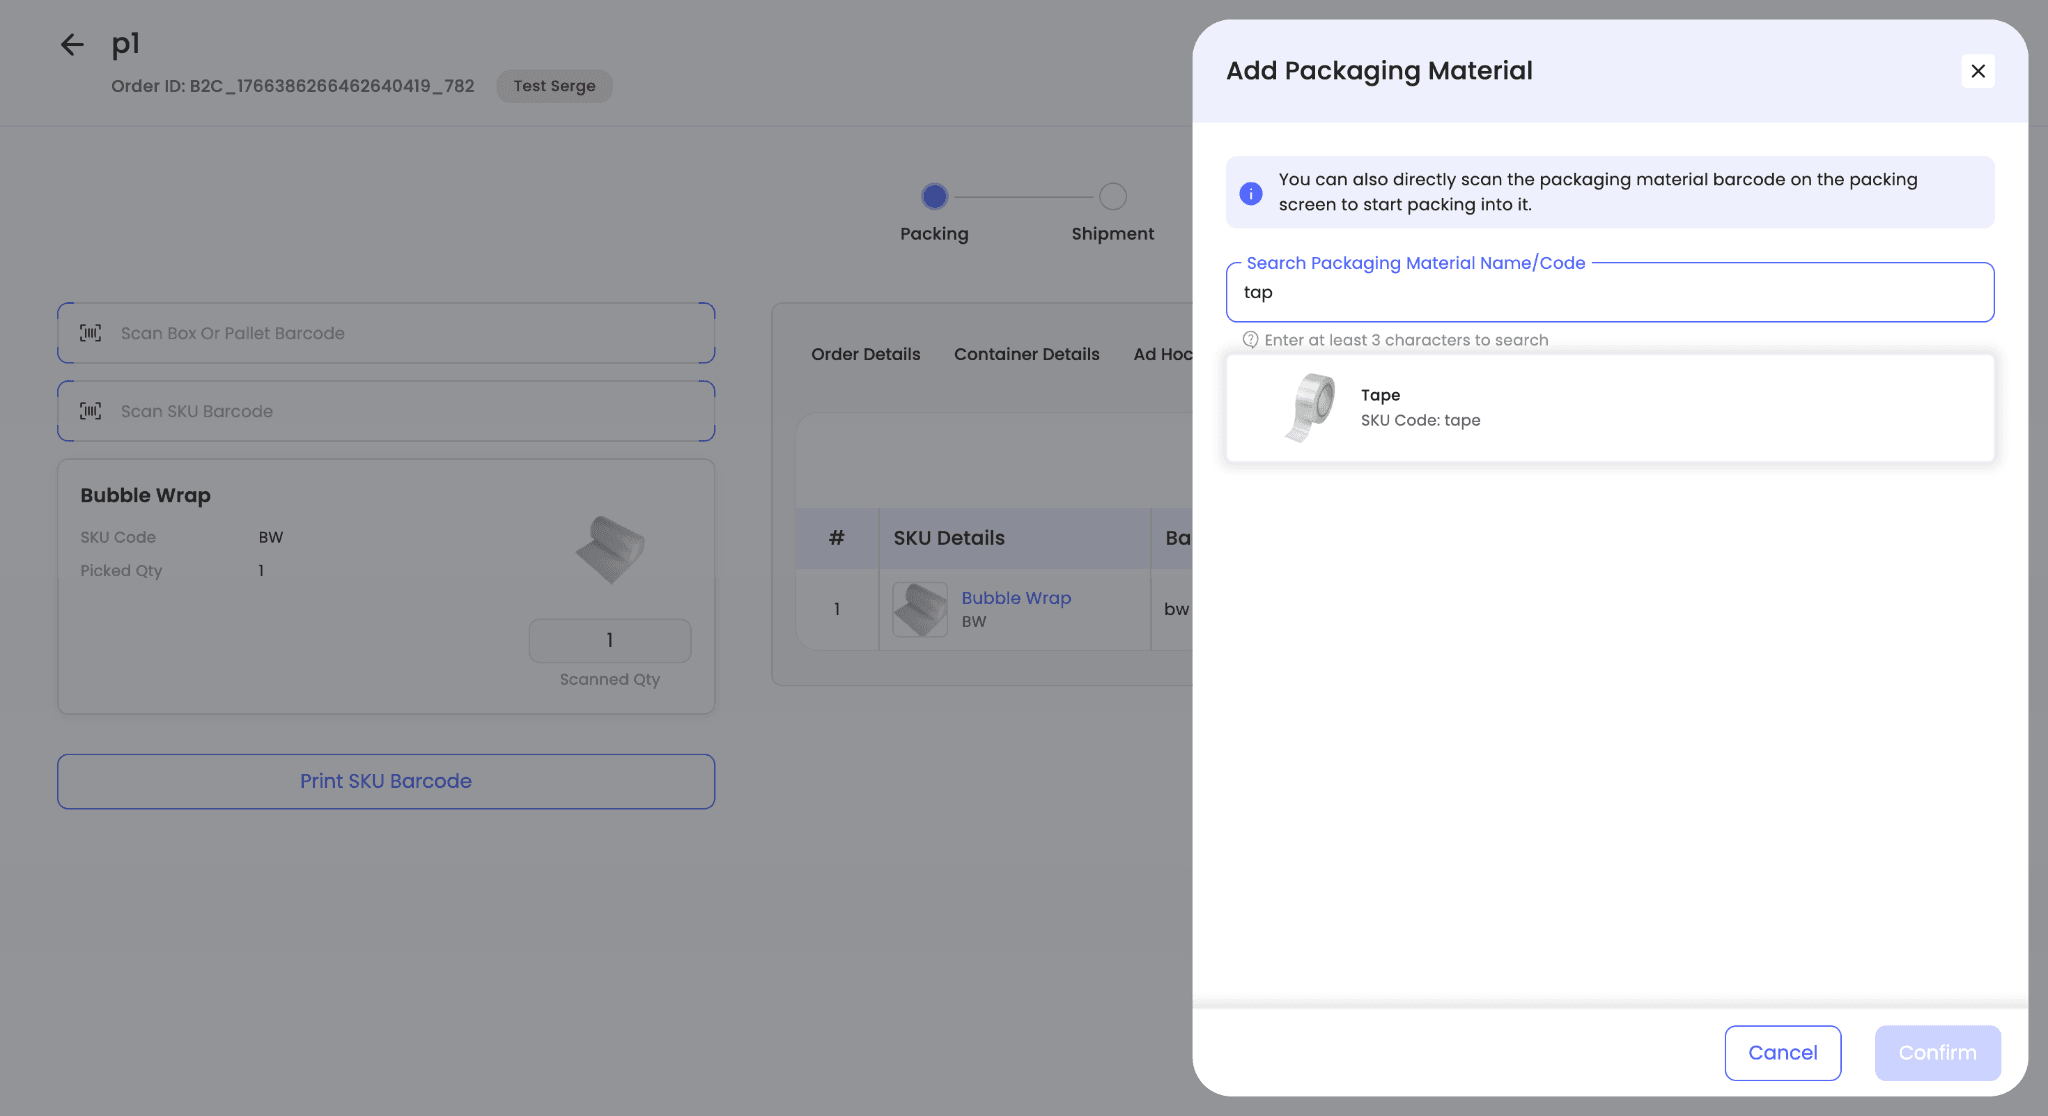
- Click + Add Packaging Material in the Packaging Materials tab.
Note: Inventory for seller boxes and other packaging materials is deducted from the mapped picking location only if inventory is available there, regardless of whether the material is added through barcode scanning or through the UI.
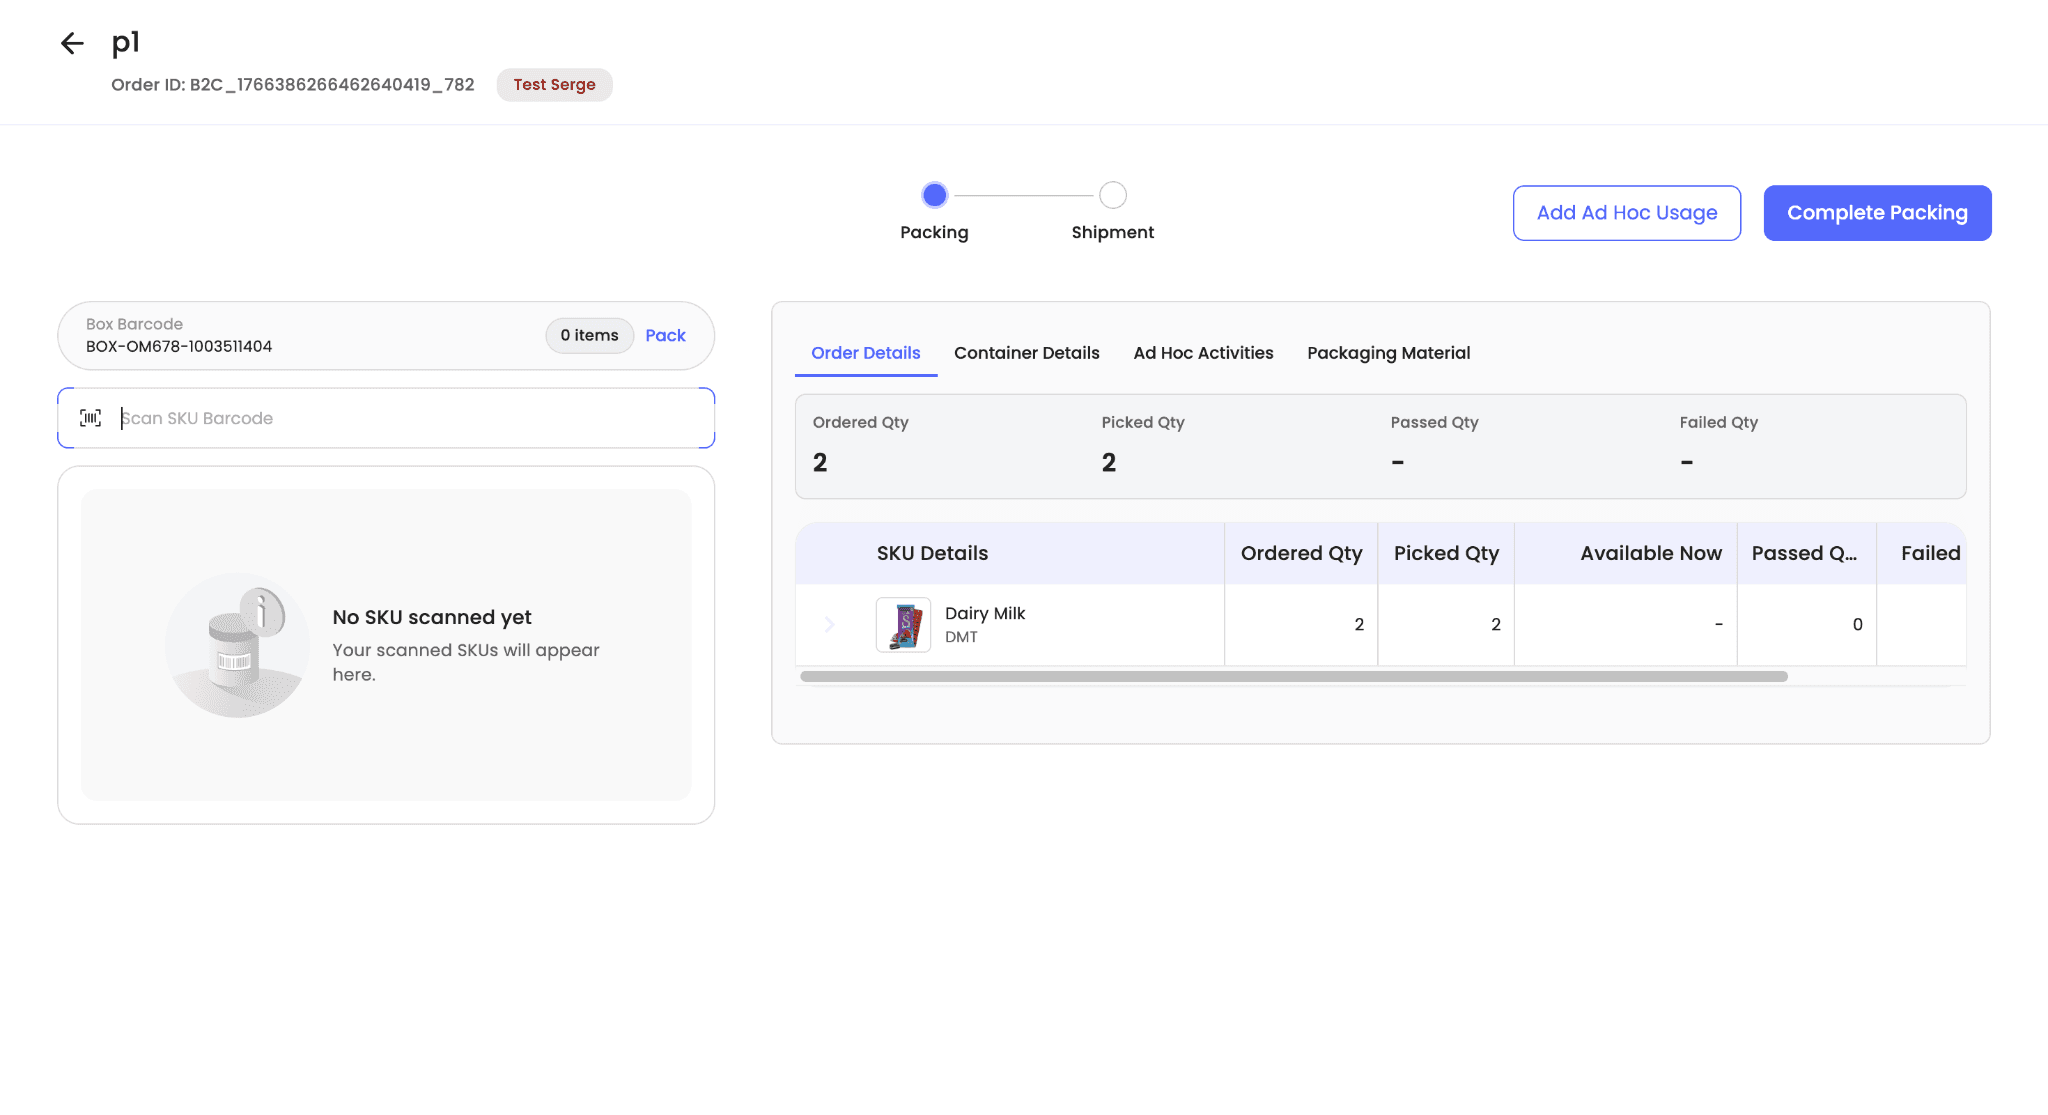
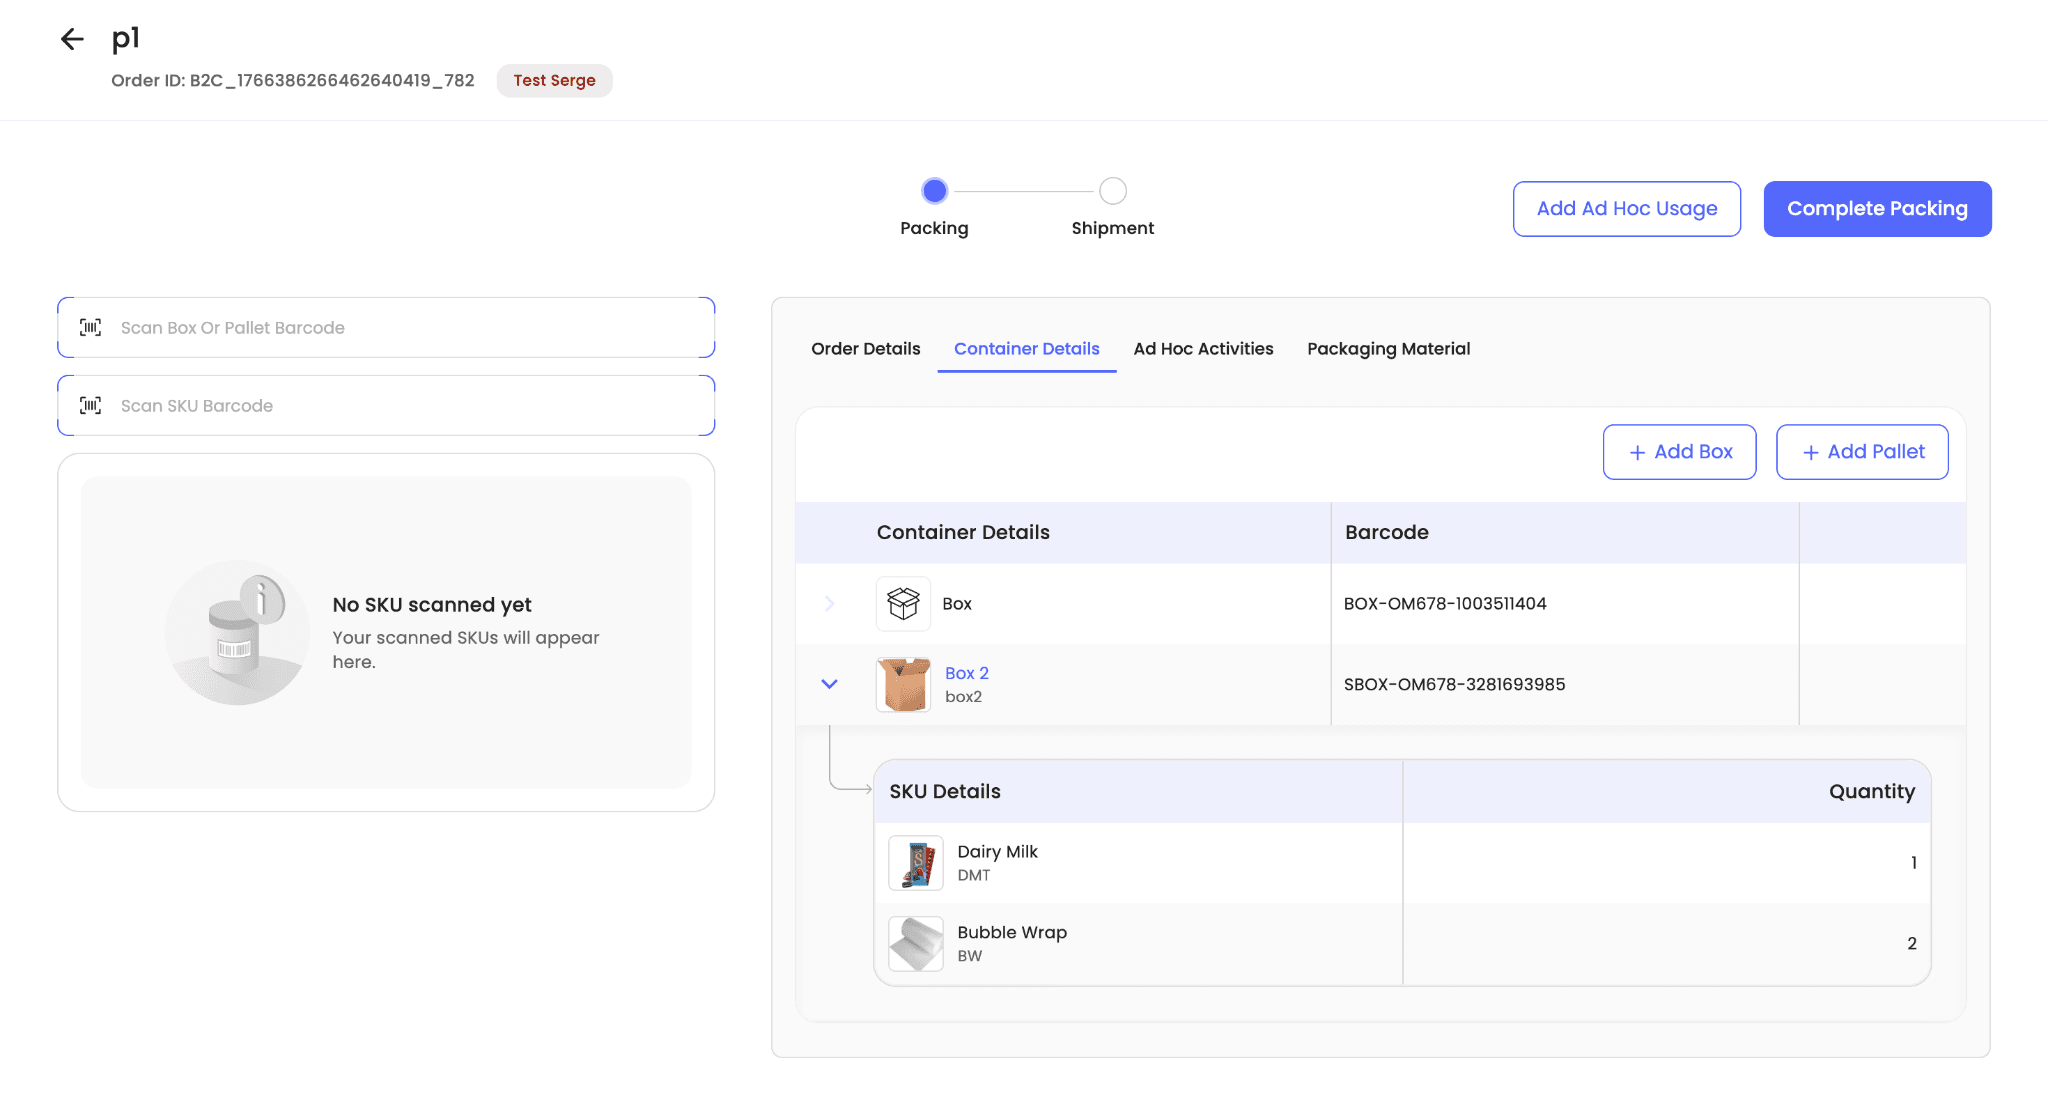
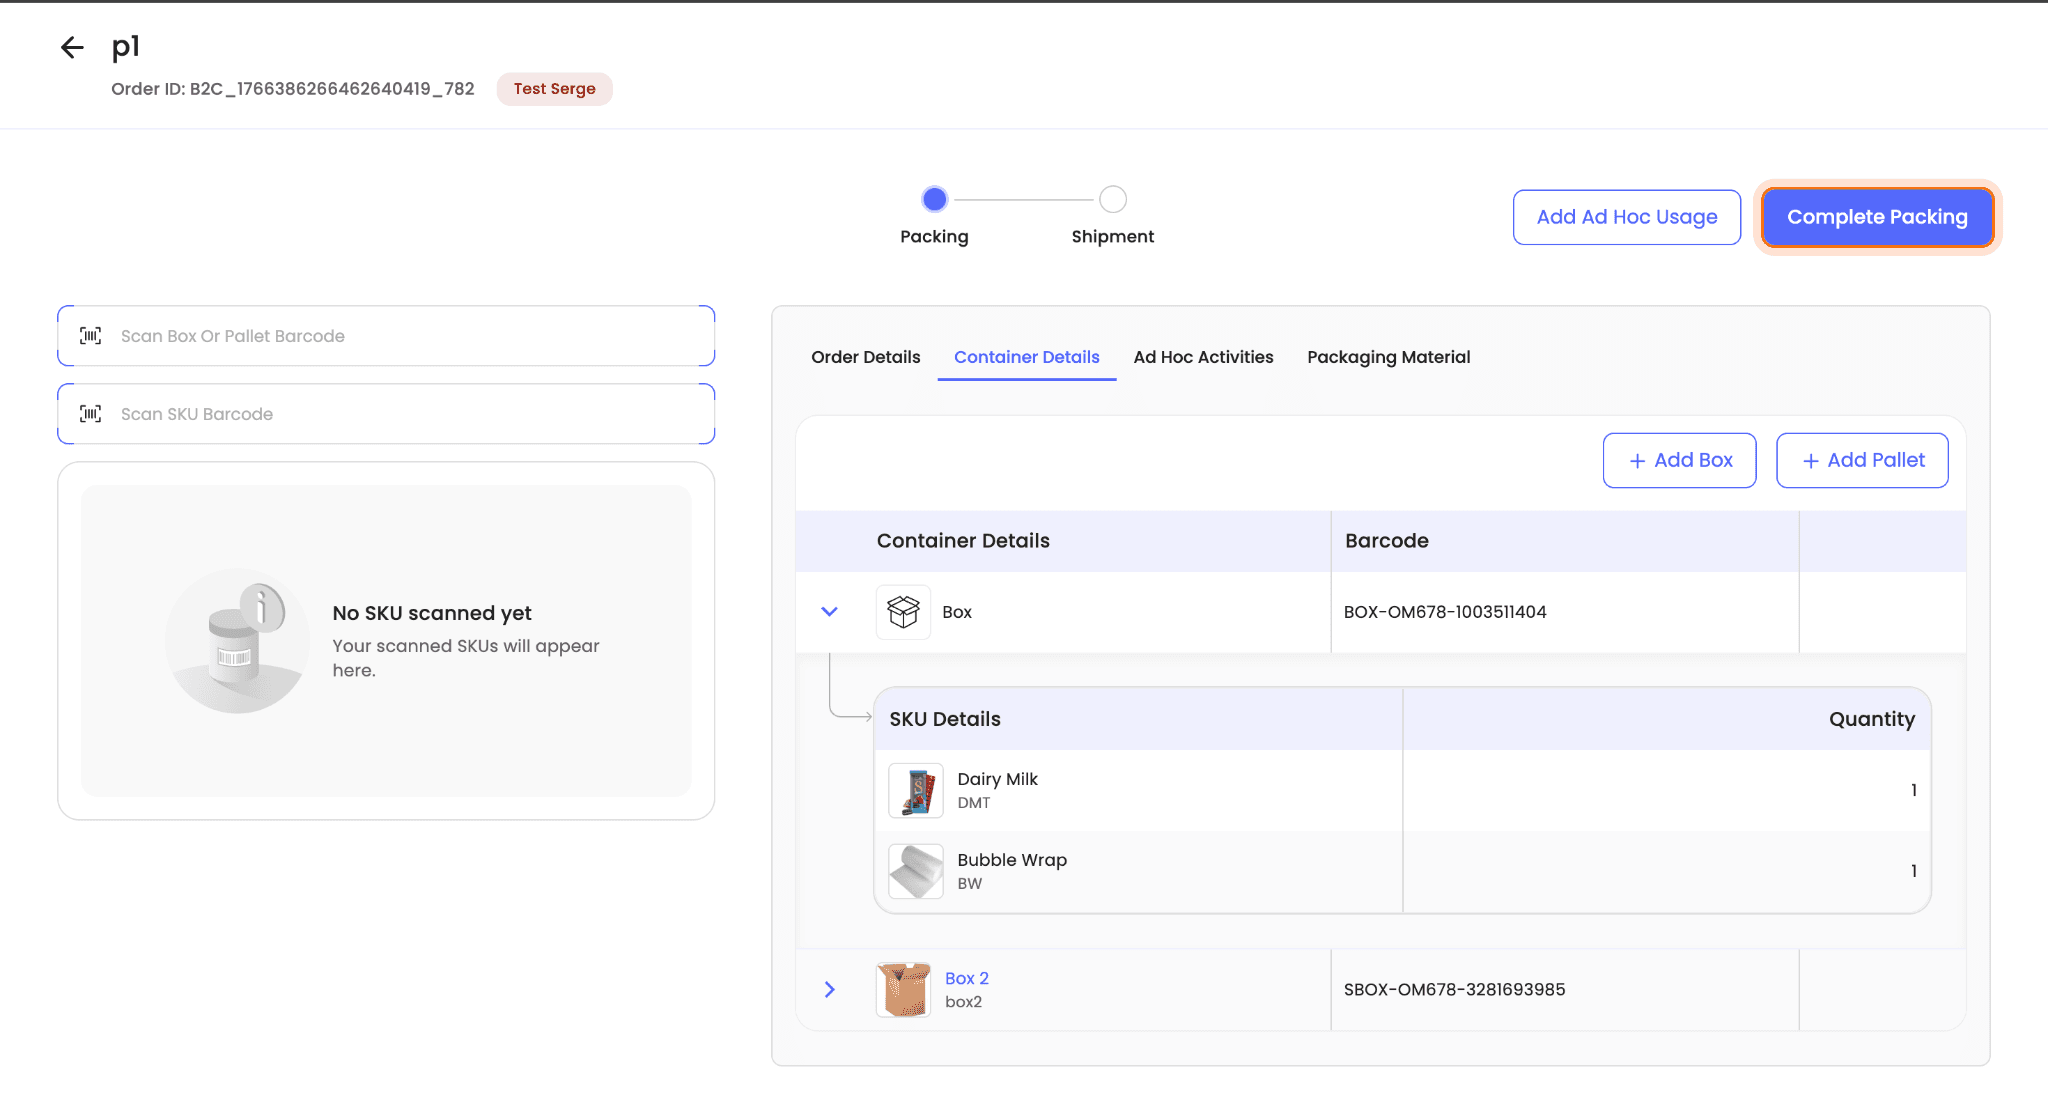
All added containers are visible in the Container Details section of the packing screen.
All added non-box packaging materials are visible in the Packaging Material section of the packing screen.
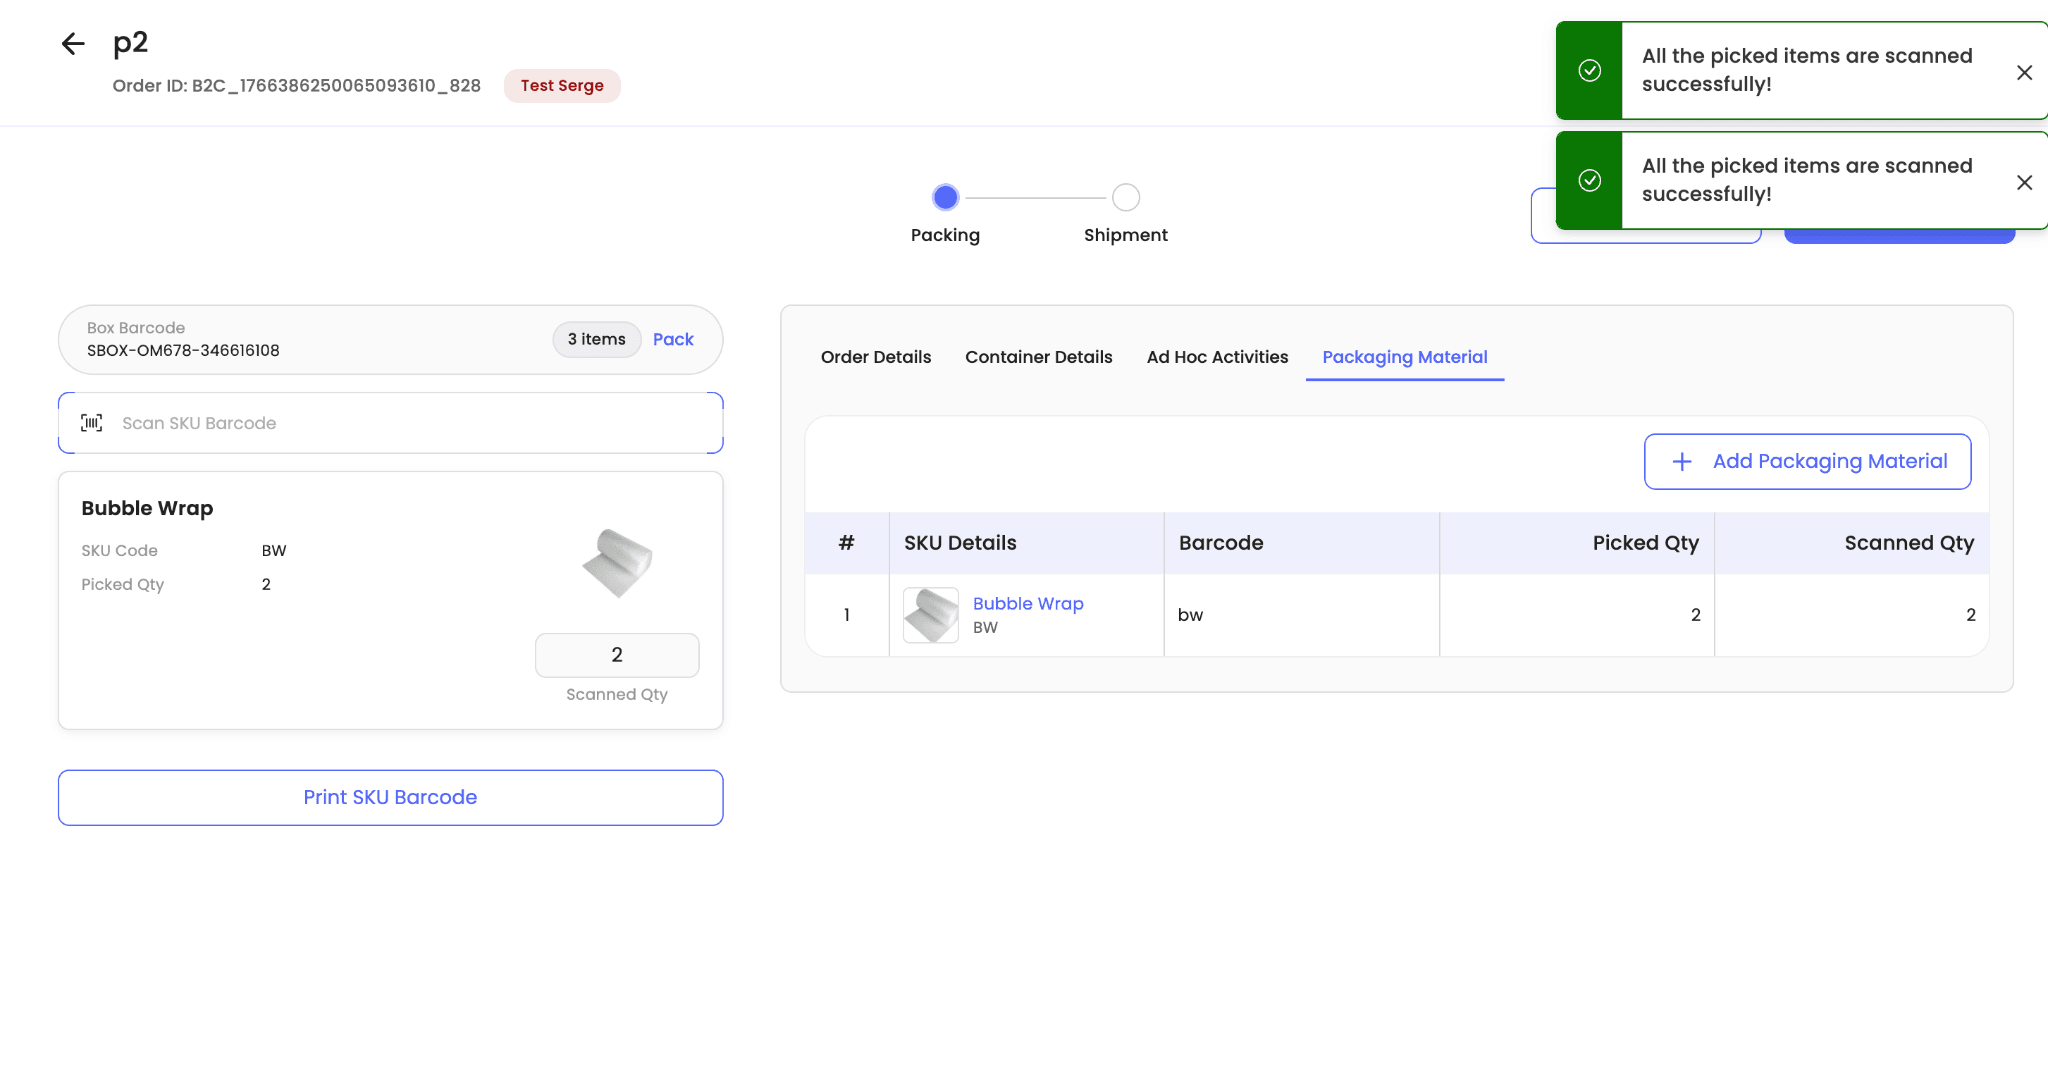
After packing the required items into a box or pallet, click Pack next to the container barcode. This links all scanned SKUs and consumed packaging materials to that specific container. To pack the remaining items in the order, repeat the same steps.
If a scanned container or packaging material is not available at the mapped picking location but exists at another picking location within the hub, the system prompts you to select an alternate location for inventory deduction.
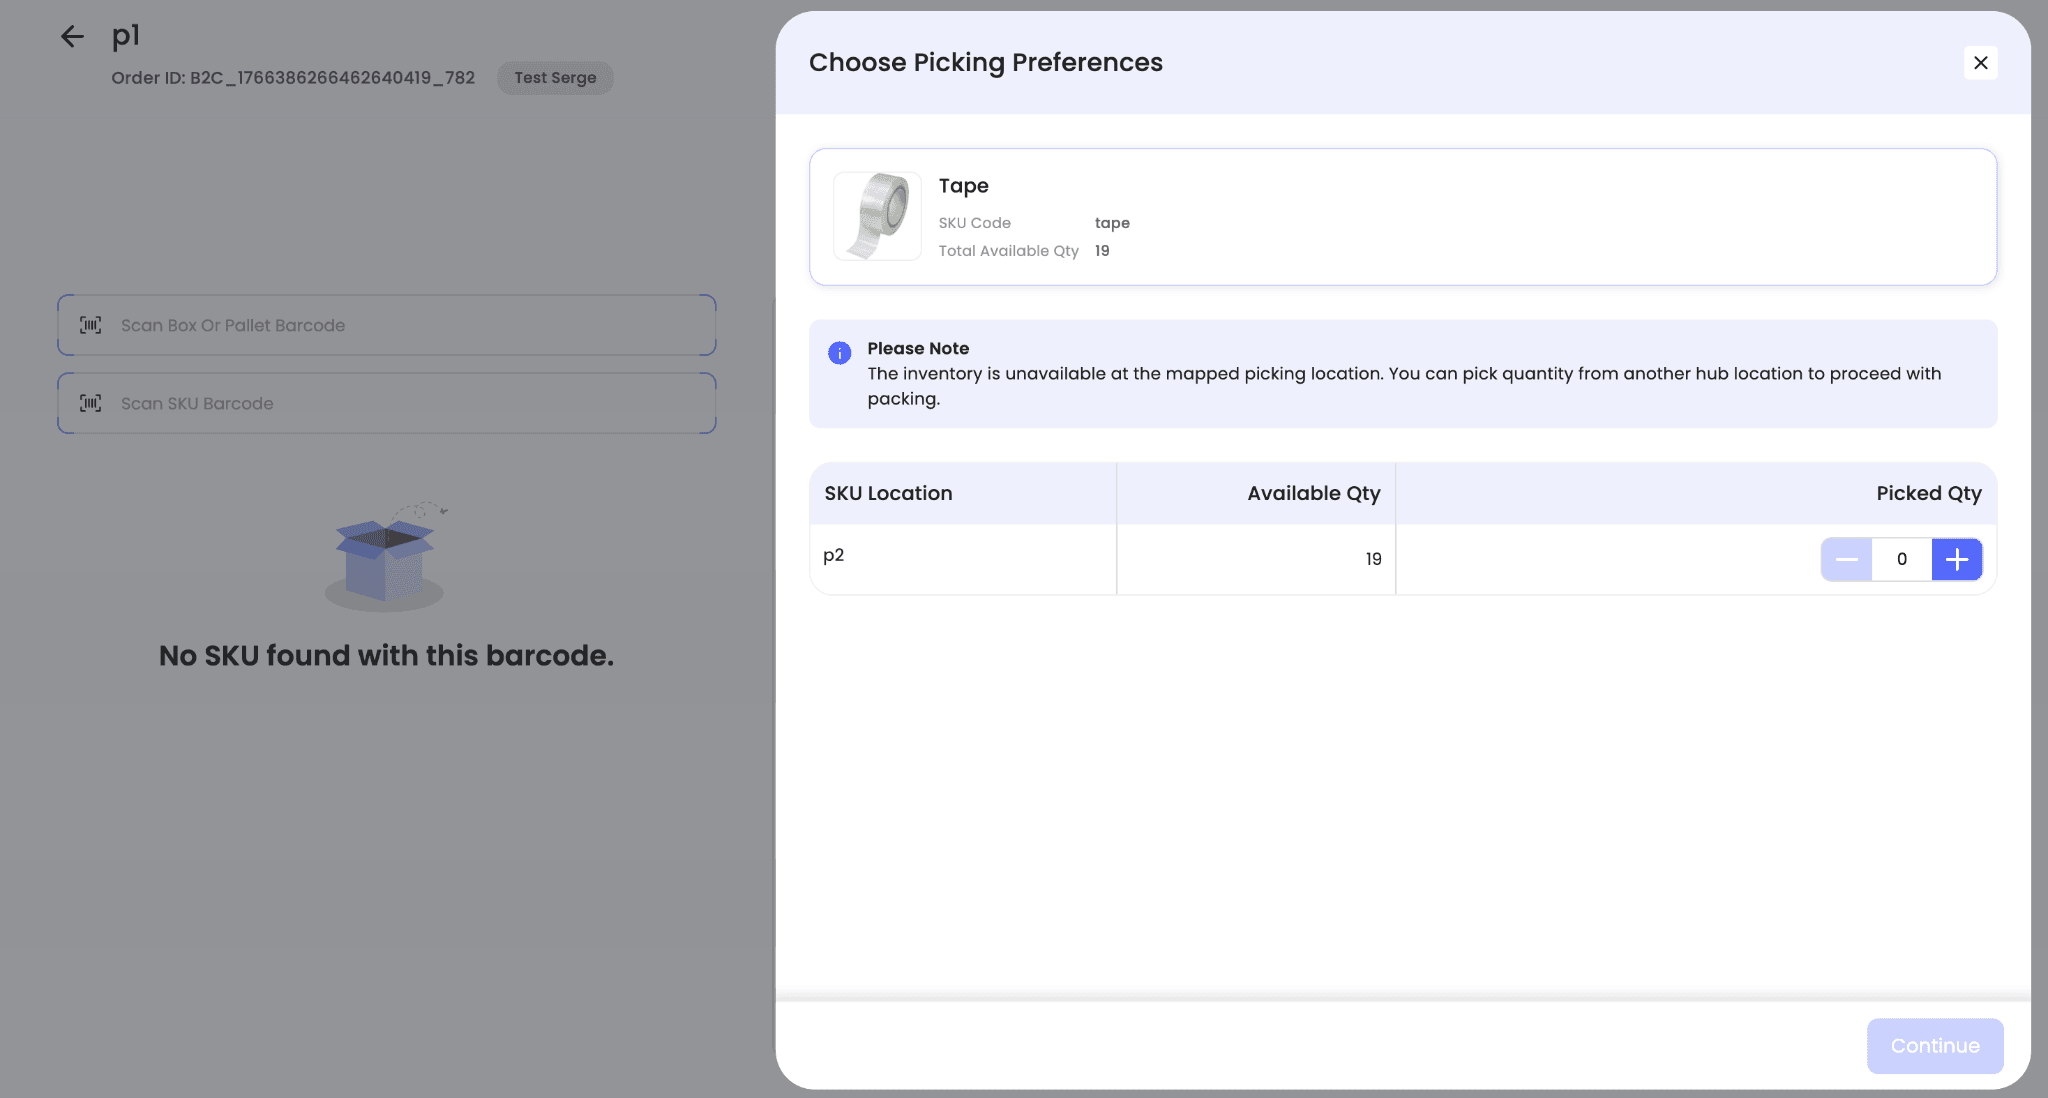
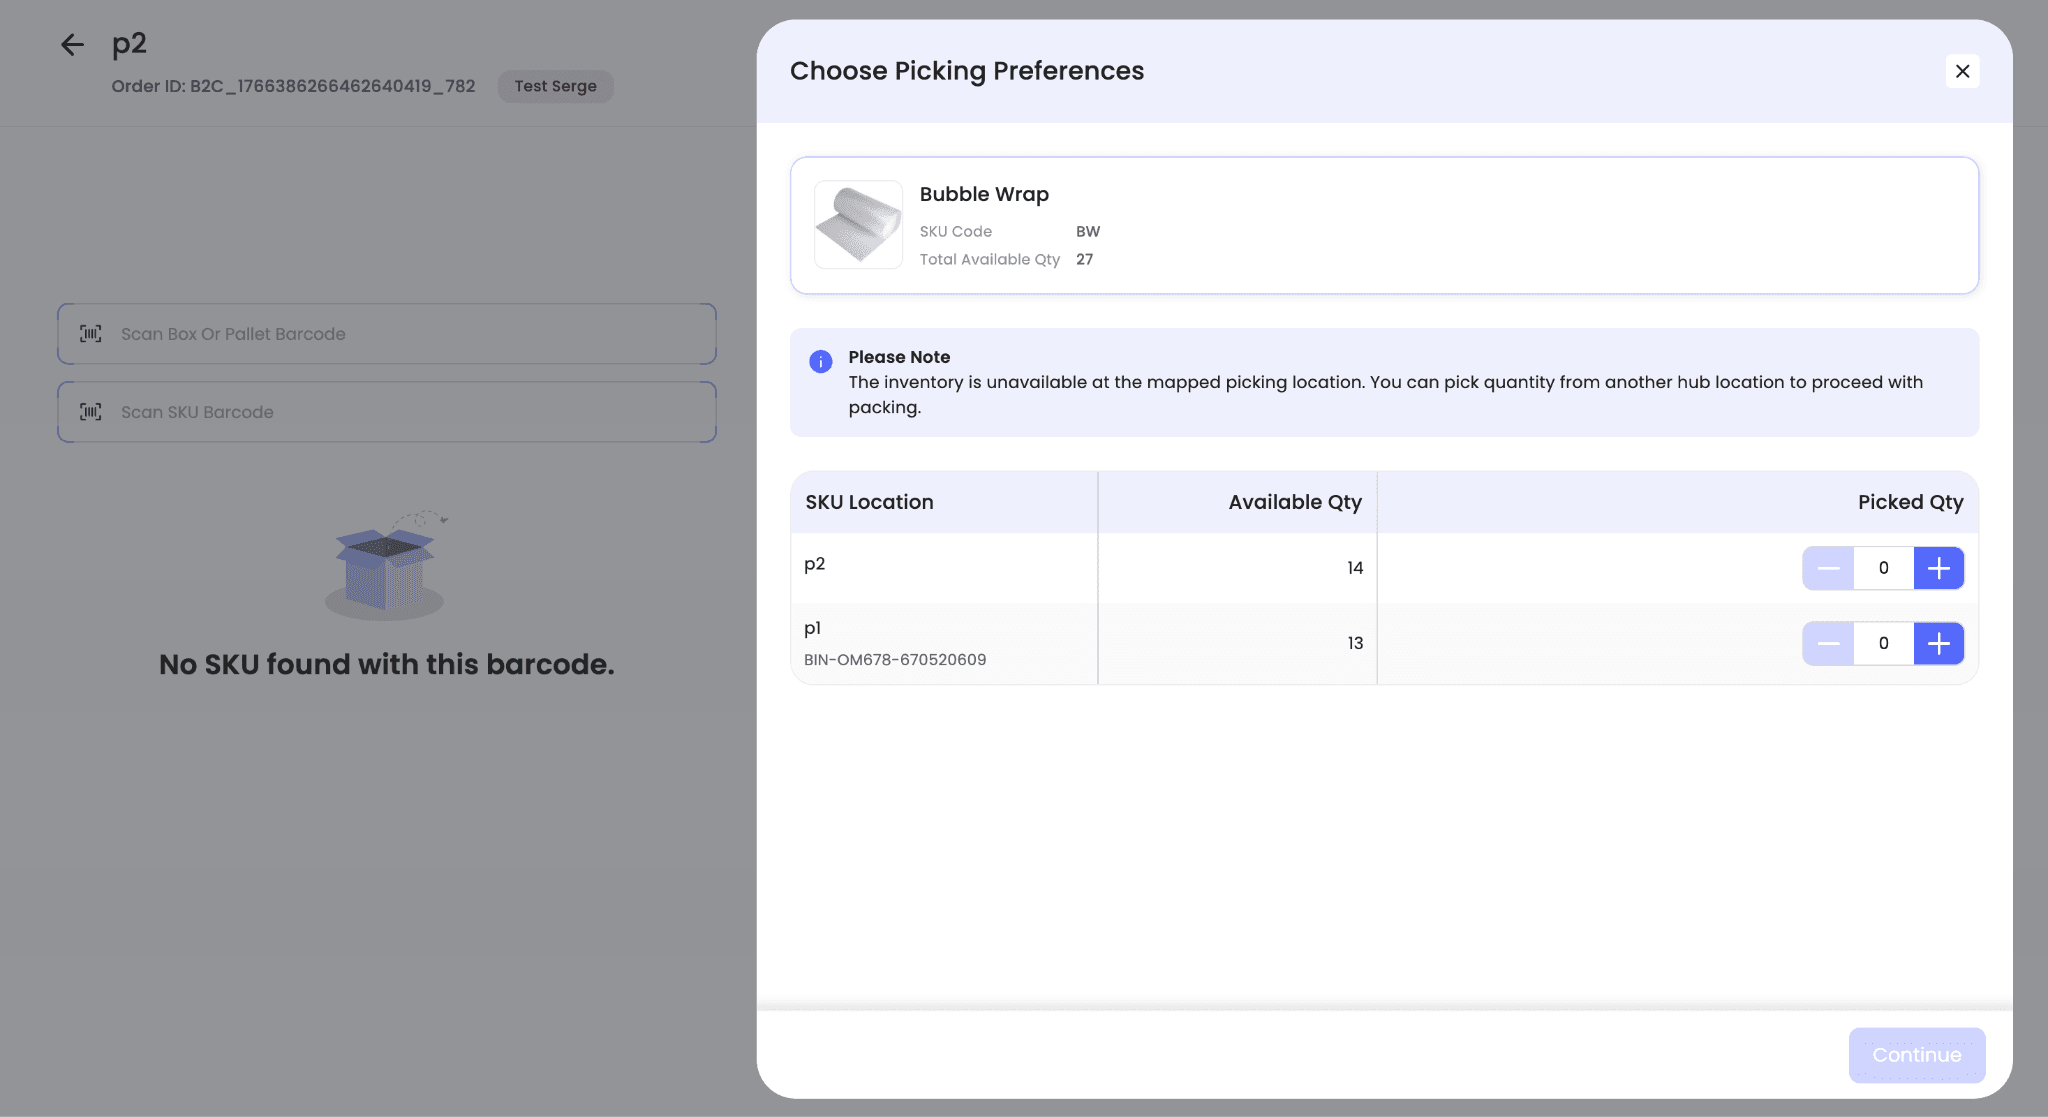
If the packaging material is unavailable at the mapped picking location but is present at multiple other picking locations, the system displays the available locations. Select the quantity and location from which inventory should be deducted, then click Continue.
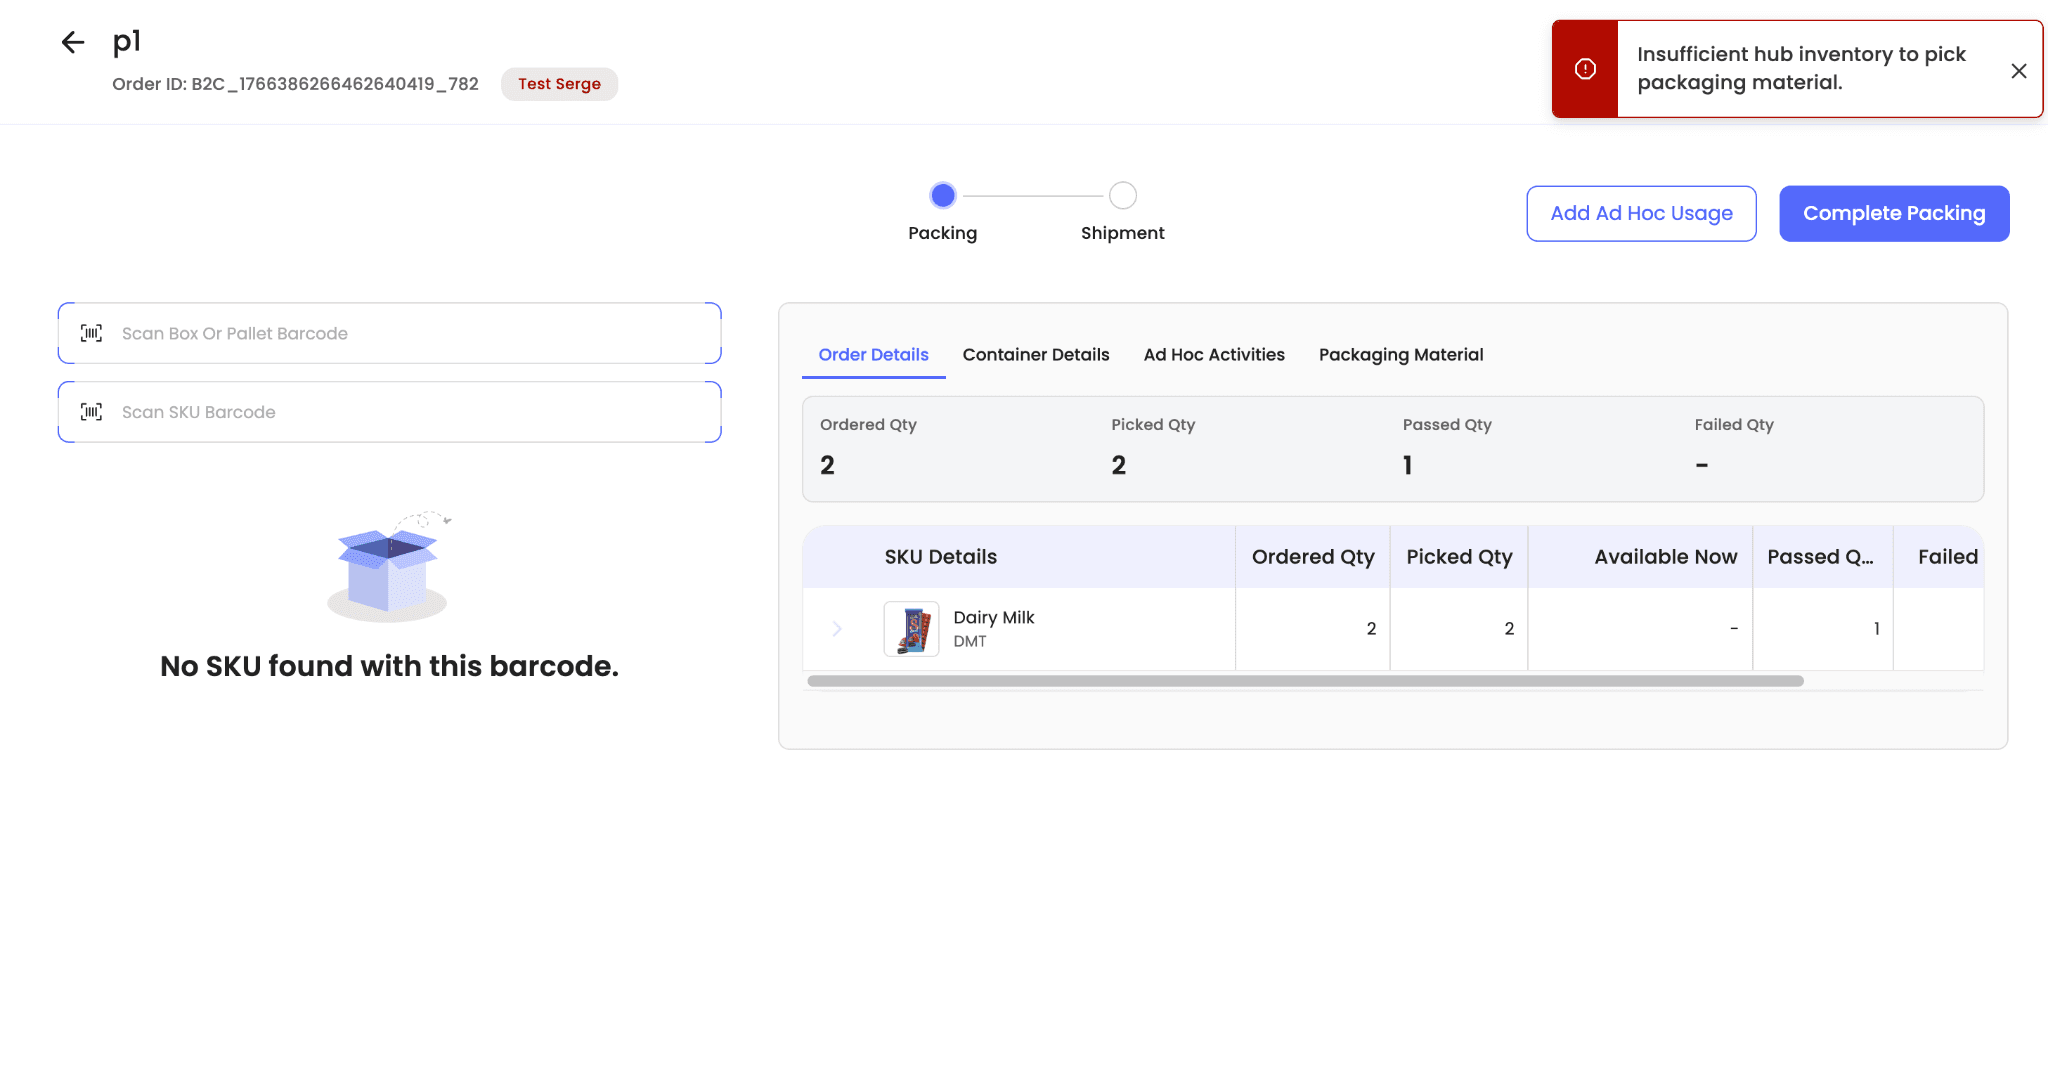
If the packaging material is not available anywhere in the hub, the system displays an unavailability error.
Once all items in the order have been packed, click Complete Packing to finish the packing process.
Packing station without a mapped picking location
When packing is done from a packing station that is not mapped to a picking location, the packaging material consumption flow remains the same as in hubs where packing stations are disabled or where the mapped picking location has no available inventory.
-
Scan the box or pallet barcode, or add it from the UI, to start packing into it.
-
Since no picking location is mapped, select the picking location from which the box or pallet inventory should be deducted.
-
Begin packing into the scanned box or pallet.
-
Scan the SKU barcode being packed along with the required packaging material barcodes.
-
Scan the barcodes of any packaging materials you added so they are linked to and consumed in the order.

-
Click Pack next to the box or pallet barcode to link the scanned SKUs and consumed packaging materials to that container.
-
After all items are packed, click Complete Packing.
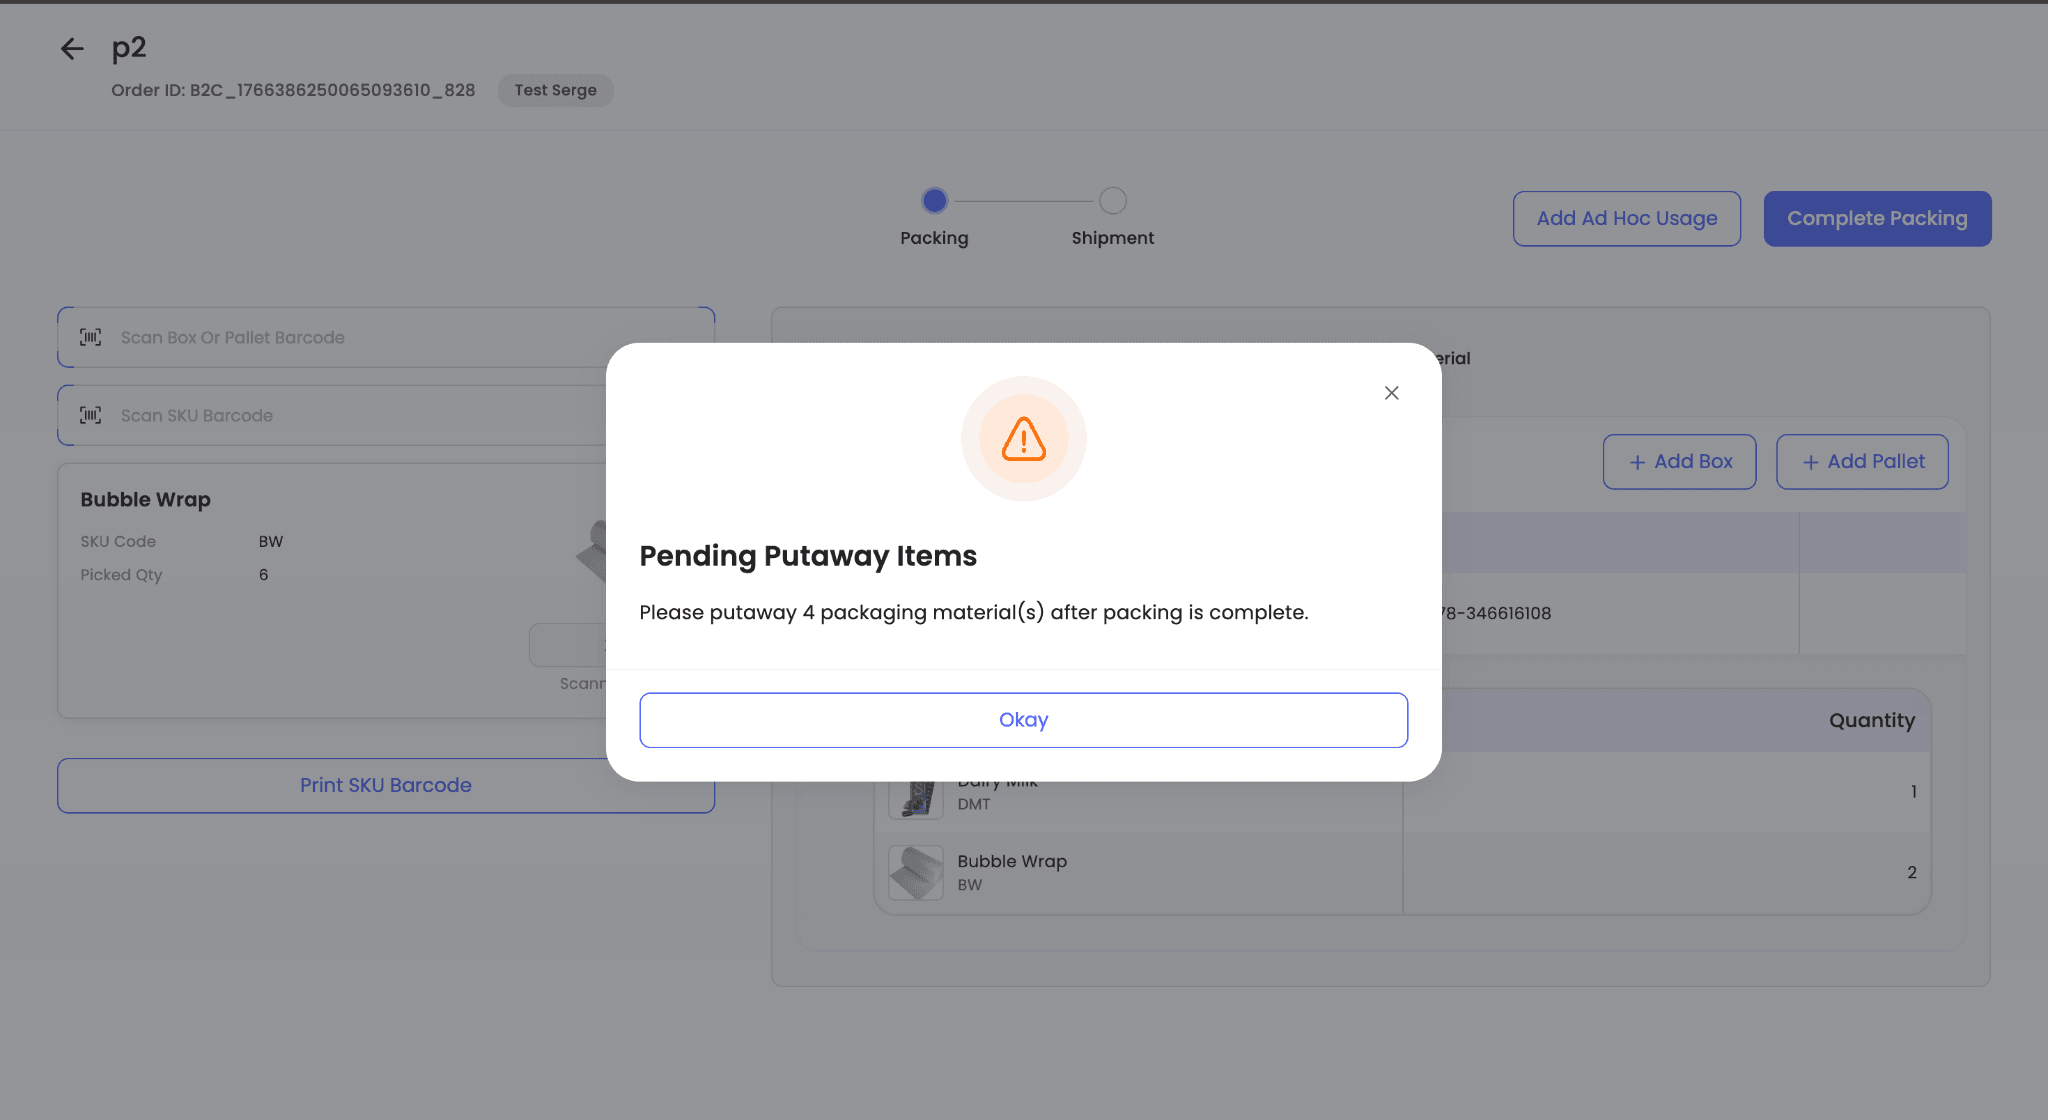
Note: If any packaging material is picked but not scanned, or if a box is scanned without any SKU packed into it, the packer is prompted to put away those items after packing is completed. Such items appear under Cancelled Item Putaway.
Hub Operation Details
You can view complete container-level packing details for any order that has progressed beyond the Ready to Pack stage. This improves traceability by showing exactly how each order was packed at the hub.
How to view packing details
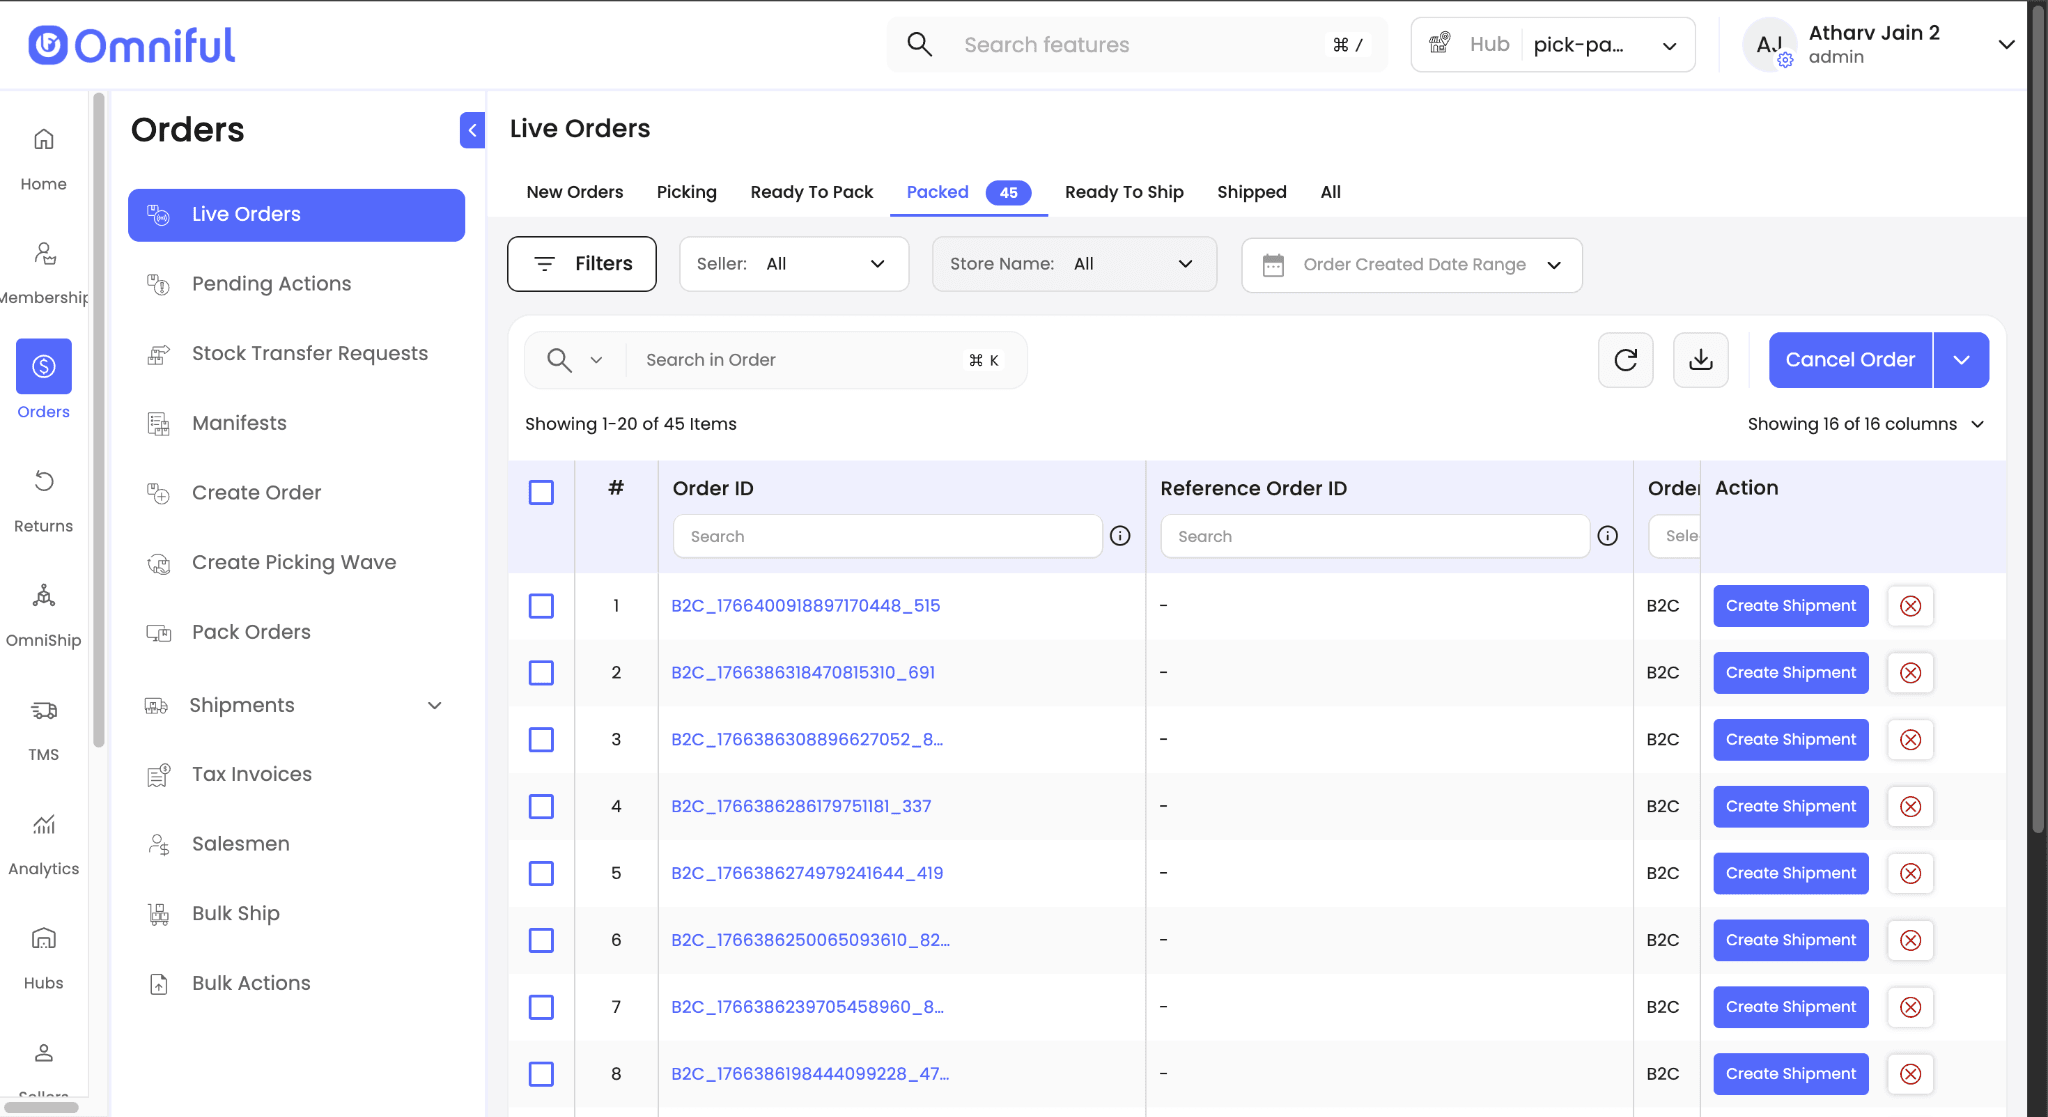
-
Navigate to Orders → Live Orders.
-
Open any order that is past the Ready to Pack stage, such as Packed or Shipped.
-
Click the Order ID to open the order details page.
-
Go to the Hub Operations Details section.
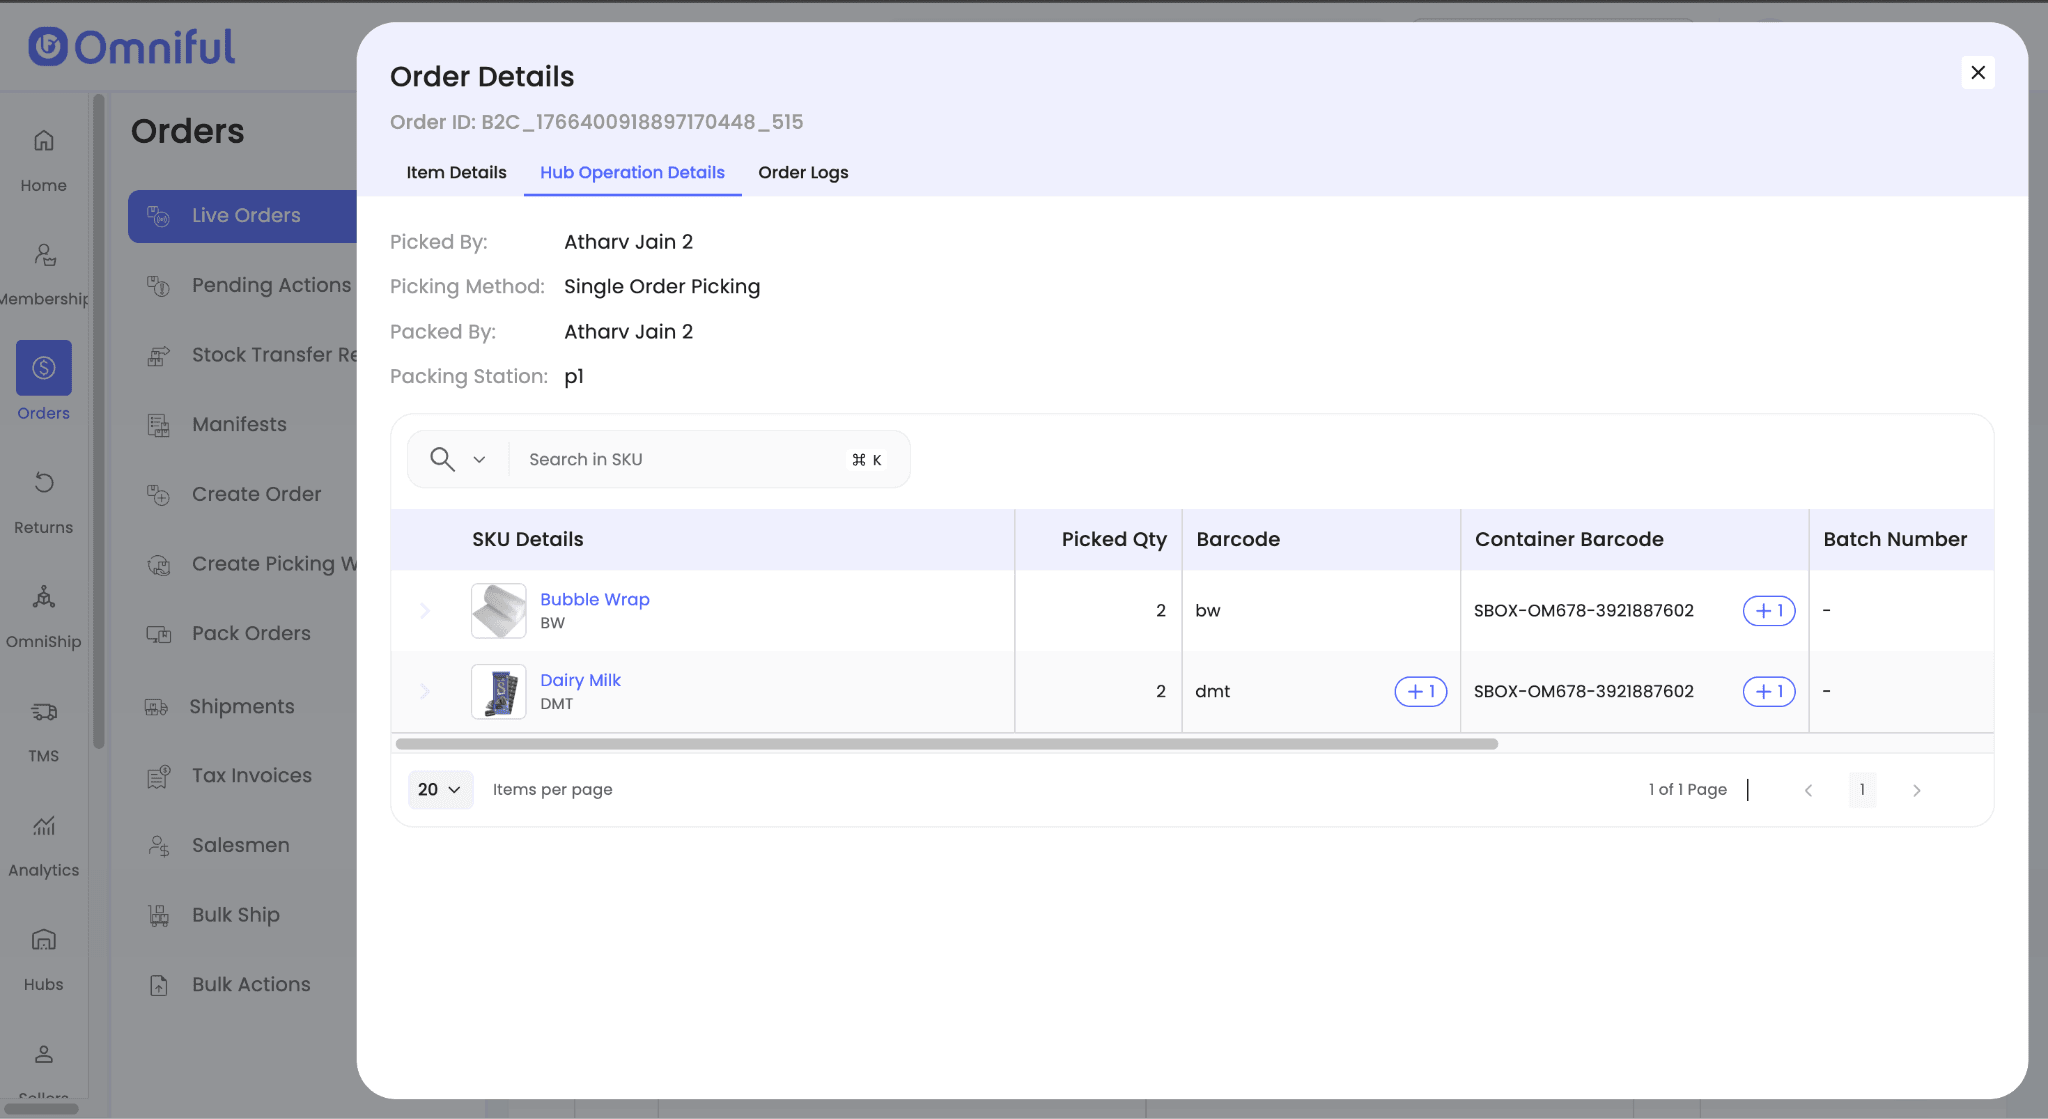
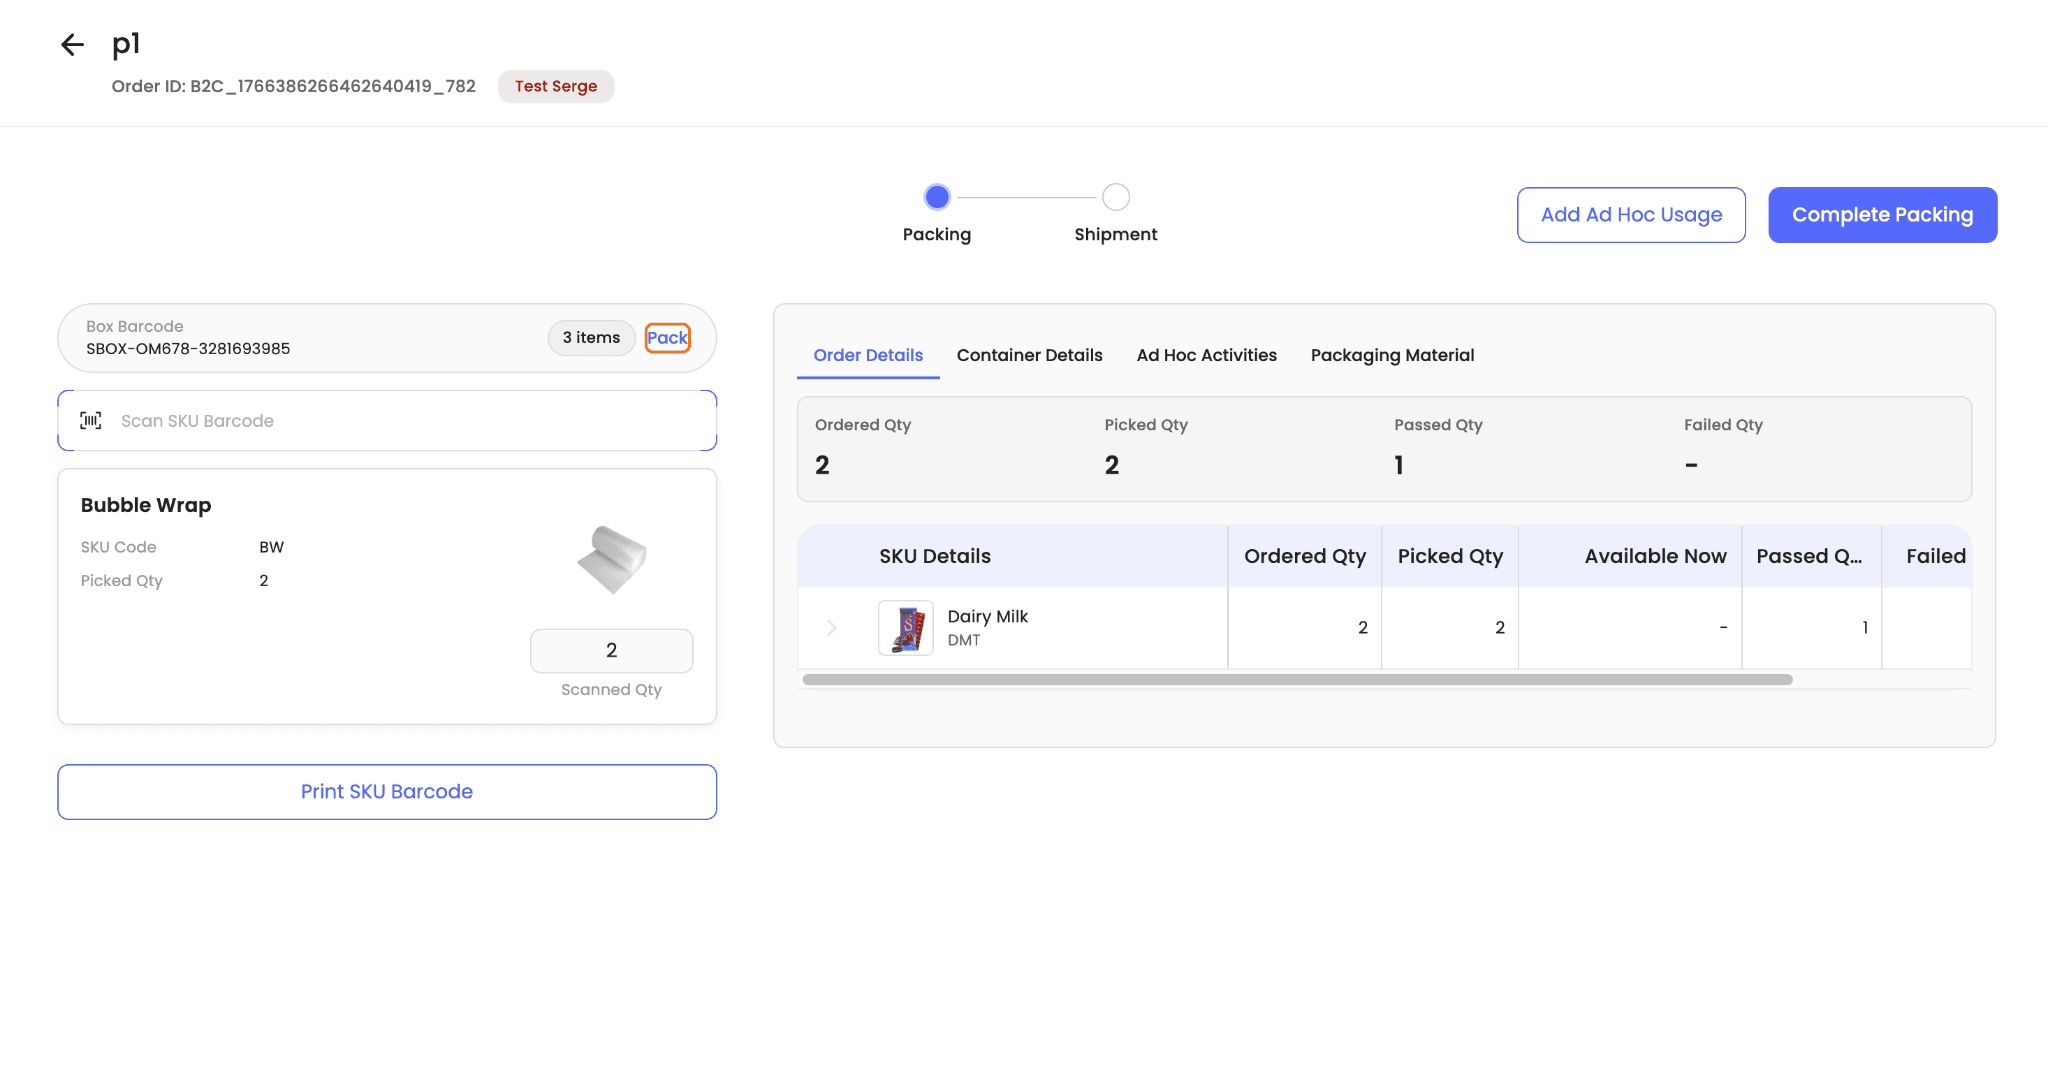
Here, you can view:
- Which SKUs were packed into each box.
- The quantities of each SKU per box.
- The packaging materials used and consumed for each specific box.
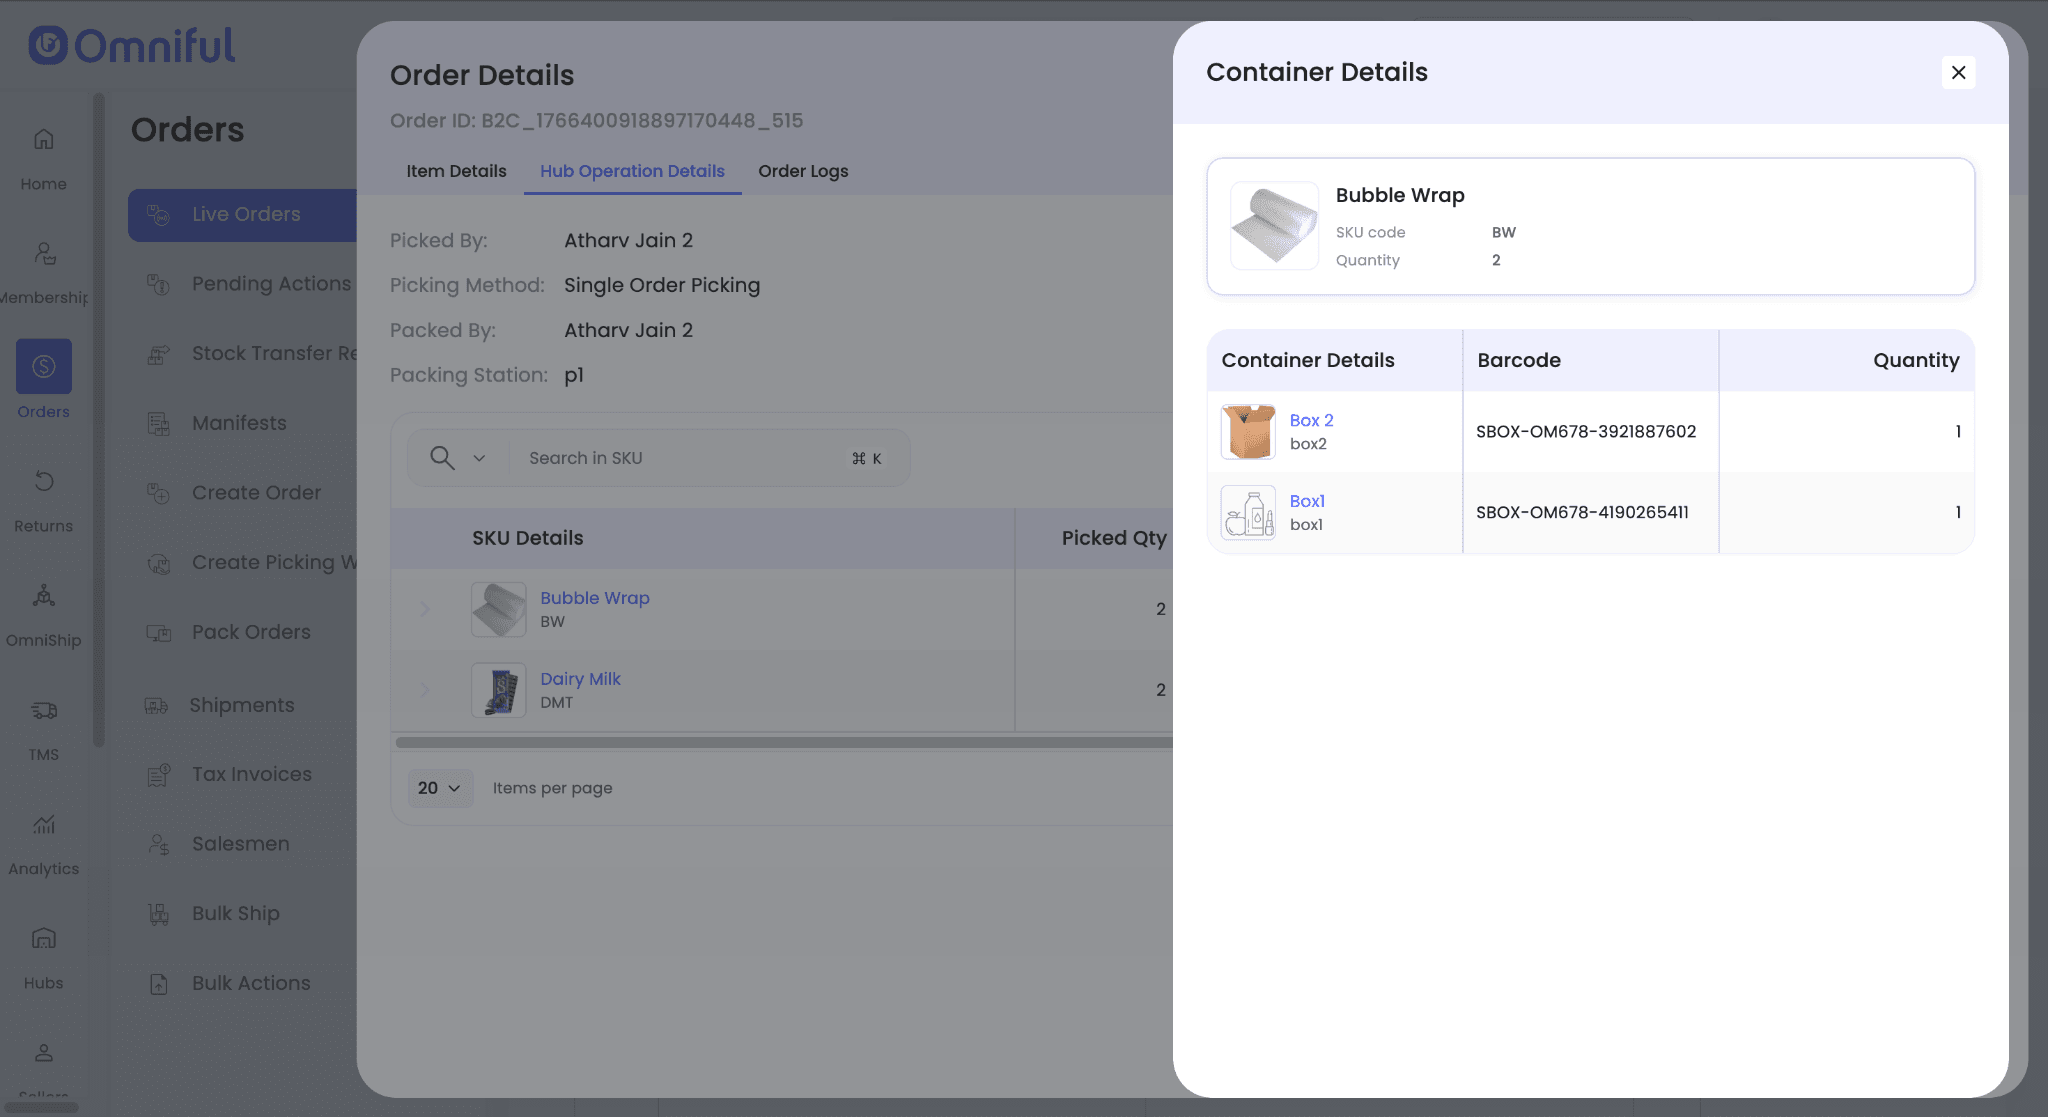
This provides end-to-end visibility into how the order was packed at the hub.
Technical Details
Scope
| Area | Details |
|---|---|
| Catalog → Packaging Material | Seller-level creation and management of packaging material SKUs. |
| Hubs → Hub Assets → Boxes / Pallets | Creation and management of hub-owned containers used during packing. |
| Hubs → Packing Stations | Mapping packing stations to picking locations for accurate inventory deduction. |
| Orders → Pack Orders | Consumption of packaging materials and containers during packing. |
| Orders → Order Details → Hub Operation Details | Container-level auditability and traceability of packed SKUs and materials. |